Page 2 of 2 FirstFirst 12
Results 16 to 29 of 29

Thread: Critique my dovetails? First attempt at a double

  1. #16
    Join Date
    Mar 2006
    Location
    Austin Texas
    Posts
    1,957
    The thing is Jason, those dovetails (as is) will hold forever and only have some cosmetic irregularities showing. We all want to do better in whatever we attempt, so I understand where you are coming from, but those dovetails are nothing to look down on. You can use a coping saw with the thinner kerf Japanese saw by inserting the coping saw (or initiating) cut with a "sawing" motion in the air just above the vertical saw cut kerf so that the saw is "sawing" as it is lowered through the kerf to the point where you want to make the turn to start making the baseline cut. The coping saw will just scuff the thinner sides of the vertical saw cut as you lower it and does not harm the saw cut at all. A thinner bladed fret saw or the Grammercy saw eliminates that need, but I tend to start "sawing" before I reach the bottom of the vertical kerf anyway as a habit even though I now use a fret saw.
    David

  2. #17
    They are all that's needed. I've seen fine 18th and early 19th century pieces that were much like yours. While the rest of
    the work showed no flaw. The shop master knew what he had to do ,and what he could let his helper do.

  3. #18
    Join Date
    May 2015
    Location
    Ingleside, IL
    Posts
    1,417
    Those are very nice "first timers". As Bill said, nothing that a little bondo can't fix. One thing I found very helpful was to video my cutting stroke, a trick I learned from a world champion billiard player, and it never failed to get rid of the yipps. Much like shooting pool, (IMHO) the shoulder the elbow and the wrist all need to be in the same plane for the cut at hand, and stay there thru the cutting action. I noticed that as I was starting the cut my elbow was in tight, but then I let it flare out a bit as I got to it and the saw would waver (can't think of a different term) during the rest of the cut. Since I fixed that, guides are a thing of the past. Keep making them - they are fun to do.
    Stand for something, or you'll fall for anything.

  4. #19
    Join Date
    May 2007
    Location
    Colorado Springs, CO
    Posts
    456
    Ah, you’re hooked now! DTs are addicting to say the least. That’s a great start. All good suggestion in the posts. Consistency is key to getting better. Pick a method and rehearse it over and over. They will become second nature after some time.

  5. #20
    Join Date
    Sep 2007
    Location
    Longview WA
    Posts
    27,430
    Blog Entries
    1
    You can use a coping saw with the thinner kerf Japanese saw by inserting the coping saw (or initiating) cut with a "sawing" motion in the air just above the vertical saw cut kerf so that the saw is "sawing" as it is lowered through the kerf to the point where you want to make the turn to start making the baseline cut.
    One of my tricks is to start with the top of the coping or fret saw and pushing it forward while lowering it in the cut. The teeth should be set to cut on the pull stroke. There is almost no resistance to the blade with a push stroke.

    jtk
    "A pessimist sees the difficulty in every opportunity; an optimist sees the opportunity in every difficulty."
    - Sir Winston Churchill (1874-1965)

  6. #21
    Join Date
    Dec 2010
    Location
    South Coastal Massachusetts
    Posts
    6,824
    When you finish the box, keep an offcut.

    Using coarse sandpaper, sift dust from the off cut into the same glue used for the joinery.

    Mix this onto a paste and apply to the gaps before the finish of your choice. Put some tape over the endgrain to keep those faces clean.

    https://www.popularmechanics.com/hom...orking-joints/

  7. #22
    Join Date
    Jul 2019
    Location
    Northeast WI
    Posts
    571
    Jim,

    I really like that chamfered look you added to yours. Thats a nice little detail.

  8. #23
    Join Date
    Jul 2019
    Location
    Northeast WI
    Posts
    571
    David, thanks for tip! I will give that a shot!

    I suppose the little imperfections are proof i cut them by hand and not on a router table. And with time will come perfection

  9. #24
    Join Date
    Jul 2019
    Location
    Northeast WI
    Posts
    571
    Thank you everyone for the advice so far! All great suggestions.

    The little imperfections dont bother me, but i am always looking to improve. I am sure time and practice will make me better, but i appreciate all the tips.

    I picked up some lumber and printed a template last night for the Gramercy bow saw. I am going to start that project soon. Will post some pictures of the build process and we'll see how it goes

  10. #25
    Join Date
    Feb 2004
    Location
    Perth, Australia
    Posts
    9,491
    Quote Originally Posted by Jason Buresh View Post
    Thank you everyone for the advice so far! All great suggestions.

    The little imperfections dont bother me, but i am always looking to improve. I am sure time and practice will make me better, but i appreciate all the tips.

    I picked up some lumber and printed a template last night for the Gramercy bow saw. I am going to start that project soon. Will post some pictures of the build process and we'll see how it goes
    Jason, your first attempt was better than mine. I do have the advantage, however, in practicing for a few decades.

    There are a few articles on my website that you may wish to read. They will lift your game.

    Through dovetails: http://www.inthewoodshop.com/Furnitu...ovetails3.html

    Half-blind dovetails: http://www.inthewoodshop.com/Furnitu...hBlueTape.html

    Through mitred dovetails: http://www.inthewoodshop.com/Furnitu...feeTable2.html


    Houndstooth dovetails: http://www.inthewoodshop.com/ShopMad...ngaBench4.html


    Regards from Perth

    Derek

  11. Nice first DT's! My pointer would be to suggest aiming to saw to the line instead of leaving excess material and chiseling to the line. Getting a good fit off the saw is a thing of beauty, and I believe the geometry of the dovetail is more consistent than if you go in there and futz with a chisel.

    If you do pins first and use a pencil to mark your tails you will quickly learn how close to that pencil line you can safely cut to get a good fit. It's different for different density woods. Doing tails first means you can gang up multiple boards to saw at once (good for case pieces with similar sized drawers), but then you have to use a knife to mark the pin. I use an old hacksaw blade sharpened into a double ended knife- each end is beveled in the opposite way for marking a left side and a right side.

    Also another tip- don't spend money on the expensive bright red coping saw if you don't have to. I wrote a FWW tips and tricks a few years back about modifying a jeweler's saw for dovetail waste removal. Just cut a slot into the clamp blocks on the saw with a 2/0 saw blade 90* to the surface. If you cut it just the right depth this will allow you to install a 2/0 blade perpendicular to the normal direction that they are installed. The 2/0 fret saw blades are narrow enough to be able to be dropped down into a western saw kerf (25 thou?) and so you can just cut the waste straight across without having to turn in the cut.

    Look forward to seeing the future dovetails.


    Pete


  12. #27
    Join Date
    Jul 2019
    Location
    Northeast WI
    Posts
    571
    Derek,

    Thank you for posting that. The blue tape trick is genius and i will be giving it a try

  13. #28
    Join Date
    Sep 2007
    Location
    Longview WA
    Posts
    27,430
    Blog Entries
    1
    Quote Originally Posted by Jason Buresh View Post
    Jim,

    I really like that chamfered look you added to yours. Thats a nice little detail.
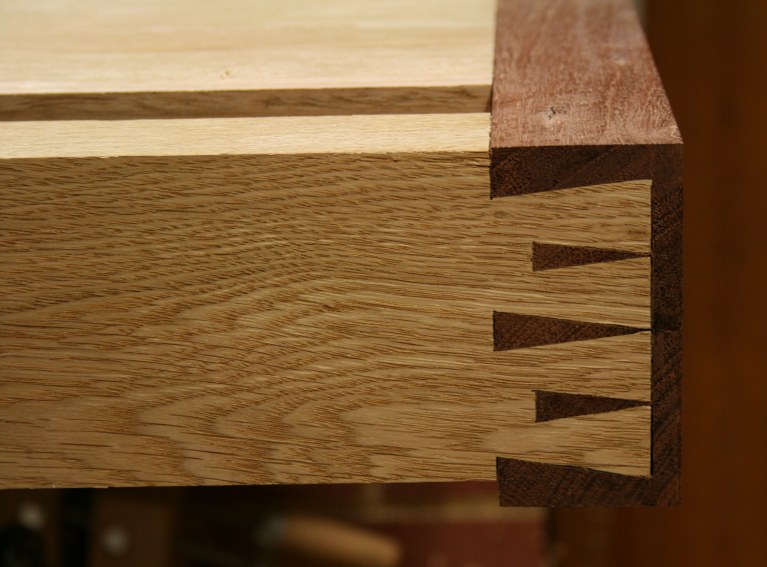
    It was done using a few chisels, here is a close up of one in use:

    Remote Box Tail Trim Detail.jpg

    That is most likely my 1" Witherby being used.

    jtk
    "A pessimist sees the difficulty in every opportunity; an optimist sees the opportunity in every difficulty."
    - Sir Winston Churchill (1874-1965)

  14. #29
    That ain't bad for a first shot. There's something sort of mystical about joinery; the more one does it, subtle details of technique and perspective become conscious and usable.
    I haven't looked at the responses yet (I will now), but I like your work.

Posting Permissions

  • You may not post new threads
  • You may not post replies
  • You may not post attachments
  • You may not edit your posts
  •