Page 1 of 2 12 LastLast
Results 1 to 15 of 19

Thread: Tap & Die Box Project

  1. #1
    Join Date
    Jun 2010
    Location
    twomiles from the "peak of Ohio
    Posts
    12,165

    Tap & Die Box Project

    Inherited a load of taps and dies...
    Next project, Dirty Dozen.JPG
    The dies....with 2 holders. And the pile of taps..
    Next project, pre-sorting.JPG
    From a No. 8 up to a 3/4" size....Finally sifted these down a bit...
    Next project, all sorted.JPG
    There was a wrench for the 2 smallest taps...
    Next project, will only fit these.JPG
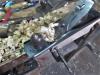
    But they only would fit the #8 or the #10....and nothing else. Stashed these two away, into the small tool Tool Chest. Which left a single tap holder/wrench
    Next project, wrench only fits these.JPG
    That will only fit maybe half of the sizes. Will be looking around for the larger sized holder...So, for now, I will ship off the extras...
    Next project, send to Gunny.JPG
    To a friend of mine. And then build a box to hold the rest . And the dies, and the wrenches. There is also a set of taps for doing pipe threads, and a 1/8" NPT die...will see about a box for them, though, not quite as big.
    For now...have bought seven Poplar "Project Boards" 1/2" x 5-1/2" x 24", and a 2 x 2 x 3' stick of Poplar. Will be standing the taps up, and they will sit in holes in the 2 x 2s. Then I build a case around the holders (3), with 2 gaps....that I will fill 1/2 way, and add a way to store 12 dies.
    Next Project, holder layout.JPG
    Then a lid of some sort....maybe cut from a glue up of these 2...
    Next Project, lid blank.JPG
    First, need to haul the boards to the shop.....sweep the floor, bring the trash can and the trash scooper to the shop...and clean off the bench....we have work to do..

    Stay tuned....just a Build-along thread..

  2. #2
    Join Date
    Jun 2010
    Location
    twomiles from the "peak of Ohio
    Posts
    12,165
    Well, first...I needed that 2 x 2 cut, as 3' was a bit..long..
    Next Project, 2 x 2 x 36.JPG
    So, I tried to cut it into 3 sections on the Mitersaw..
    Next Project, cross cut 2x2.JPG
    Saw is powered by..
    Next Project, Hydrated.JPG
    Yes, it is sugar-free now-a-days....cut three sections, then, to get them all the exact smae length..
    Next Project, ganged up.JPG
    Ganged up, with the other ends flush with each other. set these aside, once I figured out how long the box's sides need to be...then cut a "front" and "back"..
    Next Project, front cross cut.JPG
    Leaving enough out on the right side to then cut the 2 ends to length...had to choose the best out of 5 pieces of 24" long planks..
    Next Project, rest of the stash.JPG
    All 5 are supposed to be the same length? Hmmm. Then lay out a few toys..
    Next Project, dovetail tools.JPG
    Thought I could use that 1/4" plywood as a bottom for the box....usual luck, it wasn't.
    Toys are to do dovetails with, also needed one other item...
    Next Project, Joinery stool.JPG
    Since I tend to sit down when doing joinery work.

    That will be in the next episode....Through Dovetails....stay tuned.

  3. #3
    Join Date
    Jun 2010
    Location
    twomiles from the "peak of Ohio
    Posts
    12,165
    Ok, to bring things up to date on that 3 hr Shoptime, yesterday...( waiting on lunch, at the moment, before heading that way, again)

    As I do Pins first ( you can do either way, it happens to work better for me) Need a little layout done....1/2" to 1/2" sides..
    Next Project, pins laid out.JPG
    set the bevel gauge to the shape dovetail I wanted. Marking gauge set to the thickness on the boards. A shoplight pointed on the work area, better to see what I am doing. I don't like to saw with the board high in the air like this, so...
    Next Project, 2 saws.JPG
    I dropped the level down to about 1/8" above the top of the bench. Used both of those saws...Old No. 4 was having issues with getting started in some spots...No. 68 took over those...full length strokes with both, needed 8 or fewer strokes. Then a Pine scrap was set on the bench top, and the pin board was clamped down..
    Next Project, chopping.JPG
    It saves the top of my bench from chisel marks. Yes, that is Stanley No. 5002 chisel. And a Wal E World mallet. I chop 1/2 way down, and leave a front porch..usually I start on the "show face" of the board..
    then flip over, and chop the rest of the waste out. Sit a end flat on the bench, stand the just cleaned up pins onto the end board, making sure I had everything oriented the correct diection...sharp pencil to trace around the pins. Knife a stop-line....bandsaw made a lot of cuts, all in the waste side of the lines, thin slices are easier to chop out. Again, show side first, then the inside....then a dry fit
    Next Project, 1st corner.JPG
    Then, rinse and repeat for the second corner....using the 1st corner parts as templates for the spacings...left thing a tad long...dry fit?
    Next Project, 2nd corner.JPG
    When you need the mallet to slide things together...I can live with that. Need to go out and buy a 1/4" plywood panel for the bottom, and a #45 set to plough the grooves for it. Then, do corners #3 and #4.

    May just do the corners, today...we'll see.
    Stay tuned

  4. #4
    Join Date
    Jun 2010
    Location
    twomiles from the "peak of Ohio
    Posts
    12,165
    The other 2 corners are done, for now....
    Next Project, 4 corners done.JPG
    The 3 racks have been sized to fit...
    Next Project, racks fit.JPG
    Set this aside, set up a plane....open the box..
    Next Project, Stanley 45 in box.JPG
    "Some assembly required"....so...
    Next Project, ready to plough.JPG
    Set up with a #12 cutter, to plough 1/4" wide grooves....then set up a jig..
    Next Project, jig is up.JPG
    Should hold things still, long enough to make a groove?
    Next Project, grooved.JPG
    Despite the fact I was going against the grain.....such that Poplar has...groove is to hold a 1/4" thick Luann plywood bottom.
    Maybe tomorrow, or Tuesday...I can get the rest of the grooves done? Then start on making the racks ready for the taps?

    Then decide on a lid of some sort, and a latch.....maybe some handles on the ends? We'll see..

    Stay tuned

  5. #5
    Join Date
    Jun 2010
    Location
    twomiles from the "peak of Ohio
    Posts
    12,165
    Rest of the grooves for the bottom panel have been done. Panel for the bottom has been cut to size..I hope.

    1/2" wide groove to hold the shelf for the 10 Dies, has been milled, cleaned up and centered in 2 of the 2 x 2s....Shelf was a tad too thick, WR 62 to S4S it to size.

    Computer has a bug.....went into "Read Only"......am now trying to clear it out....will not let me edit the photos from today's workout in the shop....oh well...

  6. #6
    Join Date
    Jun 2010
    Location
    twomiles from the "peak of Ohio
    Posts
    12,165
    Two Hackwares....cleaning things up now...as for photos?
    Next Project, grooves work.JPG
    Next Project, filled up.JPG
    Making noodles?
    Next Project, grooves matched.JPG
    These all matched up...
    Next Project, reset the 45.JPG
    Reset the Stanley 45...#18 cutter..
    Next Project, wide plough.JPG
    Making a wide groove...
    Next Project, groove cleaner.JPG
    Groove cleaner...
    Next Project, die holder done.JPG
    And..and plywood bottom panel ready to install...
    Next Project, bottom panel to size.JPG
    More to come....stay tuned...

  7. #7
    Join Date
    Jun 2010
    Location
    twomiles from the "peak of Ohio
    Posts
    12,165
    Turned out, I did not quite have that wide groove centered, so turned the 2 x 2 around, and widened the groove a bit, to center it. The 71-1/2 was t flatten the bottom of that wide groove. The Die holder was a bit too thick, and needed the edges jointed..so..
    Next Project, Jointed edge.JPG
    We have ways...to reduce the rather rough faces a bit...to better fit the groove..
    Next Project, Die holder, S4S.JPG
    So it will fit..
    Next Project, it fits.JPG
    Then place the rails in the box...
    Next Project, tight fit.JPG
    Just enough room for the Dies..
    Next Project, needs drilled.JPG
    So, I dug out the drill bit set...
    Next Project, drill bit set.JPG
    Selected one that will match the Dies diameter..
    Next Project, 1 inch bit.JPG
    1" bit. Will try tomorrow to drill a few holes....may get a glue up of just the box....maybe, maybe not...depends on what the lid will be...

    Stay tuned...

  8. #8
    Join Date
    Jun 2010
    Location
    twomiles from the "peak of Ohio
    Posts
    12,165
    Trying to work through some computer issues....had to change how things were edited...and where to put the files at...
    So..today was a drill press day...after a bit of lay out..
    Next Project, center findered.JPG
    Find the center...
    Next Project, dividered up.JPG
    Figure out the spacings...then drill a hole to check..
    Next Project, 1st Die hole.JPG
    Seems to fit...do the other 9 holes..
    Next Project, shelf drilled.JPG
    And fill them up...
    Next Project, shelf done.JPG
    And set aside...same with the racks for the taps...had to keep changing bit sizes..but..
    Next Project, large rack done.JPG
    One rack done....went back and drilled the 2 holes for the 7/8" taps a bit deeper...then the other rack..
    Next Project, all drilled.JPG
    Dry fitted in the case, with the case's bottom installed too
    Next Project, dry fit, bottom.JPG

    About ready to at least glue the case together....will install the racks later...

  9. #9
    Join Date
    Jun 2010
    Location
    twomiles from the "peak of Ohio
    Posts
    12,165
    So..I went ahead and spread a bit of glue around..
    Next Project, Glued up, bottom view.JPG
    Added a few clamps, and some cauls....
    Next Project, cauls, glue up.JPG
    Checked the case for square, including the diagonals....will come back later, and clean up the glue dribbles...

    Right index finger has a blister on it. Was using the grinder to "adjust" the thumbscrew on the 71-1/2 plane to better fit the case....some dummy grabbed that hot part....ouch...won't mention any names, but his initials are SCN.....Hmm...pop it, or not to pop it...that is the question.

  10. #10
    Join Date
    Jun 2010
    Location
    twomiles from the "peak of Ohio
    Posts
    12,165
    Have 2 glue-ups to "de-clamp" and clean up today.....maybe after Lunch?
    Next Project, Lid glue up.JPG

    Will see....glued up a blank to make lids from...green stripe and all...
    Next Project, green stripe.JPG
    To keep, or not to keep, that is the question...

  11. #11
    Join Date
    Jun 2010
    Location
    twomiles from the "peak of Ohio
    Posts
    12,165
    De-clamped...
    Next Project, de-clamped.JPG
    Handsome, ain't they? Box needed leveled, top and bottom...
    Next Project, little off the top.jpg
    Need the sides planed smooth...
    Next Project, smoother.JPG
    Until they at least looked presentable..
    Next Project, all cleaned up.JPG
    Laid this on the lid blank...and made some layout lines...
    Next Project, Lid layouts.JPG
    Then cut out the parts...
    Next Project, lid parts.JPG
    Goal here is to miter the ends and re-attach to form a lip under the edge of the lid.. which means I use the Mitersaw..
    Next Project, mitersaw job.JPG
    Then joint an edge for the glue...
    Next Project, jointer job.JPG

    Stay tuned for part 2

  12. #12
    Join Date
    Jun 2010
    Location
    twomiles from the "peak of Ohio
    Posts
    12,165
    I also used that Millers Falls No. 15 to flatten the lid...
    Next Project, panel plane.JPG
    Then glue and a LOT of clamps...
    Next Project, lid glued up.JPG
    Let this sit a day..

    Then since the glue was handy....decided to assemble the racks ...
    Next Project, racks glued up.JPG
    Cauls in the middle because...the center rack wanted to curve and break,,,,

    And that was that, for today.....other than a LOT of fussing around trying to edit all the photos....

    Stay tuned...

  13. #13
    Join Date
    Jun 2010
    Location
    twomiles from the "peak of Ohio
    Posts
    12,165
    Boring anyone? Clamps are gone, again....things were cleaned up...racks are being glued in place...fancy way to clamp it, Jed..
    Next Project, rack glued in.JPG
    Lid has been fitted to the case..or, was that the other way around..
    Next Project, lid fitting.JPG
    Need to sort through the hardware supplies...
    Next Project, Hardware sorted.JPG
    And see what ones I want to use....still have some of that Black Chain....may see about using that, again...
    Stay tuned....

    BTW: From a Garage Sale this morning...
    Tool sale Friday, 4 dollars.JPG
    Kind of needed those 2 clamps last night...$1 each...."Flats" is a Stanley No. 117....Round top is a Crescent No. 73...need to figure out how to sharpen these two....just in case the line ahead of me is moving too slow....

  14. #14
    Join Date
    Dec 2014
    Location
    springfield,or
    Posts
    644
    Steven
    Really like the tap and die box. Looks very functional. I've lately been trying to turn any scraps into boxes for misc items in the garage.

  15. #15
    Join Date
    Jun 2010
    Location
    twomiles from the "peak of Ohio
    Posts
    12,165
    Had Laundry Detail this afternoon....so, while the washer was running...
    Next Project, Fancy screwdriver.JPG
    Hinges were installed...I used a pair of clamps and a caul to hold the lid in place...
    Next Project, hinge install.JPG

    Flip things over, and install the latch...and a name plate holder..
    Next Project, latch and name plate.JPG
    As for those square holes? Poplar scrap was trimmed to fit into them..glued in place, trimmed flush..
    Next Project, hardware complete.JPG
    Looks a bit better? Needed a pilot hole drill for some of the larger screws..
    Next Project, Pilot hole drill.JPG
    Like the ones for the handle on each end..
    Next Project, Handle installed.JPG
    Then tried to add a chain for the lid..
    Next Project, Chain installed.JPG
    First chain I cut, it took off and hid...this is the second one I cut....shouldered screws to hold the chain in place..
    Sanded everything down....eased the sharp corners a bit...and started to get the can of Minwax stain off the shelf....and a new brush...

    Stay tuned...have the stained up PIP coming right up...

Posting Permissions

  • You may not post new threads
  • You may not post replies
  • You may not post attachments
  • You may not edit your posts
  •