Page 1 of 2 12 LastLast
Results 1 to 15 of 21

Thread: advice on shop table

  1. #1
    Join Date
    Feb 2010
    Location
    Collegeville PA (30 min west of Philly)
    Posts
    1,143
    Blog Entries
    1

    advice on shop table

    I've gone so far down the rabbit hole reading posts about various workbenches. So much good information out there, but now I'm in analysis paralysis mode and thought it might be easier to state what I think I want to build (and why) and let you all argue me in or out of those decisions. This feels very newbie of me, so I appreciate your patience and help on a topic that gets a lot of coverage.

    Edit: In my case, my workbench gets used as a desk, a place to figure things out, joinery is done there, final assembly too. Lumber is staged here during milling steps. I sometimes apply finishes here too.

    My current situation requires me to constantly move my work table away from the stairs if I want to access the back side. As a result, the table is on dual locking swivel casters which work nicely but I find constant locking and unlocking, and constant moving to be inefficient... and even when locked, there's a bit of "wiggle" and I wish for more stability.

    My current situation allows for plenty of length on the table (about 6 feet long) but I'm restricted to a 30 inch wide space... I frequently find 30 inches to be just a little too narrow to accommodate certain projects.

    Current table is maple butcher block from an old manufacturing plan. Looks marvelous, ain't that flat.

    Current table height is fine, I don't find a burning need for adjustable height.

    I currently have a really cheap vice on the end of the table, but honestly haven't been making the most of it (likely because it's not a great setup).

    Note: I'm a mostly machine-based woodworker so far, but have begun dabbling in hand tools and think I'll end up using a bit of both long term. I mostly build furniture and starting to build some cabinets. A little box building.

    --------------------

    The new without-stairs space would allow me have the table be "permanent" while still allowing for me to work on all sides of the table. So I think I'm going to skip casters this time and just use dollies if I ever have a need to move it in the future. Am I going to greatly regret this decision?

    For the base of the table I was thinking of purchasing some used cabinets (Habitat Restore or similar) and modifying / adding strength as needed. Figured this would get me back to working sooner and provide lots of storage. Any qualms with this approach?

    From my research so far it seems the most commonly accepted way to achieve a flatter top is to build a torsion box top. Is that what you'd recommend here? Any specific tutorials that you've found to be especially helpful on this topic?

    I'll also have enough space to make the table a bit wider than the current 30 inches. I was thinking 36 inches might be about right... I fear going too wide (say 42 inches.. I have a table I'm building for a friend that measures 42 across and it seems enormous.. too big for a workbench it feels like). What do you think?

    My research also tells me that the idea of the "dog holes" (I think that's the right term?) in conjunction with vices is a very handy way to hold work to the table or even to do certain glue/clamp ups. Any tutorials or articles on vices/dog holes that you think are especially valuable for a newbie like me to watch and copy? Also, the number of choices on vices is mind blowing. I'd love any recommendations on reasonable options that are SMC approved (and that I can grow into without getting a 2nd mortgage).

    I currently have retractable extension cord and air hose above my table, and shop vac under the table. I was planning to stick with basically the same setup on the new table, but would gladly listen to any suggestions if there's a better way.

    And, if there's anything I'm completely missing, please pile on :-)


    Thanks in advance for any input!!! Much appreciated!!!
    Last edited by Bob Riefer; 10-31-2020 at 10:51 AM.
    - Bob R.
    Collegeville PA (30 minutes west of Philly)

  2. #2
    Couple of quick thoughts:

    Your vise might be more useful on the face (long edge) than the end (tail). Better: have both.

    I wouldn't personally use a torsion box for a surface to beat on; even less so if I wanted dog holes. Your butcher block will work really well for a bench top. Maybe try boring lines of 3/4" holes, and using Lee Valley or similar round dogs. Also, you want your bench to be pretty heavy. Solidity is a plus.

    I once built a 42"-wide bench top, and you're right: that's too big. If you're six and a half feet tall, you MIGHT be able to reach across on an angle and pick up a clamp, but you'll damage your back doing it -- and walking around to the other side of your bench turns into a "fun run." I personally think more than 28" is too wide. It's okay for things to hang over the side. That's what support stands are for.

    Mobility: if you want it to be mobile without hernias, try step-on casters. Don't use locking casters, or any other scheme that lets your bench wriggle while you're using it.

    Flatness: a biggish hand plane (#5 or larger; preferably a #7) is your friend here. Learning hand tool sounds like it's already an interest of yours. Any glued-up or slab bench can be flattened, and all of them will need to be flattened from time to time.

    Large assemblies: perhaps consider doing these on a pair of saw ponies (short sawhorses) and a sheet of ply. That nets you an assembly table that you can stash out of the way between glue-ups and finishing projects, and it's easier to heave large projects onto a low table than a full-height bench.

    Check garage sales and estate sales for "grandpa's vise" to possibly score a second vise for your project bench.

    There are no perfect benches for every situation. Use yours for awhile and decide on your next modification... or build your next bench. A maple slab makes for an enviable start!
    --Jack S. Llewyllson

    Gratitude is a gift to yourself.

    Purity tests are the bane of human existence.

    Codeine takes the pain from every muscle but the heart.

  3. #3
    Join Date
    Mar 2003
    Location
    SE PA - Central Bucks County
    Posts
    65,850
    Something I've often pointed out is that there is advantage to having an adjustable height surface for assembly work, both for access and for personal comfort...less bending over, etc. That's independent of size, position, etc.

    I also agree with Jack that sometimes a more temporary work surface is a good solution for assembly work; even better if it's a torsion box that you know is flat and have different support methods to account for the height thing I mentioned previously. And when you're not using it, it's not in the way. Being efficient with shops space sometimes involves "not having something in the shop" when it's not needed.
    --

    The most expensive tool is the one you buy "cheaply" and often...

  4. #4
    Join Date
    Apr 2010
    Location
    Nashville, TN
    Posts
    1,544
    Do an image search for “shaker woodworking bench”. It’s woodworking benches with cabinet bases mostly. I like that style with a face or leg vise and a tail vise. I currently have an end vise and don’t use it much.

    I’m about 6’ tall and 32” wide is about right for me. I would do the same top I have now in my next bench which is made from 2x4s cut down to 3” and turned on edge. I didn’t have a planer or jointer when I built it so it’s not super flat but I like that it’s soft wood and shows character with little worry about denting work pieces.

    I have a separate assembly table with mdf top and no dog holes or vises. It does have kreg track on it for face frames and pocket screw joinery.

  5. #5
    Join Date
    Apr 2009
    Location
    Palm Springs, CA
    Posts
    1,085
    As far as using dollies rather than casters, here is an effective but ugly alternative. I made retractable casters since my bench has to be mobile and the casters even when locked didn't secure the bench sufficiently. The four feet have adjustable machinery mounts so that I can use a socket on a drill/driver to quickly raise/lower them to add a little more stability when the casters are retracted and also adjust for uneven floors. I also made four spacer blocks that raise the table about 2.5" for some tasks. and the threaded machinery mounts are long enough to also allow the feet to be screwed down solidly even when the riser blocks are in place.

    IMG_2744ec.jpg

    IMG_2746ec.jpg

    IMG_2743ec.jpg

    IMG_2763.jpg
    Dick Mahany.

  6. #6
    Join Date
    Mar 2006
    Location
    SoCal
    Posts
    22,510
    Blog Entries
    1
    Edit: In my case, my workbench gets used as a desk, a place to figure things out, joinery is done there, final assembly too. Lumber is staged here during milling steps. I sometimes apply finishes here too.
    This described my shop in 2003. Room is always the deciding factor in what fixtures work best for our given situation. I know you are fighting restriction but, let's be glad for machines on wheels.

    A desk-like fixture might squeeze under the stairs but, a staging and assembly area requires clearance overhead. I think a solid, although scaled down, bench solution along with something on wheels for all the other tasks might be a consideration. My current bench is the third version that is smaller than either of the preceding ones. I find this more convenient to work from all sides, reach across, and it naturally restricts my ability to pile junk on it that doesn't belong there.

    I was able to scale the bench down by building a fixture that serves as a staging, assembly and outfeed table. The dual locking casters make it really solid but, not solid enough for a workbench. Best of all there is added storage beneath. I think by dividing these tasks, if you can make it fit, will serve you best.

    TS-Outfeed (38).jpg
    Last edited by glenn bradley; 11-01-2020 at 11:00 AM.
    "A hen is only an egg's way of making another egg".


    – Samuel Butler

  7. #7
    Join Date
    Jun 2019
    Location
    Mid-Michigan
    Posts
    271
    A torsion box top (with the care taken to make it dead flat) is best for an assembly table and kind of overkill for a multipurpose workbench. That said, the Paulk workbench is kind of cool because it’s very rigid but all built with construction lumber. I’d decide first what you really want for a top and go from there. Definitely read The Anarchist’s Workbench to get some good tips.

  8. #8
    My shop is 14x24 so my assembly table is also my outfeed table is also my track saw cutting station and also my workbench. It is 3x7 feet. I like that size, at least for my shop. I have 6 locking casters on it. Due to it's weight and the weight of the tools on it, it doesn't move easily even without the casters locked. With a couple of the 6 locked, it doesn't move. I don't know if I've ever locked all 6. The design is inspired by the Ron Paulk work surfaces. It has an upper top that is 3/4 plywood with 20mm holes made with pegboard and a woodrave router base. The resulting holes are not perfectly on 4 inch spacing but are very close. The only situation that the accuracy leaves a bit to be desired is cutting wide plywood sheets at right angles with the track saw and rail dogs. I fixed that by using a fence (with a stop) that clamps to the edge of the table and has a screw adjustment for angle. There is also a lower top surface of 3/4 plywood and separators with oval holes in them to space the upper and lower top 8 inches apart. Frequently used tools are placed on the lower surface to keep the upper top clean (er). I left the bottom open with just a shelf but have since added a stand for my track saw and domino, drawer for dogs and clamps, and domino storage bins. I have a leg vise at one end.

    I wish I had the domino when I put holes in the legs to support the other end of boards worked on edge because the round holes and plastic dogs do not work great. But other than that, I am happy with it.

    I haven't put winding sticks on it in a long time but I think it has stayed flat. The separators for the upper and lower top are straightening/stiffening ribs for the tops.

  9. #9
    Join Date
    Feb 2010
    Location
    Collegeville PA (30 min west of Philly)
    Posts
    1,143
    Blog Entries
    1
    Quote Originally Posted by Jack Llewyllson View Post
    Couple of quick thoughts:

    Your vise might be more useful on the face (long edge) than the end (tail). Better: have both.

    I wouldn't personally use a torsion box for a surface to beat on; even less so if I wanted dog holes. Your butcher block will work really well for a bench top. Maybe try boring lines of 3/4" holes, and using Lee Valley or similar round dogs. Also, you want your bench to be pretty heavy. Solidity is a plus.

    I once built a 42"-wide bench top, and you're right: that's too big. If you're six and a half feet tall, you MIGHT be able to reach across on an angle and pick up a clamp, but you'll damage your back doing it -- and walking around to the other side of your bench turns into a "fun run." I personally think more than 28" is too wide. It's okay for things to hang over the side. That's what support stands are for.

    Mobility: if you want it to be mobile without hernias, try step-on casters. Don't use locking casters, or any other scheme that lets your bench wriggle while you're using it.

    Flatness: a biggish hand plane (#5 or larger; preferably a #7) is your friend here. Learning hand tool sounds like it's already an interest of yours. Any glued-up or slab bench can be flattened, and all of them will need to be flattened from time to time.

    Large assemblies: perhaps consider doing these on a pair of saw ponies (short sawhorses) and a sheet of ply. That nets you an assembly table that you can stash out of the way between glue-ups and finishing projects, and it's easier to heave large projects onto a low table than a full-height bench.

    Check garage sales and estate sales for "grandpa's vise" to possibly score a second vise for your project bench.

    There are no perfect benches for every situation. Use yours for awhile and decide on your next modification... or build your next bench. A maple slab makes for an enviable start!

    Lots of good advice here! Thank you!

    I've long been interested in making a "carriage" and "rails" for the router to flatten things... I've seen that used to flatten slabs, perhaps could be used to tune the maple table top since I already own a nice router and have more than enough scrap to build the rest. Do you think this would be a good application for that approach?

    Step on casters... nice, googling those now.

    Here's a probably-stupid question... how do you most often use your two vices? Face vs. end
    - Bob R.
    Collegeville PA (30 minutes west of Philly)

  10. #10
    Join Date
    Feb 2010
    Location
    Collegeville PA (30 min west of Philly)
    Posts
    1,143
    Blog Entries
    1
    Quote Originally Posted by Jim Becker View Post
    Something I've often pointed out is that there is advantage to having an adjustable height surface for assembly work, both for access and for personal comfort...less bending over, etc. That's independent of size, position, etc.

    I also agree with Jack that sometimes a more temporary work surface is a good solution for assembly work; even better if it's a torsion box that you know is flat and have different support methods to account for the height thing I mentioned previously. And when you're not using it, it's not in the way. Being efficient with shops space sometimes involves "not having something in the shop" when it's not needed.


    I've been reading your historical posts around the Noden adjust a bench, and at first I moved past the idea because I *thought* bigger than my existing top might be my ticket to happiness (and felt like the Noden appeared best suited for my existing top, but not much bigger).

    But your and Jack's posts have me reconsidering. Perhaps my current 30" deep bench is fine, and the name of the game is to optimize that, and perhaps augment with a supplemental option that I can set either on my table or on saw horses when I have the need.
    - Bob R.
    Collegeville PA (30 minutes west of Philly)

  11. #11
    Join Date
    Feb 2010
    Location
    Collegeville PA (30 min west of Philly)
    Posts
    1,143
    Blog Entries
    1
    Quote Originally Posted by Dick Mahany View Post
    As far as using dollies rather than casters, here is an effective but ugly alternative. I made retractable casters since my bench has to be mobile and the casters even when locked didn't secure the bench sufficiently. The four feet have adjustable machinery mounts so that I can use a socket on a drill/driver to quickly raise/lower them to add a little more stability when the casters are retracted and also adjust for uneven floors. I also made four spacer blocks that raise the table about 2.5" for some tasks. and the threaded machinery mounts are long enough to also allow the feet to be screwed down solidly even when the riser blocks are in place.

    Nice bench! You must be an engineer :-)

    I'd like to ask you the same question I asked Jack... how do you tend to use your vices the most?
    - Bob R.
    Collegeville PA (30 minutes west of Philly)

  12. #12
    Join Date
    Feb 2010
    Location
    Collegeville PA (30 min west of Philly)
    Posts
    1,143
    Blog Entries
    1
    Quote Originally Posted by Marc Fenneuff View Post
    A torsion box top (with the care taken to make it dead flat) is best for an assembly table and kind of overkill for a multipurpose workbench. That said, the Paulk workbench is kind of cool because it’s very rigid but all built with construction lumber. I’d decide first what you really want for a top and go from there. Definitely read The Anarchist’s Workbench to get some good tips.

    Thanks! I met a guy that had the Paulk design but I couldn't remember the name to look it up. And thanks for the tip on Anarchist Workbench. That's really cool that Christoper Schwarz has it available as a free download! Will read that for sure!
    - Bob R.
    Collegeville PA (30 minutes west of Philly)

  13. #13
    Join Date
    Feb 2010
    Location
    Collegeville PA (30 min west of Philly)
    Posts
    1,143
    Blog Entries
    1
    Quote Originally Posted by Jim Dwight View Post
    The design is inspired by the Ron Paulk work surfaces. It has an upper top that is 3/4 plywood with 20mm holes made with pegboard and a woodrave router base. The resulting holes are not perfectly on 4 inch spacing but are very close. The only situation that the accuracy leaves a bit to be desired is cutting wide plywood sheets at right angles with the track saw and rail dogs.....


    I wish I had the domino when I put holes in the legs to support the other end of boards worked on edge because the round holes and plastic dogs do not work great. But other than that, I am happy with it.


    I'm learning as I read and read that these dog holes have lots of uses... you're mentioning one such use being squaring material. I'd like to learn more about that (I'll google a bit but would value any additional thoughts you have on that as well)

    The second snip... what I'm picturing in my mind is that you have pegs running down the leg of your table to act as a "ledge". I imagine you affix a board, on end, in a vice with the lower end of the board resting on the ledge peg... thereby giving you really solid setup while you work on the other end of the board. What operations most often benefit from this setup? Cutting dovetails?

    Thank you!
    - Bob R.
    Collegeville PA (30 minutes west of Philly)

  14. #14
    Join Date
    Feb 2008
    Location
    Lawrenceburg, Tenn.
    Posts
    1,133
    I have both a 24 Hour Workbench that I built years ago, that is very solid, and I perforated with dog holes for using a vise or Lee Valley adjustable dogs, as well as a Ron Paulk Torsion Box bench with my Miter Saw set in it. I like both. The torsion box is on a mobile base with double locking casters and while it moves very easily, it locks down very well. The other uses Norm Abrams method of hinging two boards under the frame, with a pair of jack boards so, if you lift one end, they fall into place and leave it on wheels.

    The solid bench is 26" wide while the torsion box is 36" wide. I like both of them, for different reasons.

    Doc
    As Cort would say: Fools are the only folk on the earth who can absolutely count on getting what they deserve.

  15. #15
    Join Date
    Apr 2009
    Location
    Palm Springs, CA
    Posts
    1,085
    Quote Originally Posted by Bob Riefer View Post
    Nice bench! You must be an engineer :-)

    I'd like to ask you the same question I asked Jack... how do you tend to use your vices the most?
    My 30" x 65" bench is about 20 yrs old and has been used for many different purposes including things like carburetor repair 
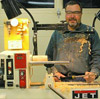
Before my recent restoration, it had LOTS of stains, dings, paint overspray and other nasty blemishes. It was a compilation of many different designs that I had researched and has been a great general purpose bench, but I have a love/hate relationship with that center mounted tool till. It seems like I often need a tool that is in the till immediately under the project I'm working on and I'm thinking about filling it in with a removeable blank. If I was to do it again, I'd possibly hang it off the rear of the bench or omit it all together. I cheated on the top by using a prefab butcherblock counter top and ripping it in two. As such it is only 1.5" thick in between the edge skirts. It works fine for my needs since I'm primarily a power tool user and don't do a lot of pounding or chiseling on it.

    The Veritas twin screw vise has been great for assisting in glue ups and general work holding for sanding and routing edges. The dog holes in the vise face are used in conjunction with the bench dog holes to secure large panels, and cabinet doors for various tasks. The vise can be disconnected on one side to handle slight tapers and that has been handy at times.

    The Record 52-1/2 quick release often has been used in much the same way that a machinists bench vise is used for general work holding for both wood and metal parts (and the inside vise jaws look like it) . It is also handy for clamping things like tall parts that can be stood on end on the floor and for table legs. Even though it has a retractable dog, it is rarely used. Of the two vises if I only had one, it would be the quick release vise as it gets the most use.
    Last edited by Dick Mahany; 11-01-2020 at 11:17 AM.
    Dick Mahany.

Posting Permissions

  • You may not post new threads
  • You may not post replies
  • You may not post attachments
  • You may not edit your posts
  •