Page 1 of 3 123 LastLast
Results 1 to 15 of 31

Thread: Hand Tool Storage Added

  1. #1
    Join Date
    Mar 2006
    Location
    Austin Texas
    Posts
    1,957

    Hand Tool Storage Added

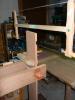
    I work from an 8' long free standing split top Ruobo style bench that does not have a "back wall" running parallel to the main run of the bench. I very much prefer the benefits of working from the free standing bench as it allows me to have different tasks on the go from different areas, but I don't have tons of tool storage close to hand. I have a tool cabinet mounted below the top on one end and I store planes, dovetailing accessories and a saw vise on shelves at the other end. I have been storing my chisels in a couple-three caddys that slide around in the gap between my split tops and I have a sliding tray to keep my marking gauges close by. I wanted to move the chisels from sticking above the split tops and bring in some more hand tools closer to the action so I built a rolling cart that lives under the least-used end of my bench for that purpose. Note that I hardly ever need to use a holdfast at that extreme end of the bench, but can roll the cart out if required. The top of the cart does allow for my bench dogs (on the left hand split top as it is viewed in the photos) to be used.
    Attached Images Attached Images
    Last edited by David Eisenhauer; 09-02-2020 at 8:41 PM.
    David

  2. #2
    David,

    Very nice. A good solution for no wall storage. I may steal some of it, not the roll around but the storage for the base unit cabinet for behind the bench.

    ken

  3. #3
    Join Date
    Mar 2006
    Location
    Austin Texas
    Posts
    1,957
    Go for it Ken. I used up the last of my 3/4" ply scraps, el cheapo bottom-mount drawer slides and pecan leftovers to make the cabinet. I had to cobble pieces together to make the back. I dread having to PROBABLY (one day) haul another sheet of 3/4" ply to have in the shop.
    David

  4. #4
    Quote Originally Posted by David Eisenhauer View Post
    Go for it Ken. I used up the last of my 3/4" ply scraps, el cheapo bottom-mount drawer slides and pecan leftovers to make the cabinet. I had to cobble pieces together to make the back. I dread having to PROBABLY (one day) haul another sheet of 3/4" ply to have in the shop.
    David,

    I'm with you, I will glue up panels before a sheet of 3/4" ply crosses the threshold of the shop. I'd rather have my butt beat than work 3/4" sheet goods although I occasionally find use for some thinner Baltic Burch. While a fitted drawer might look better than one with metal slides, the metal drawer slides work better for shop drawers. At least that is my story and I'm sticking to it.

    ken

  5. #5
    Join Date
    May 2004
    Location
    N Illinois
    Posts
    4,602
    Good work, David!!!
    Jerry

  6. #6
    Join Date
    Sep 2007
    Location
    Longview WA
    Posts
    27,454
    Blog Entries
    1
    It is nice enough to make my shop jelous.

    jtk
    "A pessimist sees the difficulty in every opportunity; an optimist sees the opportunity in every difficulty."
    - Sir Winston Churchill (1874-1965)

  7. #7
    Join Date
    May 2007
    Location
    Colorado Springs, CO
    Posts
    456
    A plastic milk crate would make my shop jealous at the moment.

    Beautiful stuff David. I too may steal some of that :-)


    Quote Originally Posted by Jim Koepke View Post
    It is nice enough to make my shop jelous.

    jtk
    With skill and tool we put our trust and when that won't do then power we must.

  8. #8
    Join Date
    Dec 2010
    Location
    South Coastal Massachusetts
    Posts
    6,824
    Very tidy.

    Build a "riser" to stack on top at the same height as your bench to handle larger boards, carcasses, etc.

    I envision a Neanderthal outfeed table.

  9. #9
    Join Date
    Apr 2007
    Location
    Columbus, Ohio, USA
    Posts
    3,441
    Very nice, I particularly like how you are storing your chisels. What are those chisels, it looks somewhat custom based on the handles and ferrules.

    My only concern is dust, but you could slap on a front that would take care of that if it turned out to be a problem (if the front would not get in the way).

    I always really like seeing how people store their tools.

  10. #10
    Join Date
    Mar 2006
    Location
    Austin Texas
    Posts
    1,957
    Thanks for the kind word Jerry.
    David

  11. #11
    Join Date
    Mar 2006
    Location
    Austin Texas
    Posts
    1,957
    Jim/Rick: Thanks for the kind words. This is not (and was not intended to be) "nice furniture work". It is a plywood carcase glued and nailed together with a scrap wood face frame (OK, that is M&T together because it is too narrow to use a biscuit joiner on), dadoed and rabbeted drawers glued together and el cheapo metal drawer guides. I don't like to spend time on trying to build heirloom shop cabinetry but do want it to be functional and solidly built. I used up the last of some of my dropoffs from earlier projects. It does have a 3/4" ply back because I felt that I may want to hang stuff from the back one day. I wanted it to fit underneath the bench overhang so that it would not be another thing taking up floor space to work around.
    David

  12. #12
    Join Date
    Mar 2006
    Location
    Austin Texas
    Posts
    1,957
    Thanks for the idea Jim. I had not thought of using it as a mobile jack stand and I like your suggestion. I have used my roll around heater with a riser for that task, but this cart will be much better.
    David

  13. #13
    Join Date
    Mar 2006
    Location
    Austin Texas
    Posts
    1,957
    Thanks Andrew. The reddish handled chisels facing you in the photo are Ashley Iles (Mk 2?) bench chisels and the chisel ends you see are the LN socket handle bench chisels. I still need to add in some dividers between the chisel ends to keep them from making contact and haven't decided between chopping individual dados for them to sit in or simply plugging in some short extending 1/8" dowel rods to fence each chisel end in. The second drawer down has my rasps and files in it. I don't particularly worry about dust on my tools and don't see myself adding a door because I would not want to have to open it every time I wanted a tool. That's me, others may successfully do differently. I would love to have a wall behind the bench so that I could install a kitchen type upper/lower cabinets or shelves plus a counter top to temporarily put things on, but the shop is too crowded to turn the bench 90* and free up the wall space for the cabinetry.
    David

  14. #14
    Join Date
    Apr 2007
    Location
    Columbus, Ohio, USA
    Posts
    3,441
    Quote Originally Posted by David Eisenhauer View Post
    and don't see myself adding a door
    I meant a face for each drawer that went all the way out to the edges, not a door per say. I agree that having to open a door would be annoying especially since it would have to open all the way so that you could then pull out the drawer.

    Had not considered gluing some bits in place, fast and easy. I did something similar in one of my Chisel holders.

  15. #15
    Nice, David!

    Good inspiration to one day make something like this to get the rest of my wood working tools out of the craftsman roll around cabinet and closer to the bench. Being able to make the drawers the exact heights needed would be a boon (vs. too tall drawers).

Posting Permissions

  • You may not post new threads
  • You may not post replies
  • You may not post attachments
  • You may not edit your posts
  •