Results 1 to 12 of 12

Thread: A little experiment

  1. #1
    Join Date
    Jul 2016
    Location
    Lebanon, TN
    Posts
    1,722

    A little experiment

    Not very exciting, but thought I’d share.


    I'm making a set of cutting boards for a friend as a wedding present and so am going to do some epoxy inlay on the underneath.


    This is my first time doing this, so I bought some Epoxy resin and Mica Powder.


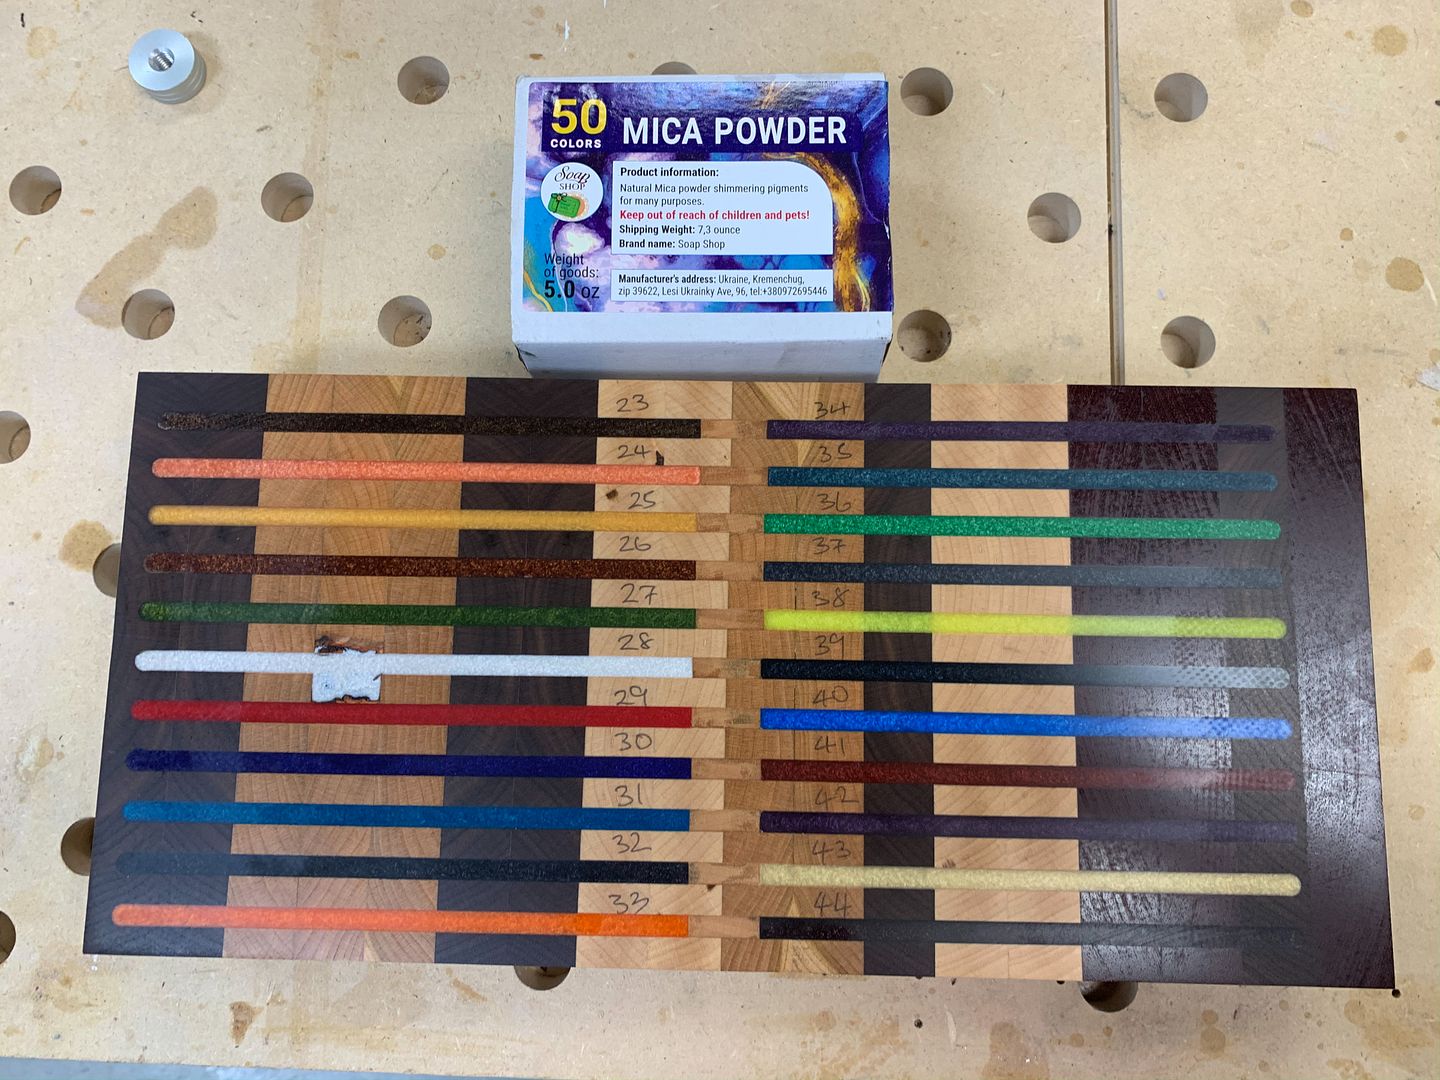
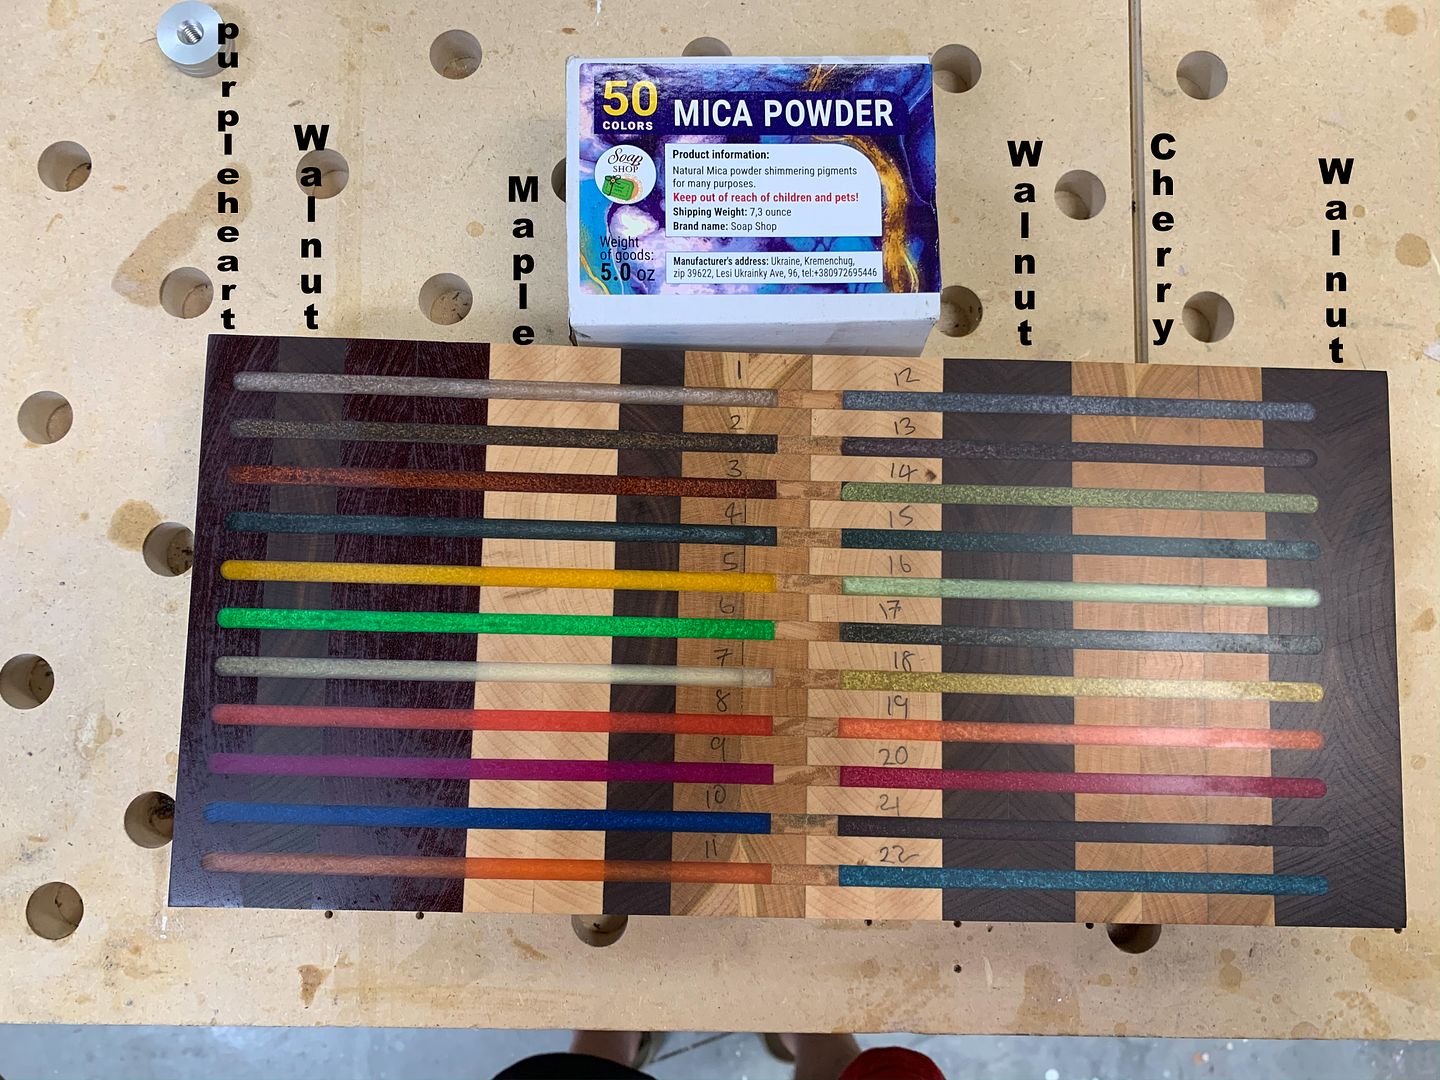
    I make most my end grain cutting boards from a combination of Purpleheart, Walnut, Cherry, Burbinga and Maple.


    Not knowing how each Mica color would tint the epoxy and which would look best in the various woods, I made this test board and put 44 samples, of the 50 in the box. The two pictures are the top and bottom of the board.

    Top

    Bottom

  2. #2
    Join Date
    Jul 2007
    Location
    NE OH
    Posts
    2,628
    Wow, that was a lot of work! Saving the pics just in case.....thanks for posting.
    --I had my patience tested. I'm negative--

  3. #3
    Join Date
    Mar 2003
    Location
    SE PA - Central Bucks County
    Posts
    65,875
    That was a really good idea to do that sample board to reference!

    BTW, what was your source for the mica?
    --

    The most expensive tool is the one you buy "cheaply" and often...

  4. #4
    Join Date
    Jul 2016
    Location
    Lebanon, TN
    Posts
    1,722
    Got the 50 color pack from Amazon ($24) https://www.amazon.com/gp/product/B0...?ie=UTF8&psc=1

    Many of the colors are very similar, so I just filtered out 6 of them.


  5. #5
    Join Date
    Feb 2003
    Location
    Hayes, Virginia
    Posts
    14,775
    Nice job on the test boards Chris and thanks for the link.

  6. #6
    Join Date
    Jan 2010
    Location
    Tampa Bay, FL
    Posts
    3,927
    Thanks, Chris.

    Never thought of using Mica powder to tint epoxy. Could be a game changer.
    - After I ask a stranger if I can pet their dog and they say yes, I like to respond, "I'll keep that in mind" and walk off
    - It's above my pay grade. Mongo only pawn in game of life.

  7. #7
    Join Date
    Mar 2003
    Location
    SE PA - Central Bucks County
    Posts
    65,875
    Thanks for the link!
    --

    The most expensive tool is the one you buy "cheaply" and often...

  8. #8
    Join Date
    Jul 2016
    Location
    Lebanon, TN
    Posts
    1,722
    This was my test board, had a Purpleheart and Maple end grain board, lying around that I never finished with.

    So this was my experimental piece. I routed out the letters and the design with my Shaper Origin, 4mm deep.

    The Bronze and Black epoxy didn't really stand out that well, that's when I decided to made the color swatch board above.

    The green was a test to see if it was necessary to give the routed out section a coat of de-waxed Shellac prior to dribbling in the epoxy. The answer was yes. even though I over filled each green groove, the epoxy in the groove without the Shellac was sunken below the board surface, so some epoxy definitely got sucked into the end grain.

    I did cut the two green grooves using a piece of Oramask stuck on the board. I wanted to see if it would stop any bleeding of the resin into the wood. That was successful on both the Shellac and no Shellac'd side.


  9. #9
    great work - definitely saving that link and your photos for reference. thanks for posting.

  10. #10
    Join Date
    Mar 2003
    Location
    SE PA - Central Bucks County
    Posts
    65,875
    Chris, I think that you're going to find that for boards that you want to do inlay work, you'll want to go with a much simpler background. Mixing the woods with great contrast works well for non-annotated boards, but "busy" backgrounds are going to be a challenge for the inlay to have an even appearance. What you can do, however, is to consider doing like one of my clients does for charcuterie boards...leverage interesting material like ambrosia maple for interest while also using resin inlays for personalization. The general background, despite being kewel to look at, is stable enough visually so that the inlay is clear and clean.
    --

    The most expensive tool is the one you buy "cheaply" and often...

  11. #11
    Join Date
    Jul 2016
    Location
    Lebanon, TN
    Posts
    1,722
    Agreed, this project is for a friends Son who is getting married, so I don't plan to do a lot of these.

    My other thought was to select one of the woods, being used in the board, and then do a 1/4" deep rectangular inlay of long grain and then route the design on that. I may try this on the other side of my test board.

    My initial thought was to do the insert, but actually do the inlay piece with actual wood. I know this can be done, but I went the safe method with the resin. I may try this, on a sample, before I make the final cut.

    The design will be on the under side and not on the cutting surface, although for all the cutting boards I've given to friends, no one has actually used them to cut on, "Be like taking a Ferrari Off Roading, you just don't do that" was one friends response.
    Last edited by ChrisA Edwards; 09-03-2020 at 10:04 AM.

  12. #12
    Quote Originally Posted by ChrisA Edwards View Post
    "Be like taking a Ferrari Off Roading, you just don't do that" was one friends response.
    Yes, but it is a free Ferrari, let's see what it can do.

Posting Permissions

  • You may not post new threads
  • You may not post replies
  • You may not post attachments
  • You may not edit your posts
  •