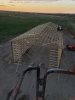
Page 1 of 2 12 LastLast
Results 1 to 15 of 18

Thread: 1980 powermatic 66 restoration

  1. #1

    1980 powermatic 66 restoration

    Hi everybody, I’m new to the forum here. I just bought a powermatic 66 green table saw. I disassembled most of it for the transport home. Now I’m taking almost all of it apart to get it looking good and working great. I need to find a cast iron ext wing, and a motor cover. I also happened across a beismeyer fence that will go with the saw. I’ll try to post pictures along the way. Mike.
    Attached Images Attached Images

  2. #2
    Join Date
    Jun 2014
    Location
    Western PA
    Posts
    1,245
    Look at that tired old soul in need of a helping hand. Glad you got it, Mike, and hopefully for a song! You took the trunnion bracket out to move it? What motor did you get with it? Look like it is 3hp. Do you plan on repainting it at all or just getting it in good working order and making sawdust as quickly as possible? Theres a fair amount of documentation on your saw, but feel free to post any issues you run into. I havent owned a 66, but i did completely restore a 72 that is a little older than your machine, owned a 68 for a few weeks, and another older 72. For about an hour and a half of work and $100 you should be able to replace the arbor bearings, motor bearing, and belts. Frankly, i would rip everything out even if you twirl the bearings and they "feel ok". That paint scheme means the saw is from the late 60s through the 70s, i think, and by the looks of it, someone hasnt cared for it much for the last 20 years.

    If you repaint it, i hope you keep the period paint scheme. I know some folks think the racing stripes are lame, but i really like that color combo. My favorite scheme of the powermatics. My 72 is early to mid 60s and was pea green, so i repainted it pea green.

  3. #3
    Join Date
    Apr 2018
    Location
    Cambridge Vermont
    Posts
    2,289
    A little over a year ago I picked up a slightly newer PM66 (gold colored one) and went through the whole thing. It's really a pretty basic machine. I even removed the locking mechanism for the tilt and raising the blade. Wile everything worked before once cleaned up it was amazing how easily it worked. I replaced the bearing on the arbor but I measured the runout on the blade before removing it. It'll be a little harder with it removed but I would try to check the runout. I don't think Powermatic has the arbor anymore but you can find companies that make replacements on ebay. No sense putting new bearings on a arbor that is too far out. Unless you know the bearings were just replaced I would absolutely change them since you are 90% of the way there.

  4. #4
    Yes, thanks. I plan on replacing the bearings. I’m also going to keep it green in color. I need to find and 1 1/8 socket to get the rest of the guts apart. I sold all my 3/4” drive stuff years ago. This is my 1st powermatic. I do have many walker-turner machines though. And a couple delta bandsaws. Thanks for chiming in. Mike.

  5. #5
    Welcome to the forum. I just overhauled a 1970 66’ a few months ago and found parts were easy to find. Also found quite a bit of help here in the forum.
    The saw has been a real joy to use. A little concerning not to have a riving knife but Ill soon have a splitter on the insert.

  6. #6
    Join Date
    Dec 2006
    Location
    Porter,TX
    Posts
    1,523
    PM 66 are fantastic saws in 10" cls,I also had Unisaw but the 66 is more HD than other. As in back of your truck is trunnion which is more beefy than Unisaw but I am fan of both. One I have was in better condition than yours but like you I decided to take it completely apart and clean up go through it. Mine was missing the motor cover and dust door which I was able to get dust door off ebay but never found motor cover. So I had to make myself one which I made few changes than the original covers. At top you can see two bolts which are about 6" long,at the bottom of the cover I mounted HD piano hinge so that after removing those 6" bolts the cover would fold down for cleaning. All fasteners I went back with 316 stainless steel.Post some pics as you make progress on your saw restoration project.
    Attached Images Attached Images

  7. #7
    Join Date
    Apr 2018
    Location
    Cambridge Vermont
    Posts
    2,289
    The dust door is sold by part's vendors while the motor dust cover can be bought off ebay from a guy who makes them (I think he even sells the both together). The problem is that the shipping charge is way out of whack. Between shipping costs and the cost of the door and cover it would of cost me more than I paid for the saw. My dust cover is just cracked so I repaired it with aluminum tape. I figured sooner or later I might make a mold of it and then make a new one. I think I could do it in carbon fiber and still be cheaper than the plastic one you can buy.

  8. #8
    Yes, I think I’ll end up making a motor cover, maybe with bottom slanted downward for dust collection. Can’t think about that yet. I got the arbor out and the bearings off, they were not matching manufactures ? Weird, anyway, I’ll have them tomorrow. Borrowed a big socket and will take that giant nut off tomorrow. Shifting gears, I ordered “wheels” only for the shopfox dolly that came with it, took the whole assembly apart and hosed out years of saw dust and other stuff, 😏. Not sure if I should look for a right side ext wing or just build a table, the fence is 52”. Still working on a paint and a color, it will be in the green scheme.

  9. #9
    Join Date
    Dec 2006
    Location
    Porter,TX
    Posts
    1,523
    Shop on ebay for the wing and the cast iron wrench for taking that nut off. Even if nothing there right now those items do come up once while.

  10. #10
    Hi everyone, I just moved the saw from NJ to TN, I picked up a used beismeyer fence for it. I replaced the arbor bearings. I’m still looking for paint. I know the hammered green is a good match, I may go a little creamier on the racing stripe to match the fence. I ordered new casters for the shopfox dolly , the solid rubber tires went flat. 🤷*♂️ I got those at caster city. 3”. Still looking for a right hand cast iron ext. table, or maybe just make a long one, was thinking about using corian. I’ll post some more pics in a bit. Thanks. Mike

  11. #11
    Join Date
    Jan 2008
    Location
    Western Nebraska
    Posts
    4,680
    I was just thinking about how to spend a splendid afternoon Mike, and your thread popped up. Inspired me to head for the shop to spend some time with one of my old saws. Really like your PM, glad to see it getting a fitting home.

  12. #12
    Here are some random pics. One of the bolt holes was cracked, it was still crazy tight, so I cleaned it really good with naphtha and a toothbrush, compressed air and then J B weld. Came out good.

  13. #13
    Forgot how to post pictures 🤦*♂️
    Attached Images Attached Images

  14. #14
    Hi everyone it’s been a while since I last posted, hope everyone is well. I moved the saw to TN. I hope. Remember how to post pictures, so here goes.
    Attached Images Attached Images

  15. #15
    Join Date
    Dec 2006
    Location
    Porter,TX
    Posts
    1,523
    Dang its looking fantastic,love that strip

Posting Permissions

  • You may not post new threads
  • You may not post replies
  • You may not post attachments
  • You may not edit your posts
  •