It's a copy (from plans, basically) of a PRS. I made a Telecaster before this and am currently making a couple more. It's highly addictive - perhaps more so than the vortex of turning.


 Moderator
It's a copy (from plans, basically) of a PRS. I made a Telecaster before this and am currently making a couple more. It's highly addictive - perhaps more so than the vortex of turning.
 Contributor
When my mom came to visit, she liked the oak mechanic’s tool chest I had made for myself. So, I’m making her a little chest out of walnut for her sewing supplies. It will have three drawers for thread, then a top compartment for needles/scissors/current project stuff/etc. I’ll make a dovetailed solid wood case and frame and panel tops and bottoms, then saw the top 1” of the case off to be part of the top. The case will be 12 1/2” x 12 1/2” x 17”. The drawers will be about 2 1/2” tall each.
this is the first real thing I’ve made out of walnut, and it I’m really liking how it saws and planes. It is really nice wood. Seeing pencil marks is tricky though, if I get my lamp at the right angle I can see them more from the reflection of the lead. I’ll go to the art supply store in town and see if I can find some light colored pencils to help with marking.
I’ve got the tails cut on the back panel. I decided to make this with really narrow pins. My 3/16” chisel is just small enough. I took a lot of care in cleaning up the tails and making sure everything was square. I pared a couple of them where I didn’t cut at exactly the angle I wanted. I decided to use blue tape on the end of the pin board so I could see my lines better.
it was right before lunch, I had transferred my lines, and I decided to go ahead and make my saw cuts before eating. So, I peeled off the tape and started my first cut when I realized I peeled off the tape on the pins instead of the tails. I had only made two saw strokes, so I’ll be able to make a shim out of an off-cut of this board, glue it in and plane it flush. The fix will disappear in the finished piece. But, I’m a little disgusted right now. It’s a good reminder to step back and slow down when you feel your attention starting to wane, especially when you’re doing something a little different.
8943FAA5-EC42-4E5B-AF49-DD3236B4B808.jpg
Contributor
This is my first completed piece of actual furniture. My wife wanted a small bookcase to go into a corner of our bedroom that matched our existing pine furniture and I said I'd like to make it. Most of my woodworking has been functional in nature - kitchen cabinets, simple shelves - so I aspired to be careful and get it right.
It took longer than anticipated to get it completed, even though I used S4S plain western pine from our local home center. The worst part was finishing; through testing I found the pine would splotch like crazy and I thought I found a combination that worked well prior to staining (thinned blonde shellac). Well, the water-based flat finish I chose lifted the stain right up; I should have tested putting the stain directly in the finish. I switched to shellac for the topcoat which still lifted the stain but it did so more slowly and I found a technique to apply it that avoided most second passes with the brush, although I occasionally forgot and it's obvious where that happened.
2020-10-25 17.18.20.jpg
Anyway, from a few feet away it looks pretty good and the books hide the worst of the finishing blunders where the shelves meet the sides. I want to make a bigger pine bookcase that more closely resembles the other furniture and for that I think I'll explore spraying. Not sure how to get even coverage on the inside by spraying, but I'll be damned sure to experiment before applying anything on that piece. I'm going to order some southern pine (someplace, haven't found where to do that yet) so it'll be a while before that gets underway.
It was a learning experience; more of one than I had intended. But my wife is really happy with it and she doesn't care at all about the imperfections. Or so she says.
- Leo
 Contributor
The bookshelf looks great Leo! If I was spraying it, I'd tape off where the glue is going, and spray it before assembly.
~mike
happy in my mud hut
Very impressive Jon! I would like to think my joinery is fairly tight but not watertight! Would love to see some build pictures if the opportunity presents. Thanks for posting.Originally Posted by Jon Snider

In my early 20s I was shanghaied into a two man surf dory race (start on the beach, row out through the surfline around the buoy and back in). Coming back through the surfline flipped the dory, the gunnel came over and broke my arm. It still doesn't work right. I hope you have better luck in Colorado!
Best, Mike
8 foot long "mid century modern" Walnut sideboard for my brother-in-law. This is not my preferred style and was built on request based on design well pretty much a cocktail napkin sketch he provided.
The carcass is mitered at the corners walnut plywood that I foolishly attempted to glue/assemble by myself (my Boys are some how never around when I really need them), which accounts for the completely un-square final result. That "Original Sin" of building out of square carcass led to multiple "workarounds" to make doors, sliding doors and interior dividers fit. Best I can say is at least the drawers fit nicely and the doors slide. I'm hoping no one notices the rest the mistakes.
Heaviest thing I've ever built. Will be glad when it's out of the shop.
Cheers, Mike
DSC_0078.jpgDSC_0076.jpgDSC_0074.jpgDSC_0073.jpgDSC_0072.jpg
 Friend of the Creek
Not my style either, Mike, but wow, nicely done. Are those dowels at the corners?...nice touch.
 Member
Mike,
As always beautiful work but damn someone needs to talk to your Brother-in-law. That is one of the reasons I do not build to request.
ken
It was fairly easy to plane the 45° miters in the high quality plywood by hand. Joints are screwed from both directions. I found some pre-made, tapered bungs at Rockler (not really sure what they're called) to fill the holes and hide the screws. They were much easier to use than dowels and quite a time saver. The decorative letter color would on the sliding doors is curly maple. I re-sawed to about 3/8" thick two book matched. Final surface planing was a real bear! I confess the electric orbital sander came in very handy.
Ken, you speak the truth! This project was certainly not my preferred style or material. Working with the plywood sucked, especially with no table saw (that reminds me I need to resharpen the 8PPI crosscut saw I dulled to butter knife level sharpness sawing the plywood). Design was a compromise between my brother-in-law (who is a really good friend) and his wife. I spent lots of time texting them pictures of the build process asking "are you sure this is the way you want to look?".
The other thing I didn't appreciate about plywood is how fricken heavy it is! Once the carcass was assembled, it didn't move from the glue up table until the entire project was complete. When the time comes to load this into the truck, I plan to faraway. Definitely a job for the young bucks!
This product is also given me an new appreciation for the challenge of installing factory made MDF/plywood kitchen cabinets etc. In the back of my mind, I always thought our empty nest/retirement strategy might be to buy an older home and remodel it so I could do all the built-ins, finish carpentry etc. Aside from the fact that there's probably a 0% chance the Boss would sign off on that plan, this project has made me think it wouldn't really be very much fun to build my own kitchen cabinets. I'm too old to be moving those plywood boxes around. Guess I'll have to come up with another plan!
Cheers, Mike
 [OP]
Contributor
[OP]
Contributor
Hi Mike,
Looks great-let's see a picture of you next to it in your finest bowling shirt
Best,
Chris
"You can observe a lot just by watching."
--Yogi Berra
Sorry Chris, no build pictures for this project. Would've have to been a rated R video for all the cussing and groaning!
Friend of the Creek
LOL, Mike.
 Member
Not furniture... but probably a step closer to "Neanderthal".
I've started chopping down the Ashe Juniper in my small backyard. And decided to (re)learn knots/lashings I've not used since boy scouts. I'm cutting it up on this... (the Mark II, Mark I fell over. I still need to add another stabilizing piece between the X frames).
2020-10-25 16.06.53.jpg 2020-10-25 16.28.49.jpg
 Contributor
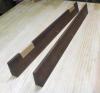
Have been working on a cherry entry shelf for our mud room. Have a couple drawers, one for me and one for my fiancee. The idea is we will put our car keys in these drawers and can leave each other love notes from time to time. The drawer fronts are some wenge I have had laying around for a while. I'm currently applying finish and will post pics after the finish is done. The first coat of finish has really transformed the piece and has elevated the contrast between the cherry and wenge. The cabinets in our mud room are stained black hence why I chose such a dark wood for the drawer fronts.
Entry Shelf Unfinished Side.jpg Entry Shelf Unfinished Top_Front.jpg Entry Shelf Unfinished front.jpg
 Posting Permissions

 Reply With Quote