Page 1 of 3 123 LastLast
Results 1 to 15 of 37

Thread: Neander' Project III Progress

  1. #1
    Join Date
    Jan 2012
    Location
    Austin, TX
    Posts
    495

    Neander' Project III Progress

    Today I was able to work a good 12 hours in the shop and made some decent progress on my hand tool project number 3. This is a (Dutch) tool chest. If I'm going to have any hope of getting the table saw de-cluttered I need better storage. Hopefully this will help. (But I can already see I should have built the larger version... oh well).

    A few days ago I got started... other than two practice dovetails, these are the first I've done in a decade. I'm pretty happy. (I don't have a coping saw, and my bowsaw wasn't having any of it, so I chopped them out with a chisel)

    2020-06-29 19.38.16.jpg2020-06-29 19.38.07.jpg


    I messed up somehow laying out/sawing the shelf dados...
    2020-07-02 14.09.08.jpg

    But dry fit went OK. The shelf will be nailed in from the side so... onward!

    Glue-up of the shelf went OK. Almost square. I messed up by preparing the shelf to the exact dimensions on the cut list... should have make it oversize then trimmed to exact fit. Oh well, nails, right?
    2020-07-02 16.35.42.jpg

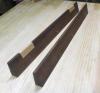
    Next I needed a 1/4" thick by 2" wide piece for the slide. After casting through the scrap and coming up empty, there was no choice but to resaw something. I was kind of dreading doing it and starting having thoughts of just maybe it was time to buy that bandsaw I'm pretty sure I eventually want... but since I vowed to do these three projects entirely by hand... I went for it.
    I used my coarsest rip saw (7 PPI), which was pretty slow going... and I wasn't able to completely hold my line, but it came out a little thicker than 1/4" in all but one tiny spot.
    2020-07-03 11.23.50.jpg2020-07-03 11.31.42.jpg 2020-07-03 11.39.59.jpg 2020-07-03 11.40.53.jpg

  2. #2
    Join Date
    Jan 2012
    Location
    Austin, TX
    Posts
    495

    Continued...

    It planed out pretty good. Just a minor spot where I sawed too thin to make the 1/4" desired thickness.
    2020-07-03 12.04.57.jpg 2020-07-03 12.08.48.jpg

    Now, examining the dovetail glue up... this was hidden previously to me by the clamps.
    The board had some twist or cupping which I had a heck of a time dealing with. I thought I had it licked, and I thought that the little bit of cup would be taken care of by the clamps... Nope. The other side looked like after planing would be just fine though.
    2020-07-03 13.12.53.jpg 2020-07-03 13.13.04.jpg

    Last thing I had time for today was to cut the boards for the tongue and groove back.
    A lot of ripping here. It actually went pretty quickly, though I still have a lot of skill development to do as I wasn't able to keep on the line or keep the cut straight. Always tended to wander towards me about 2/3rs of the way into the cut. I lack the control, but once the saw was near vertical and in a two handed grip it ripped through the panel fast. Way faster than I thought. Maybe hand ripping isn't so bad (in pine).
    2020-07-03 18.12.45.jpg Lol. As I'm now reading this I realized I used my 10 PPI crosscut for the ripping, not my 7 PPI rip. Guess it should have actually gone even faster. Doh!
    Last edited by Erich Weidner; 07-04-2020 at 12:22 AM. Reason: Doh!

  3. #3
    Join Date
    Mar 2006
    Location
    Austin Texas
    Posts
    1,957
    Good progress Erich and nice work on the re sawing. Staying tight to a line on both sides of a board takes some experience (and a flat saw plate) and your work looked very well done for someone who claims not much prior experience. I like the setup of your end vise for re sawing. Don't sweat the short spot of <1/4" thick you show in the first couple of photos. I find that I can keep my saw square to the cut (90 deg) in the horizontal plane without too much effort, but can get off square in the vertical plane when I am working (huffing) away vigorously and trying to make some progress. When I allow my saw to roll over slightly, things start heading south in a rapid fashion. Looks like you get to practice fixing up joinery gaps . Have you noticed that the 7th Gate of Hell has been opening up a little wider lately? It is in SW Austin anyway. Thanks for sharing.
    David

  4. #4
    Join Date
    Sep 2007
    Location
    Longview WA
    Posts
    27,430
    Blog Entries
    1
    Erich, Looks good so far.

    Your bench looks to be the same as mine. Here are links for things to help make the bench much more useable.

    First is a weight under the tail vise > https://sawmillcreek.org/showthread.php?119667

    A couple of 3/4" holes were drilled in the apron for holdfasts. Use them lightly as a hard hit with the mallet can cause the holdfast to split the apron wood. DAMHIKT! The holes can also be used with dogs and a squeeze clamp.

    The other bench accessory that has been a great help is an anti-rack-spacer-stack > https://sawmillcreek.org/showthread.php?183743

    1- Anti-Rack Spacer Stack.jpg

    This has had a few changes since this was posted. All the leaves are original but some have had the top shoulders rounded to make it collapse quicker for storage.

    There are a lot of 'standard' size spacers stored under my bench. Often a piece of scrap from the lumber being worked is saved for this task.

    Here it is shown being used to prevent the vise from over squeezing some thin stock:

    Planing Thin Stock.jpg

    A spacer stack is useful for more than just regulating a vise prone to racking.

    It can also be used when setting the fence on a plow plane.

    jtk
    "A pessimist sees the difficulty in every opportunity; an optimist sees the opportunity in every difficulty."
    - Sir Winston Churchill (1874-1965)

  5. #5
    Join Date
    Jan 2012
    Location
    Austin, TX
    Posts
    495
    Quote Originally Posted by David Eisenhauer View Post
    I find that I can keep my saw square to the cut (90 deg) in the horizontal plane without too much effort, but can get off square in the vertical plane when I am working (huffing) away vigorously and trying to make some progress. When I allow my saw to roll over slightly, things start heading south in a rapid fashion. Looks like you get to practice fixing up joinery gaps .
    Yes looks like I do. I guess since part of the point of a tool chest is to keep dust, critters, and moisture out; I need to do something. I was actually contemplating epoxy... but that may spoil some of the old school purity of the project. But I guess if I apply it by hand I'm still sticking to my hand tool project vow. Otherwise... how to fix? Trying to cut exact sized banana shaped wedges doesn't sound fun. (I used liquid hide glue)

    Quote Originally Posted by David Eisenhauer View Post
    Have you noticed that the 7th Gate of Hell has been opening up a little wider lately? It is in SW Austin anyway. Thanks for sharing.
    Yes indeed! I'm up in the Round Rock area. I smoked a small brisket and ribs yesterday (as per usual the brisket took 3 hours longer than planned, but I digress), it was stupid hot and the stick burner needs attention every 20-30 minutes during the smoke so I was outside most of 2PM to 7PM. Got sunburned and a bit dehydrated, but many beers later I was tip top again (well, except for the hangover today).
    Last edited by Erich Weidner; 07-05-2020 at 11:14 PM.

  6. #6
    Join Date
    Jan 2012
    Location
    Austin, TX
    Posts
    495
    Quote Originally Posted by Jim Koepke View Post
    Erich, Looks good so far.

    Your bench looks to be the same as mine. Here are links for things to help make the bench much more useable.
    First is a weight under the tail vise...
    That is definitely a problem with this bench (and I have come to hate the bench quite a bit...).
    My original solution was to bolt it to an full sheet of plywood so my body weight kept it in place. That worked decent, but I kept tripping on the plywood sheet and when I moved my tools from the spare bedroom to the garage I ditched the plywood. Right now I have a bunch of clamps, bench hooks, and offcuts underneath on the shelf. For the most part it doesn't move except in heavier planing. I am definitely going to build a bench this year, but first have to get my skills up a bit.

    Quote Originally Posted by Jim Koepke View Post
    ...The other bench accessory that has been a great help is an anti-rack-spacer-stack...
    A spacer stack is useful for more than just regulating a vise prone to racking.
    It can also be used when setting the fence on a plow plane.
    I've so far just been using offcuts/scrap. That has worked for the most part. I like your solution, and the fence setting idea is great. I'd never have thought of that.

  7. #7
    Join Date
    Mar 2006
    Location
    Austin Texas
    Posts
    1,957
    Joinery gaps equal thin ended wedges that get pushed into (with a little glue smeared) the gaps and then cut/chiseled/planed flush with the drawer side after the glue dries. Just pick up a small cut-off of the project (small, thin block) that is the same width (or cut it to make it the same) of the gap and push/hold one end of the block against one of your bench hook fences. Use a chisel to pare away at the end pushed against the fence to create a wedge shape thin enough to enter into the gap, then tap it home. On a dovetail gap, it will result in an end grain repair wedge going into an end grain gap - no show! From here, it looks like the big one on the left is really the only one that would be a candidate for repair as the others are small-small gaps that could be filled with a glue/sawdust paste if you really want to exorcise some anality.
    David

  8. #8
    Join Date
    Jan 2012
    Location
    Austin, TX
    Posts
    495
    Not much progress today. But definitely learned some lessons about drilling pilot holes for forged nails... had two of the boards split a teeny bit. (I caught it as it was starting, pulled out the nail and widened the pilot holes.
    Then back to the test board. I was able to get away with a step smaller bit on the test board, but it split on the actual piece. (Test board was an off cut of one of the panels). I was not having a clear thinking day and messed up layout lines for nails, then almost nailed into the dovetail... so I have several gratuitous nail pilot holes.

    At any rate the back is nailed in place except for three more across the bottom.
    2020-07-06 18.06.54.jpg2020-07-06 19.47.41.jpg2020-07-06 19.47.45.jpg

  9. #9
    Join Date
    Jan 2012
    Location
    Austin, TX
    Posts
    495

    More Progress

    Tonight went better. I was more on the ball for sure.

    Some discrepancies between (what I thought I heard on) the video, the 2013 PWW article and the sketchup drawings left me a bit confused as to exactly what width the front panel should be... So I just went for making it flush with the bottom of the shelf. That meant my nails are too close to the beading on the bottom edge of that panel. It looks like the sketchup drawing has the bottom of the shelf 10-1/2" from the bottom. I thought I heard 10" on the video and that's what I did. So the 7-1/2" wide shelf doesn't hang down. Hopefully not a big deal. I think I like the look of the shelf being flush with the front panel. But I'll probably have to modify the dimensions of the tip out front panel.

    Also I managed to drive a big splinter into the exact place I sliced my pinky on the plane edge yesterday. Fortunately the big ones are easier to remove. But... "ow".

    Beveling the front panel to the 30° angle with the jack plane was surprisingly easy (8" camber). I really think I'm going to like moving to a cambered jointer when I get around to resharpening it.

    My ripping continues to be substandard. I can't yet figure out why my angle tends to shift off of 90° and to more of a 100° angle somewhere halfway and 2/3rds through the board. It then also tends to dive back into and across my cut line (waste being on the right of the cut). When ripping the bottom lip I caught this just as it was turning catastrophic. Flipped the board end for end and finished the cut from the other side. Saved it with just a little bit of bad area where the saw went too far. I oriented this to be facing the floor so I didn't bother cutting a new one.

    2020-07-07 21.46.38.jpg2020-07-07 21.46.46.jpg2020-07-07 21.50.45.jpg

    I ran out of wide boards tonight. I'm short by the Lid and the Drop-front panel. Trip to the lumberyard tomorrow.

    2020-07-07 22.17.01.jpg 2020-07-07 22.17.08.jpg

  10. #10
    Join Date
    Mar 2015
    Location
    SE Michigan
    Posts
    3,225
    Looking good Erich! Long rip cuts can certainly be challenging. I’m still working on perfecting it myself. We have to keep in mind that as hobbyists, we aren’t ripping boards all day long to get the muscle memory.

    I tend to get less than 90* as well, and it’s usually just because my arm has turned to the left (I’m left handed). I’ve gotten to where I know that the first knuckle on my thumb needs to be pointing straight up...if it shifts some, I’m off square. Kind of a silly crutch, but helps me. It also helps to look down both sides of the saw and especially important to start the cut square and keep it that way. I tend to start using more of the heel area of the saw to use the wider plate to hold the angle.

    As far as moving off the line, most of your cut is pretty straight, so I’d say the saw is set up properly. Could just be loss of concentration, not letting the saw track itself, or some other technique issue. I find I move myself or the board frequently to keep my distance from the cut (and body/arm angles) consistent. I also probably drop the saw handle lower than normally advised to keep more of the saw plate in the cut line. With a well set up saw and good body mechanics you should be able to rip straight with your eyes closed. Believe it or not, I’ve tried that with scraps and it works surprisingly well. Not saying I do it for pieces that count, but it’s a nice way to force yourself to let the saw do the work and concentrate on body/arm mechanics.

    There are far more experienced hand sawers here that will likely chime in as well.

  11. #11
    Join Date
    Feb 2011
    Location
    Carlsbad, CA
    Posts
    2,230
    Blog Entries
    2
    [QUOTE=Phil Mueller;3035601]Looking good Erich! Long rip cuts can certainly be challenging. I’m still working on perfecting it myself. We have to keep in mind that as hobbyists, we aren’t ripping boards all day long to get the muscle memory.

    With a well set up saw and good body mechanics you should be able to rip straight with your eyes closed. Believe it or not, I’ve tried that with scraps and it works surprisingly well. Not saying I do it for pieces that count, but it’s a nice way to force yourself to let the saw do the work and concentrate on body/arm mechanics.

    .[/QUOTE]


    +1 to Phil's comments. A big part of getting straight rip cuts is the fundamental set up:

    1) saw bench knee-high so you can get your upper body over the layout line.

    2) Good light so you can see the layout line.

    3) Work clamped securely to the saw bench. For me, trying to keep the work piece still with just your body weight is recipe for disaster. Another argument for fairly heavy saw bench that will not move around under heavy work.

    4) When starting your cut, use a square on the work piece to give you a visual reference of 90°.

    5) For right-hander: with your upper body over the work piece, saw plate at 90° per square reference, align your right eye with saw plate and layout line. When starting your cut, use your left thumb to align saw plate with layout line, hold tooth line at a relatively low angle to the work piece, with no downward pressure to get the saw started exactly on the line. As you get cut established, you can raise the handle to a more comfortable/efficient 45° angle relative to the work piece.

    6) As you progress with the cut, try maintain the fundamental body geometry you established at the start, particularly the right eye/saw plate/layout line alignment. Try and keep your right elbow fairly close to your side. The stroke is basically a tricep extension. Phil is right, well tuned saw should track dead straight – you shouldn't have to "steer" it. In fact, if you can "steer" your saw fairly easily off the layout line, you probably have more set in the teeth than you need.

    Just my thoughts,YMMV!

    Nice work Erich – don't give up you can definitely do it with a little more practice!

    All the best, Mike

  12. #12
    Join Date
    Mar 2015
    Location
    SE Michigan
    Posts
    3,225
    Funny, I just ripped two cuts in a 37” board and split the pencil line with one hiccup leaving a full pencil line in one spot. Of course, I was using a Mike Allen tuned Disston. Yes, a well tuned saw is a joy to use.

  13. #13
    Join Date
    Mar 2006
    Location
    Austin Texas
    Posts
    1,957
    Given that the saw is set up so that it is not pre disposed to cut to one side or the other, I've always felt that: if you start the cut on/next to the line - keep the saw plate vertical - and keep the saw rotated at 90 deg to the material - then the cut will follow the line. I typically don't watch my lines when cutting tenons or dovetails without any issue and get offline when making long rip dimensioning cuts when I start "driving" or "pushing" the saw to hurry the cut instead of letting it set the pace. When I "drive" the saw, I tend to overpower with my right hand (I am right handed) and roll the saw slightly off dead solid vertical. It is the same when a person is shooting handguns - if you grip the gun too hard, a right hander will push the shots to the left and maybe down some as well. Phil or someone above mentioned that we don't typically do that much rip sawing for dimensioning and don't develop or maybe retain the muscle memory as well as we need for continuous good performance. I agree with that - muscle memory is a key point of many physical activities. You're getting there and I don't think the bench is really out of reach or not that far away at any rate.
    David

  14. #14
    Join Date
    Jan 2012
    Location
    Austin, TX
    Posts
    495
    Quote Originally Posted by David Eisenhauer View Post
    When I "drive" the saw, I tend to overpower with my right hand (I am right handed) and roll the saw slightly off dead solid vertical. It is the same when a person is shooting handguns - if you grip the gun too hard, a right hander will push the shots to the left and maybe down some as well.
    This may be where I'm going wrong. The wandering only happens after I've started more vertical power strokes (the saw takes a new life and starts really ripping through the material... pun intended). Somewhere after that as I'm gazing down at the majesty of that saw sailing through the rip cut... things go awry.

    By the time I got home from 2nd job today, I didn't have the motivation to go out and work. But I'm enjoying a beer and reading the forum, so still fun.

  15. #15
    Join Date
    Jan 2012
    Location
    Austin, TX
    Posts
    495

    Continued Ripping Problems

    Tried following Mike's advice. Still not out of the woods yet...

    Started off OK...
    2020-07-11 14.25.10.jpg

    But now I've crossed the line from waste side to keeper side...
    2020-07-11 14.26.36.jpg

    I've wandered off of 90 degrees again...
    2020-07-11 14.28.23.jpg 2020-07-11 14.28.44.jpg

Posting Permissions

  • You may not post new threads
  • You may not post replies
  • You may not post attachments
  • You may not edit your posts
  •