Results 1 to 12 of 12

Thread: Redwood Trellis build

  1. #1
    Join Date
    Feb 2011
    Location
    Carlsbad, CA
    Posts
    2,230
    Blog Entries
    2

    Redwood Trellis build

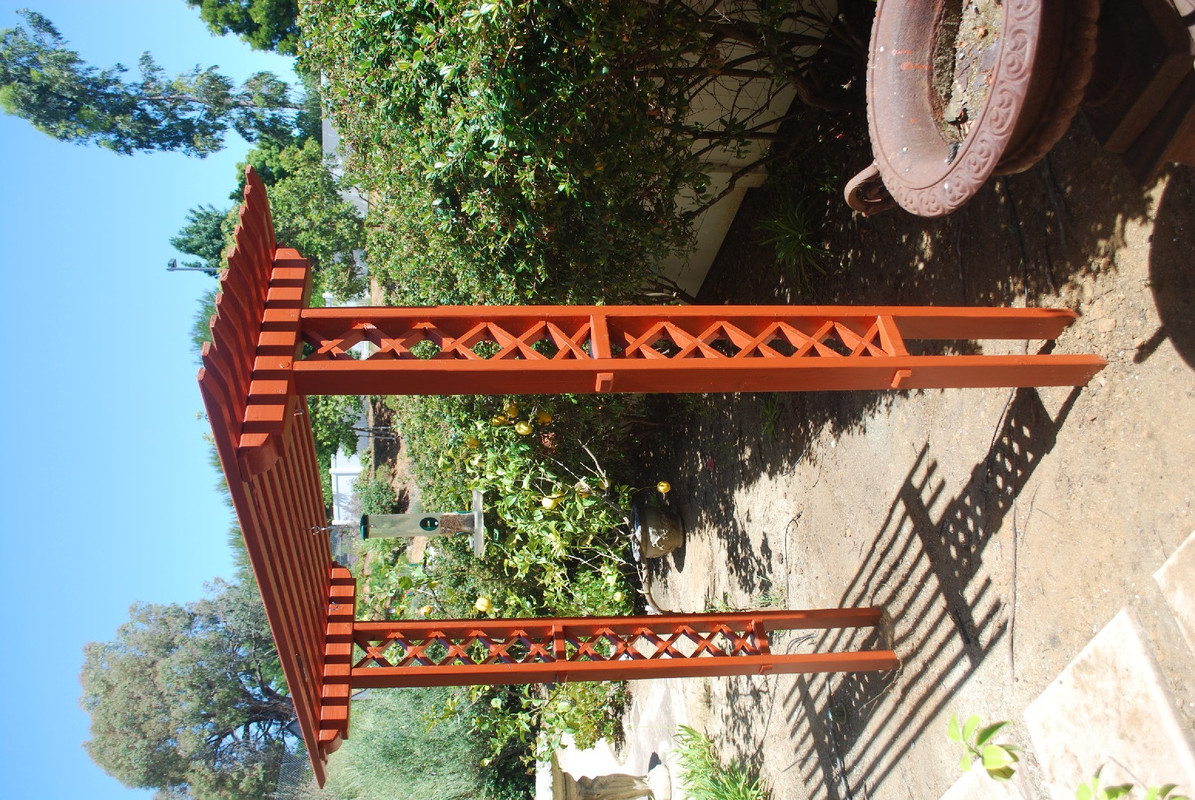
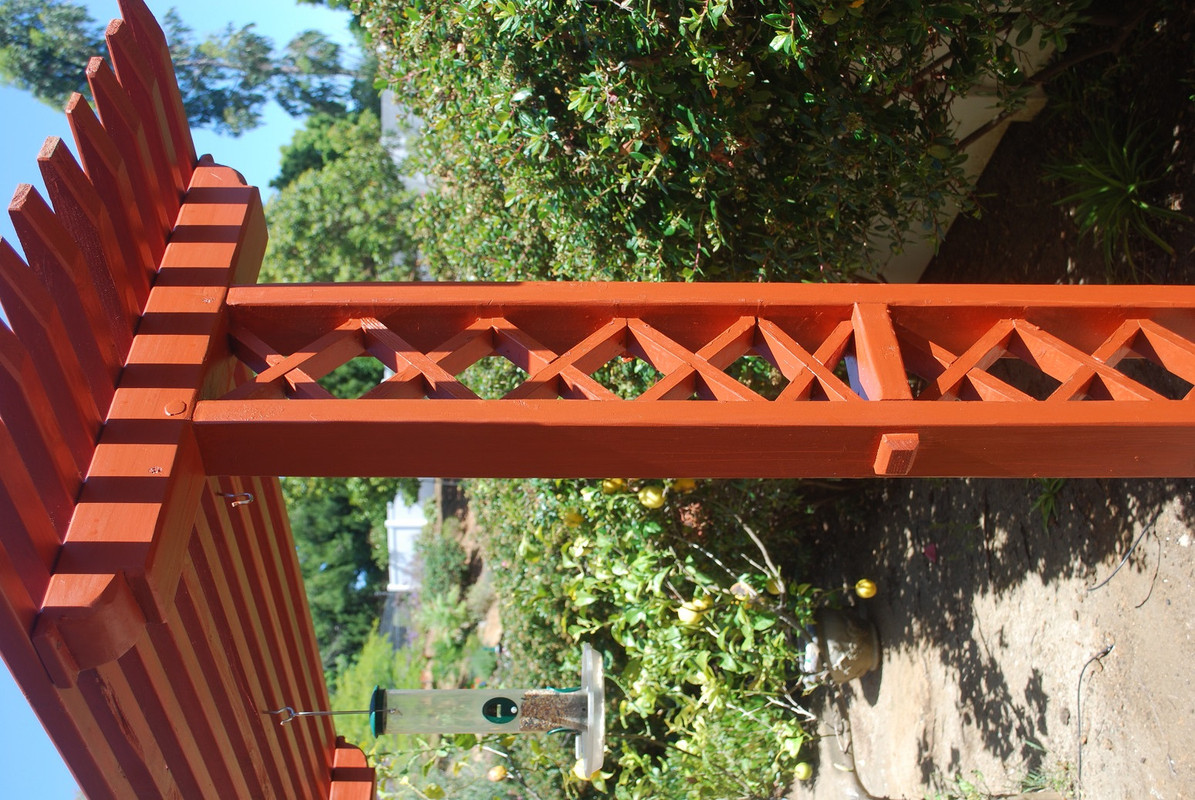
    My wife wanted a place to hang the bird feeders outside the kitchen window. I just completed a small scale project and it sounded like fun to try something of a larger scale – a Redwood trellis for the birdfeeders and some climbing points.

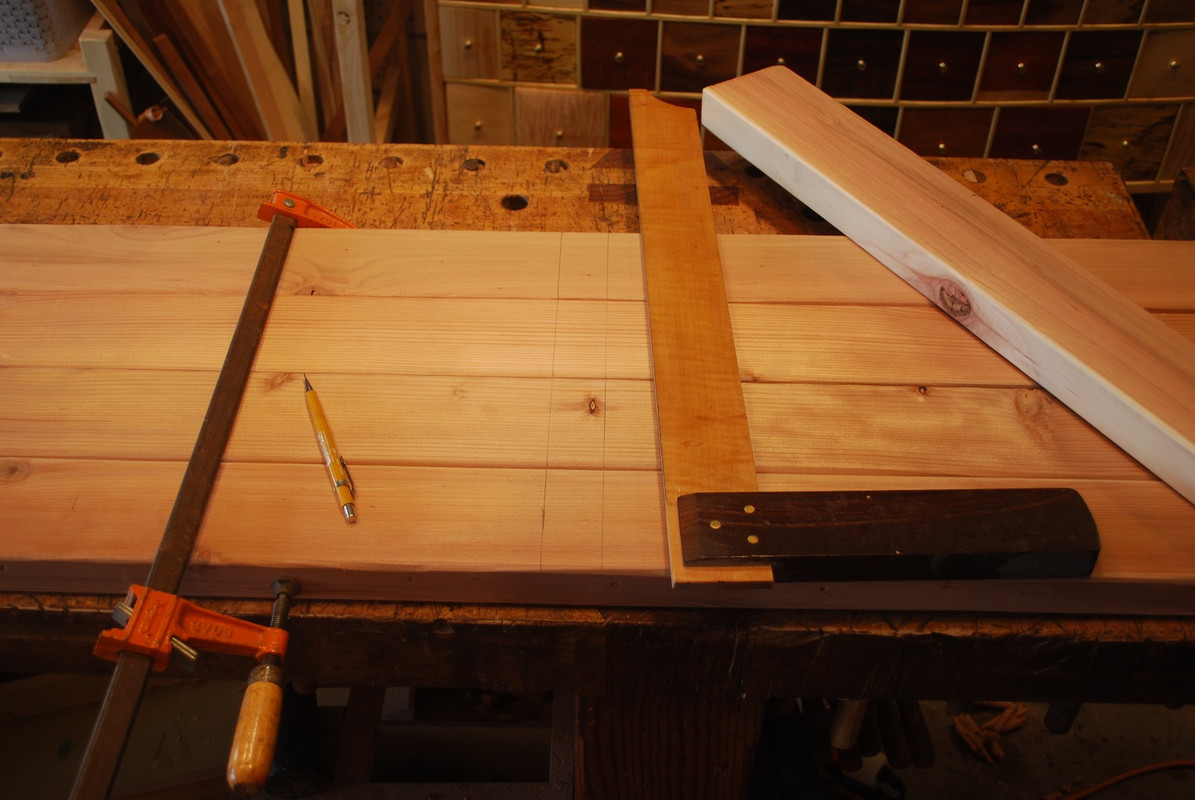
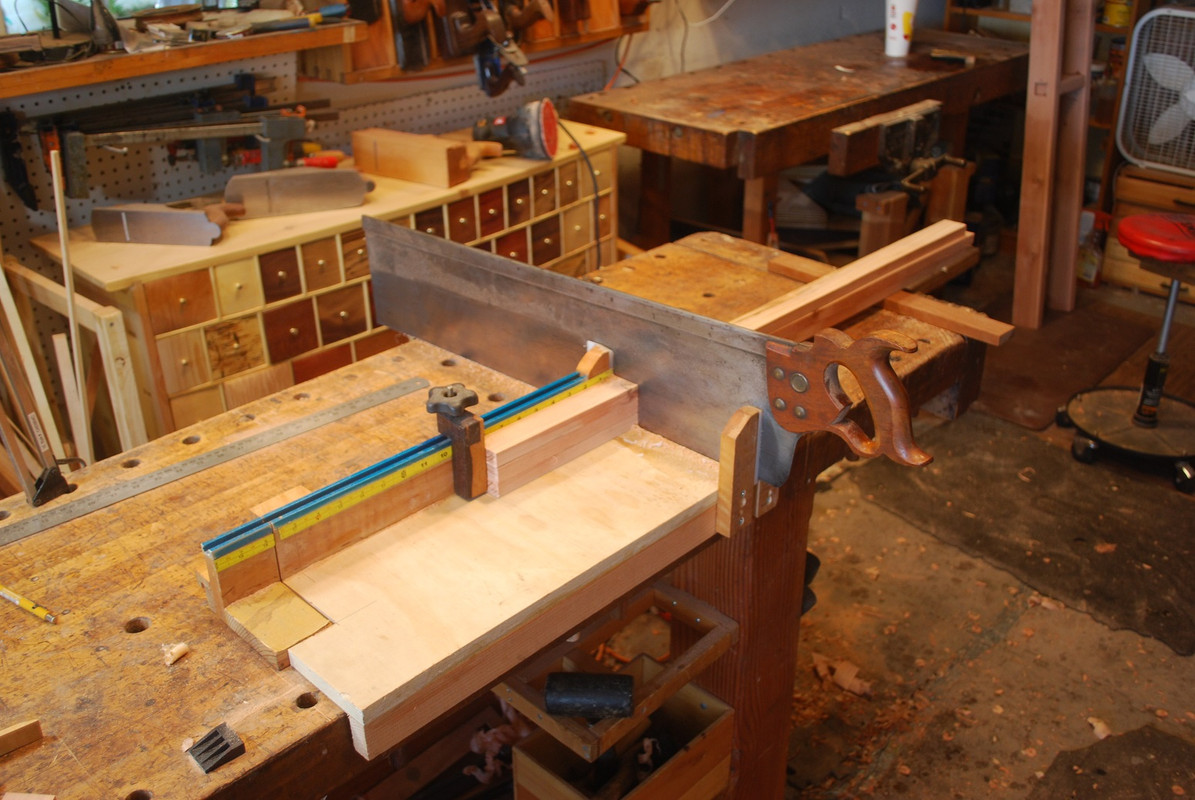
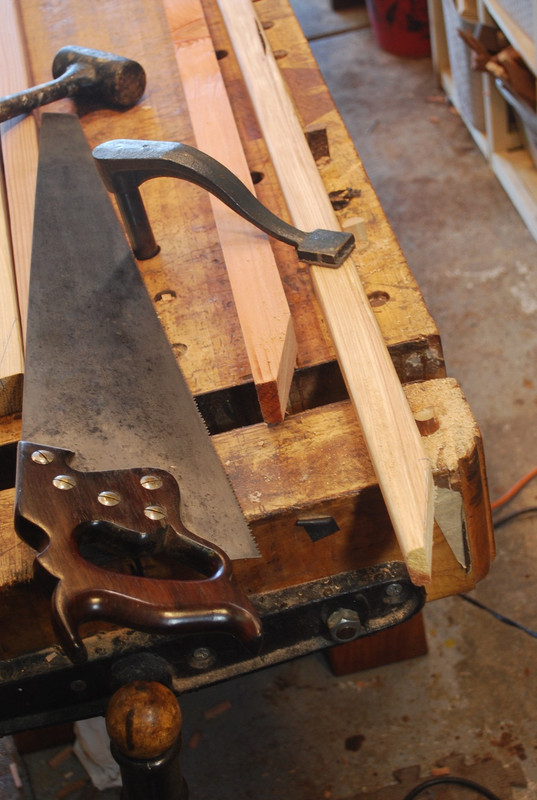
    Local Borg had some decent Redwood in 4 x 4 and 2 x 4 format that fit the bill. Here is crosscutting the 4 x 4’s that will form the top of the trellis. Used D8 thumb hole 5 PPI crosscut – oh I know you didn’t think you needed it 5PPI crosscut – but perfect for this job!


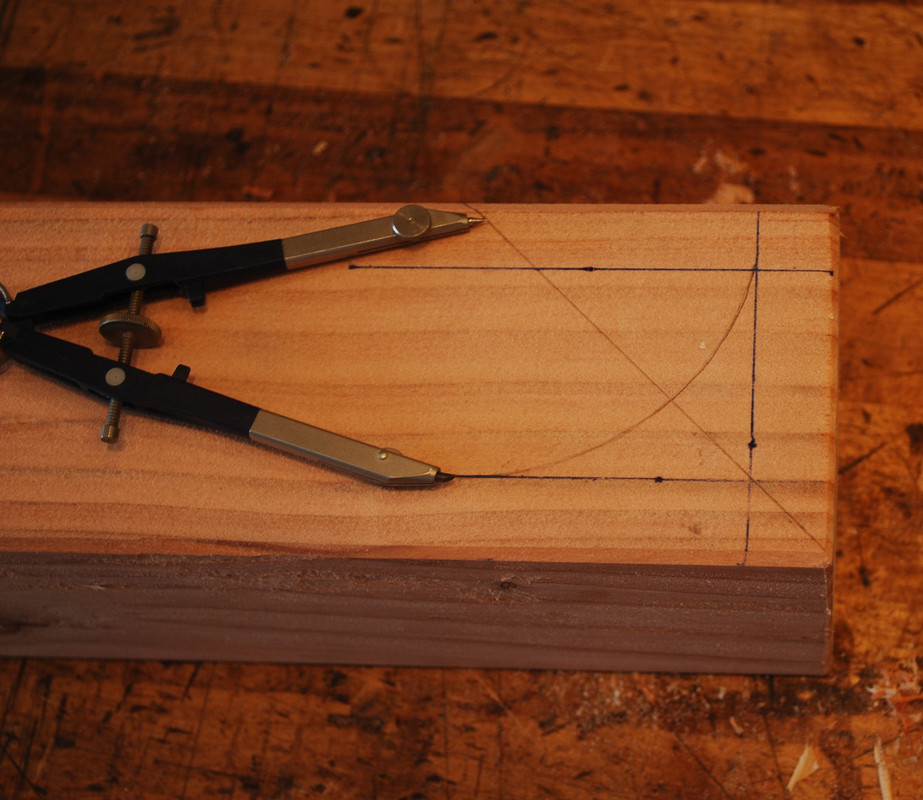
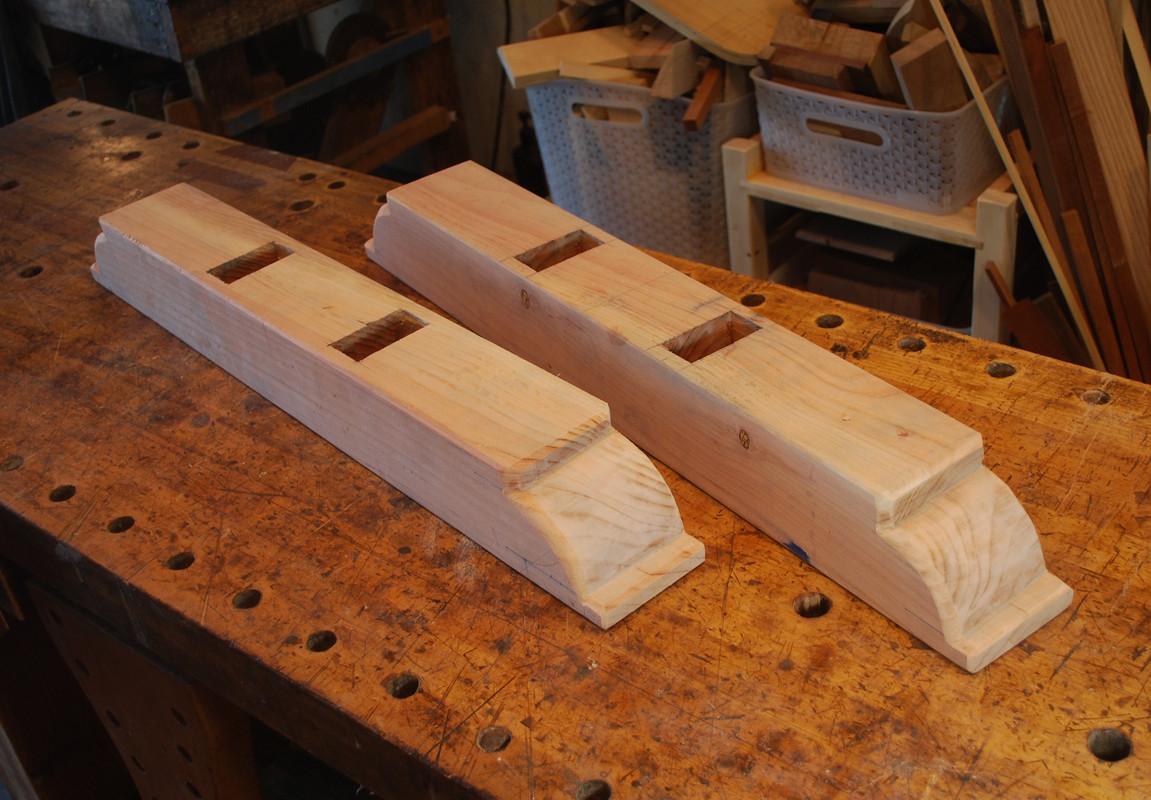
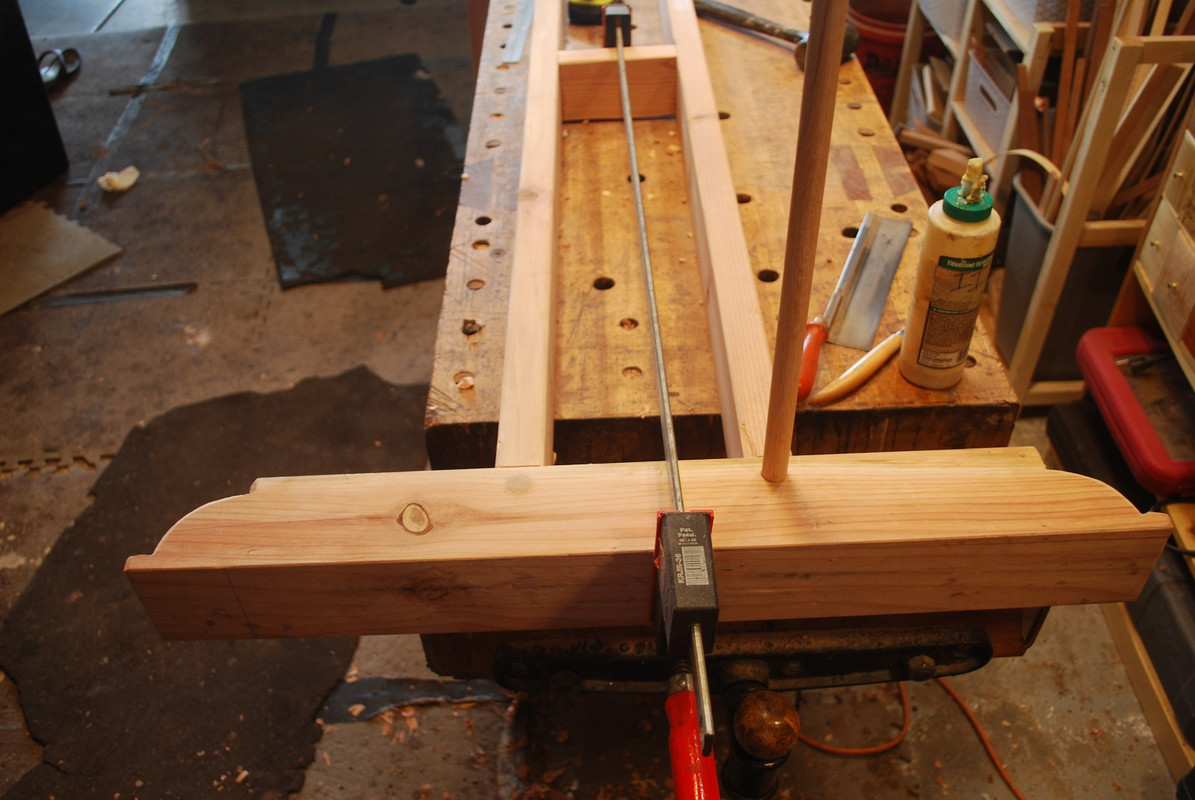
    Laying out the curves on the softwood required in ink pen for visible layout lines. Sawing and paring the end grain with a chisel.


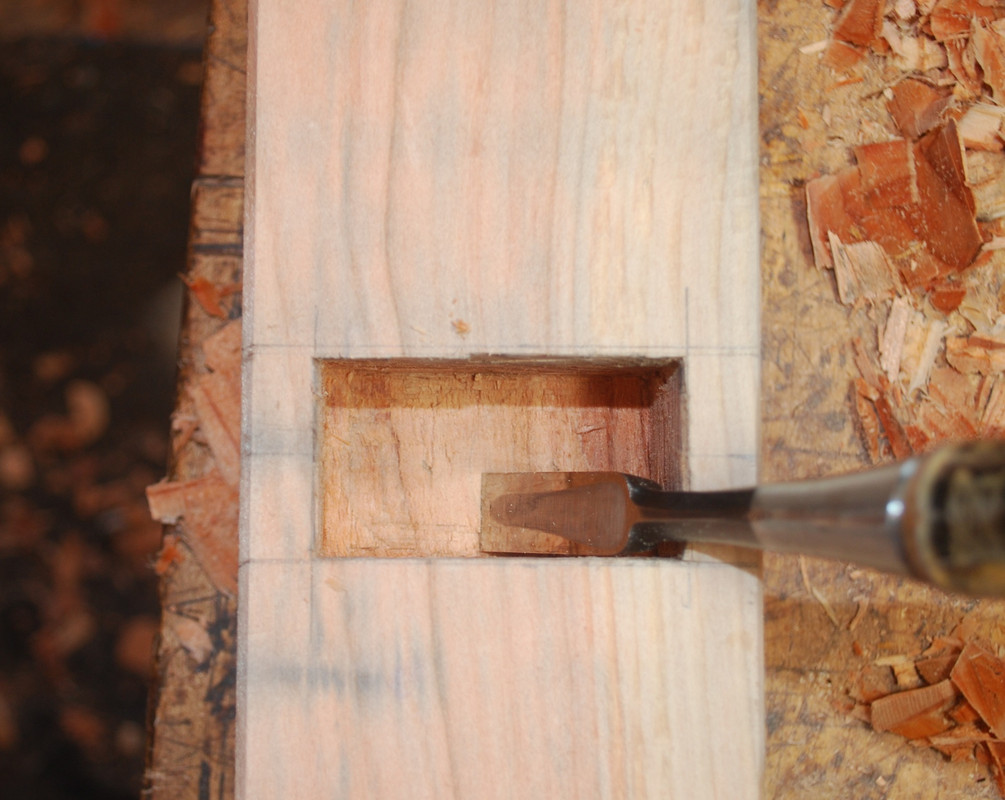
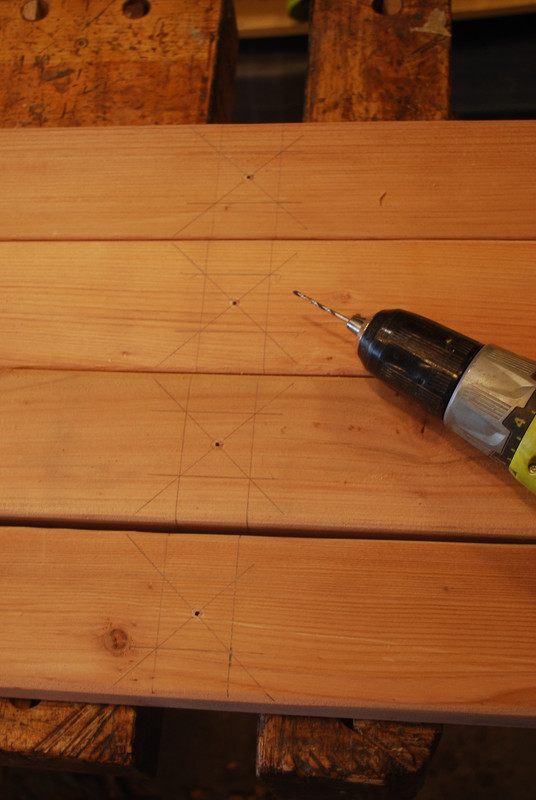
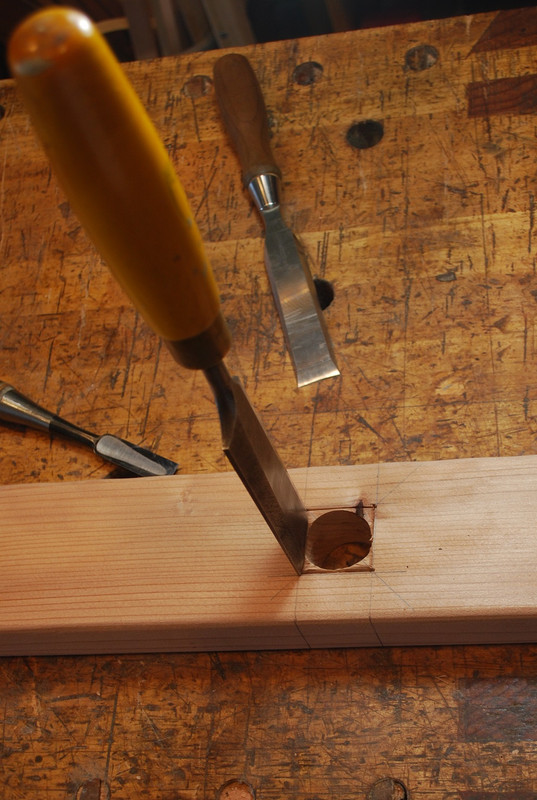
    Drill press and Forstner bits for roughing out mortises that will accept vertical posts.


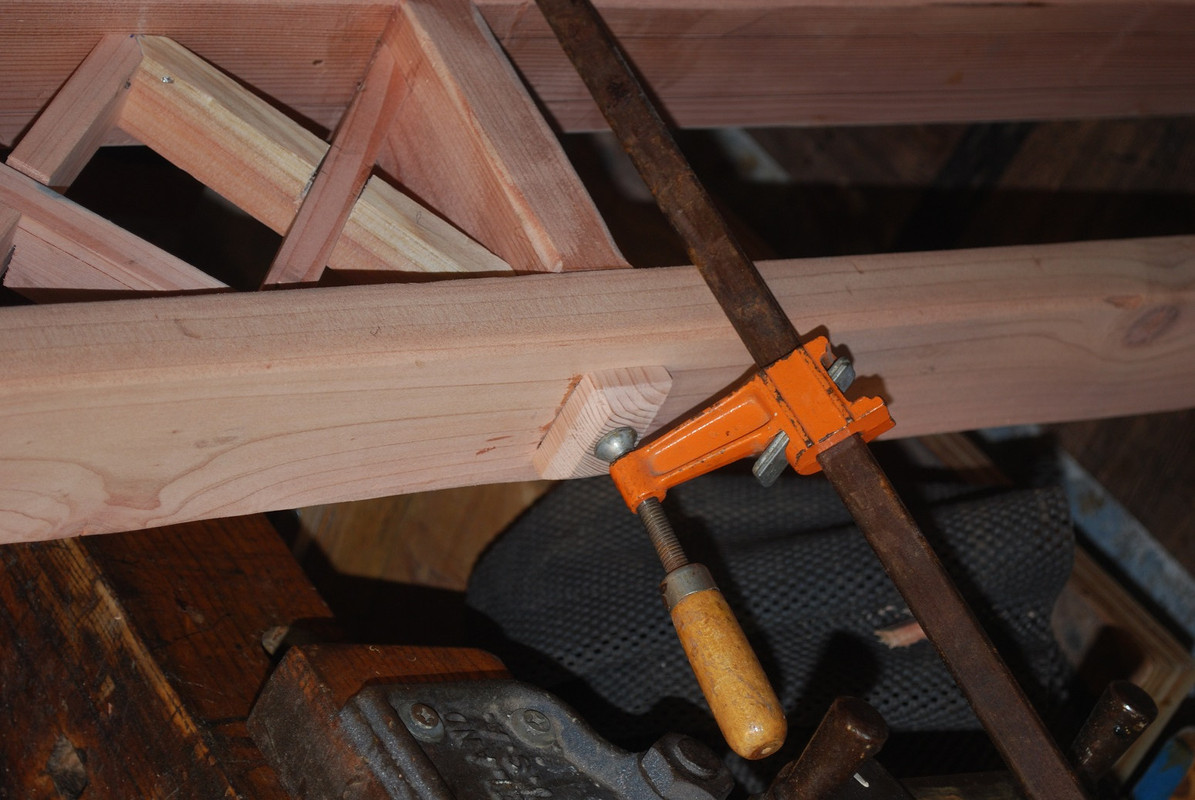
    Clamped all 4 vertical posts together to layout what were intended to be through mortises in tennon joinery for stretchers – as you see didn’t quite work out that way.


  2. #2
    Join Date
    Feb 2011
    Location
    Carlsbad, CA
    Posts
    2,230
    Blog Entries
    2
    Mortises were too big for my mortise gauge so used two of my favorite layout tools to work from reference edge to layout mortises. Honestly as a hand tool guy, I don’t know how I would get by without these sliding marking tools.


    To avoid spelching on outside show surface, drilled a small reference holes through the middle of the mortise so that I could drill and chop from both sides.


    Sawing the matching tenons for horizontal stretchers was fun sawing practice. Particularly for rough work like this, I want my joinery to fit right off the saw with minimal fussing/pairing required. Read a quote from a timber framer who said he “wanted M&T’s that he could push into place with his hat”. That was the plan here.


    Gluing/pegging vertical posts into header tested the limits of my 8 foot workbench.


    Sawing up diagonal dividers was an exercise in repetition with miter boxes.


    Screwed up the layout so – tenons for horizontal structures were too short to pass all the way through the posts requiring addition of external “caps” to cover the mortise. “Lemons – meet lemonade.”


    Sawing the bevel’s for 2 x 2 stretchers that run the length of the trellis the form the “roof”.


    As usual finishing proved the adage “never too late to screw up a good project”. I wanted to leave the Redwood unfinished but LOML “suggested” “it will look old and weathered. Let’s add a protective finish” I chose a redwoods “stain” that I thought would bring out the figure and provide a uniform color. Turned out it was more like “paint” – Completely obscured the figure in the wood – ugh!


    Adding insult to injury that was the finishing failure, even though we have two, 20 something, 6’ 4” Sons who seem to have no trouble manhandling beer kegs in and out of our backyard when the spirit moves them, they were nowhere to be found when it was time to dig the holes and put up the trellis. I know - shocking right? I’m sure some of you can relate. 
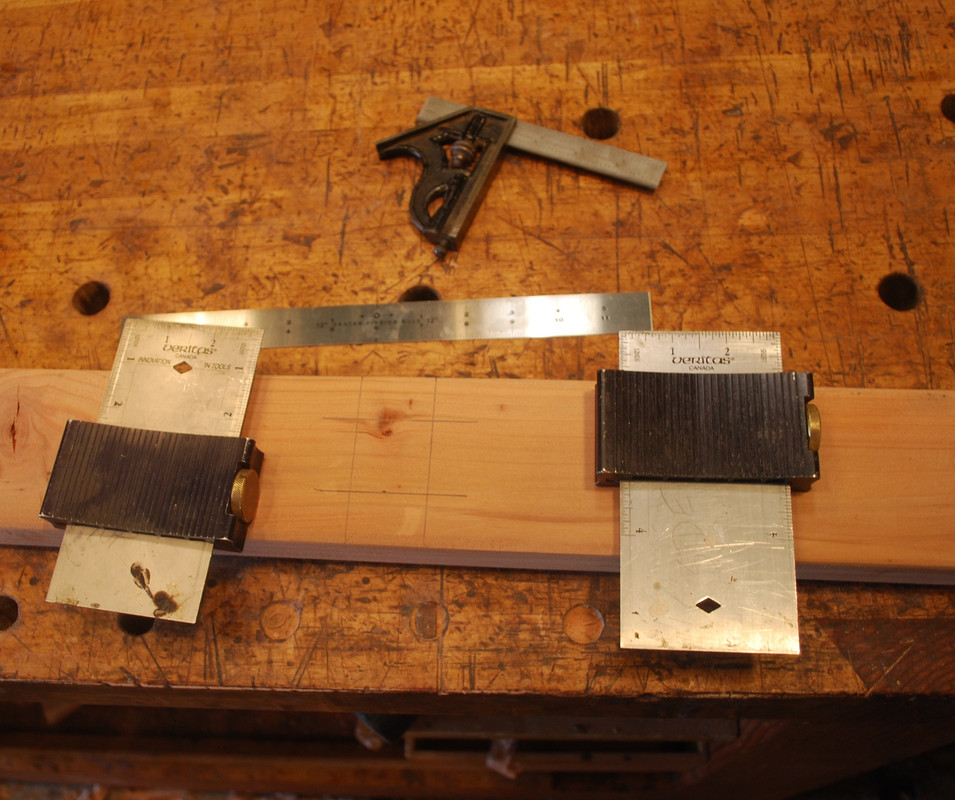
As I am an impatient, ill-tempered old cuss I did it myself and nearly turned the whole thing into firewood, but that’s a story for another day.

    Thanks for looking. All the best, Mike
    Last edited by Mike Allen1010; 06-17-2020 at 5:31 PM.

  3. #3

    Thumbs up

    Nicely done Mike. As for the stain obscuring the grain, it doesn't matter. What matters is that management is happy. and you are now off the hook.
    Dave Anderson

    Chester, NH

  4. #4
    Join Date
    Oct 2004
    Location
    SoCal
    Posts
    866
    Wow! Think it will be strong enough to hold up a bird feeder?

  5. #5
    Join Date
    Feb 2005
    Location
    Texas Hill Country
    Posts
    707
    Nice looking trellis Mike.

  6. #6
    Join Date
    Sep 2007
    Location
    Longview WA
    Posts
    27,454
    Blog Entries
    1
    Nice trellis Mike. Candy wants me to build a few of those for wisteria and other climbing plants.

    jtk
    "A pessimist sees the difficulty in every opportunity; an optimist sees the opportunity in every difficulty."
    - Sir Winston Churchill (1874-1965)

  7. #7
    Join Date
    Mar 2006
    Location
    Austin Texas
    Posts
    1,957
    I like it Mike, but I am afraid you have signed up for a never-ending re finishing job on maintaining the stain to the trellis. I have never found any finish that lasts more than a year or so, but - hey - there are the sons to help out, no? At any rate, the trellis is a tour de force for sure. A favor to ask, if you have time or the inclination, I would be very appreciative if you could walk me through your thinking and methodology of the layout of the curve in photo #2. It looks like the "By Hand and Eye" stuff and came out looking better than the typical trace-of-a paint-can curve.
    David

  8. #8
    Join Date
    Aug 2012
    Location
    Missouri
    Posts
    2,152
    Very nice Mike. You are sure right about that 5 point crosscut. I’ve been around long enough to have worked on framing jobs with no electric on site and no pre-cut studs. Once you get the hang of getting a running start on a cut you can almost keep up with a couple of guys nailing up walls. That is if there are not many windows or doors involved😀

  9. #9
    Join Date
    Feb 2011
    Location
    Carlsbad, CA
    Posts
    2,230
    Blog Entries
    2
    Quote Originally Posted by Jim Koepke View Post
    Nice trellis Mike. Candy wants me to build a few of those for wisteria and other climbing plants.

    jtk
    JTK, the most time-consuming part of the build was the interlocking, 45° angle dividers between the posts. I think last time I was at the local Borg I saw they had some similar, preassembled Redwood lattice. If I were doing this again, particularly with a focus on climbing plants, I would find a way to incorporate the store bought lattice and spend the build time/materials on the other elements that were little more fun to make.

    Make Candy happy – we want to see the pictures!

    Best, Mike

  10. #10
    Join Date
    Feb 2011
    Location
    Carlsbad, CA
    Posts
    2,230
    Blog Entries
    2
    Quote Originally Posted by David Eisenhauer View Post
    if you have time or the inclination, I would be very appreciative if you could walk me through your thinking and methodology of the layout of the curve in photo #2. It looks like the "By Hand and Eye" stuff and came out looking better than the typical trace-of-a paint-can curve.


    Hey David, great to hear from you! You give me waaaay too much credit for understanding geometry well enough to create purposeful curve in picture 2!! My approach is strictly trial and error on graph paper based on what looks like it "should" work.

    Divided the with the cross piece into five equal parts – that unit became the width of the rabbits that are the straight edges on the terminus of the curve. This is just up arbitrary number. Connect those two points with a straight line. Divide that line in half. Mark a 45° angle line that passes through that midpoint. From there you put the point of the compass on the 45° angle line with the lead where you want the curve to start. If you're height and width of the right triangle formed at the outer corner of the work piece are the same, then the arc from that compass point should connect to both ends. If the height and width of the right triangle are different, then you'll have to play around with where you locate the pivot of the compass so that the arc will connect both ends.

    I guess there's probably some geometry formula that would allow you to calculate these points, but I have no idea what that is.

    I am a terrible designer, with absolutely no creativity or "eye" for what looks good. For that reason I'm a huge fan of "By Hand and Eye". The two principles from that book that are most valuable for me are:

    1) Whole number ratios. Once you determined the basic rectangle that defines the outer dimensions of your piece and you're trying to figure out how tall should I make these drawers or how wide should these doors be – the answer is always whole number ratios. Divide the width of the sideboard in thirds and you have the dimensions for two outside compartments may be covered with doors and a central bank of drawers. Within each of those sections, further apply the principle to determine width of rails, styles, drawer fronts, raise panels etc.

    2) curves, especially compound curves, always make me nervous – for me super easy to get in shape that may have a "fair" line, but somehow just looks "wrong" in total. My feeble approach is: divide the overall curve into sections using principle number one above and then form the actual curves of each section using arc of a circle. For this purpose I have a whole set of circle or partial circle templates ranging from 1" in diameter to 20" in diameter (for smaller curves the plastic drafting template of circles is super handy). Graph paper, pencil and huge eraser complete toolkit.

    Just my approach, your mileage will certainly vary!

    Cheers, Mike

  11. #11
    Join Date
    Mar 2006
    Location
    Austin Texas
    Posts
    1,957
    Thanks Mike. I need to digest this when I'm out in the shop with some scrap wood and dividers. I appreciate your explanation and will dig out the book again to finish reading it. Again, nice work on the trellis.
    David

  12. #12
    Join Date
    Sep 2007
    Location
    Longview WA
    Posts
    27,454
    Blog Entries
    1
    Quote Originally Posted by Mike Allen1010 View Post
    JTK, the most time-consuming part of the build was the interlocking, 45° angle dividers between the posts. I think last time I was at the local Borg I saw they had some similar, preassembled Redwood lattice. If I were doing this again, particularly with a focus on climbing plants, I would find a way to incorporate the store bought lattice and spend the build time/materials on the other elements that were little more fun to make.

    Make Candy happy – we want to see the pictures!

    Best, Mike
    My way to get around that was to use 4X4 posts. Not quite as elegant as your solution. Here is the trellis made for Candy six years ago:

    Wisteria Trellis.jpg

    Here it is four years ago:

    Wisteria in Bloom.jpg

    Now it looks like the wisteria won:

    Wisteria June 2020.jpg

    We have a few more wisteria plants in the greenhouse that Candy would like to have growing on trellises.

    jtk
    "A pessimist sees the difficulty in every opportunity; an optimist sees the opportunity in every difficulty."
    - Sir Winston Churchill (1874-1965)

Posting Permissions

  • You may not post new threads
  • You may not post replies
  • You may not post attachments
  • You may not edit your posts
  •