Results 1 to 9 of 9

Thread: Drawer planing fixture

  1. #1
    Join Date
    Feb 2004
    Location
    Perth, Australia
    Posts
    9,492

    Drawer planing fixture

    This concept is not original, but I breathed on it to make it adjustable and rigid in use.


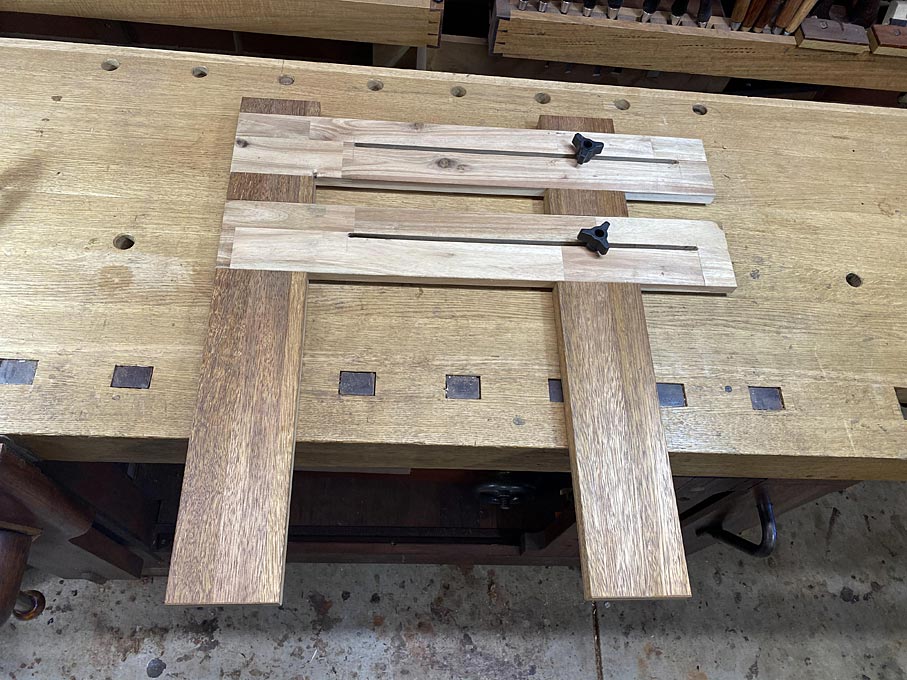
    This is the basic design ...


    The legs can open to 24" and close down to near nothing ...


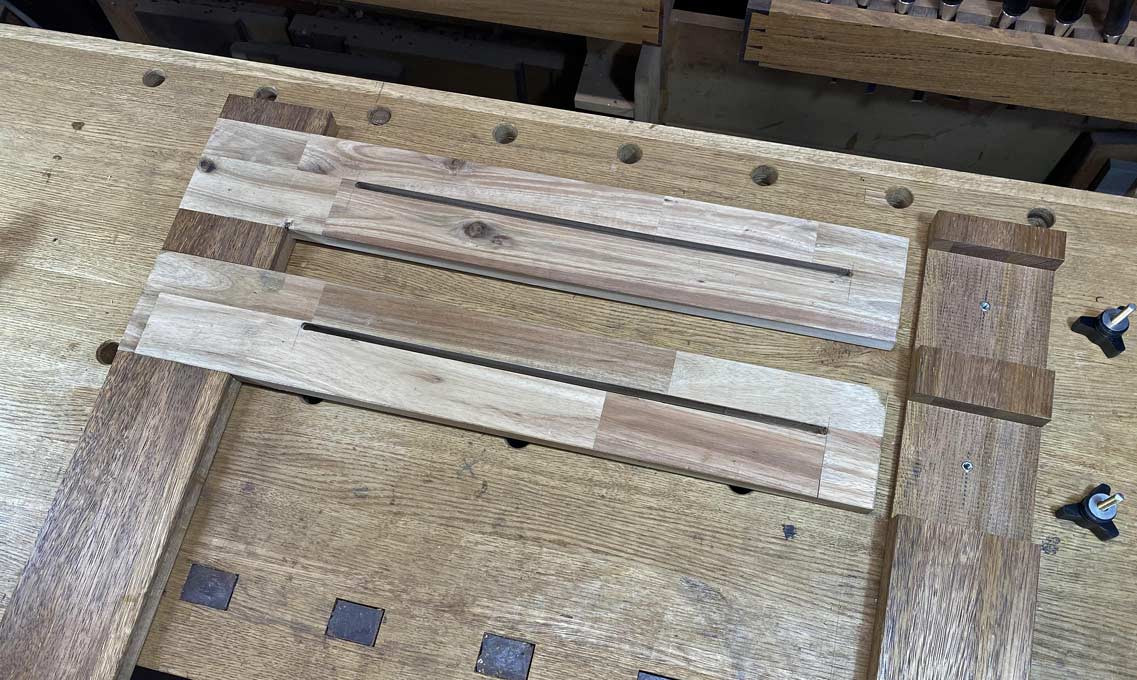
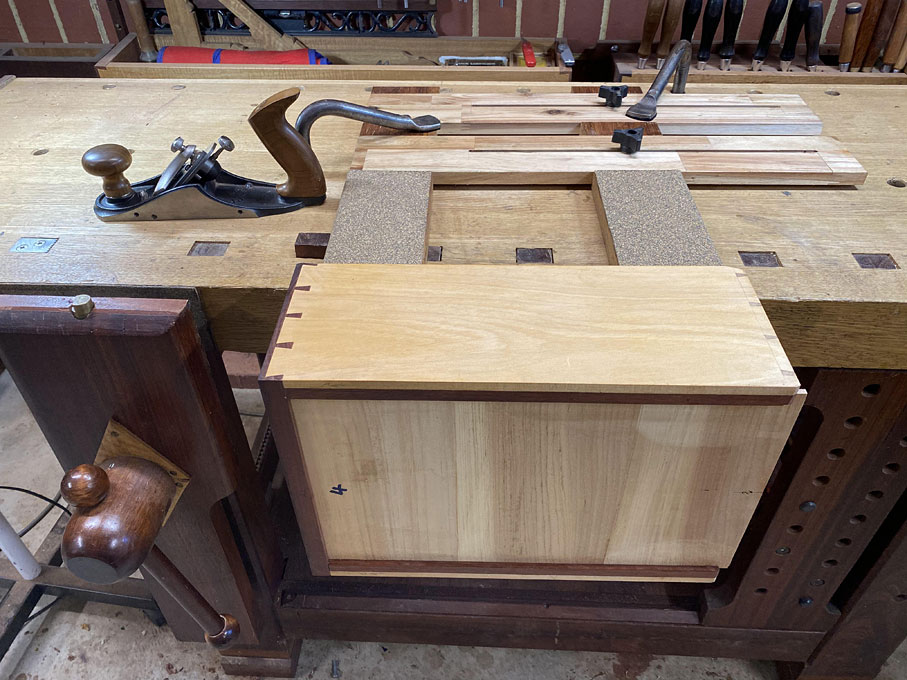
    The arms slide in wide mortices, and are held by screwed clamps into threaded inserts ...


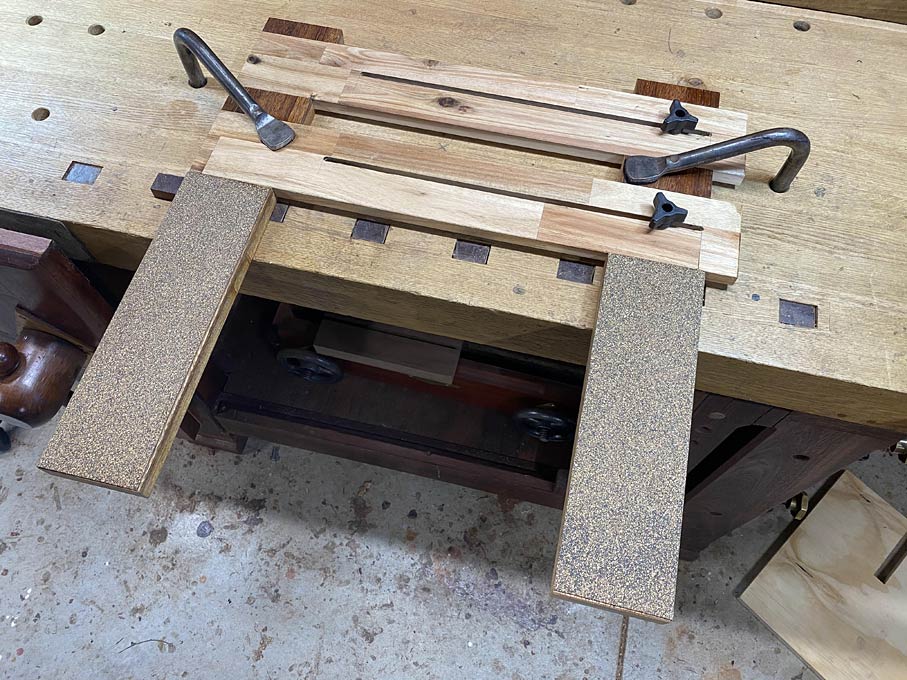
    To complete the build, the legs are covered in cork-rubber. This protects the inside of a drawer. It has the extra benefit of being a superb non-slip.
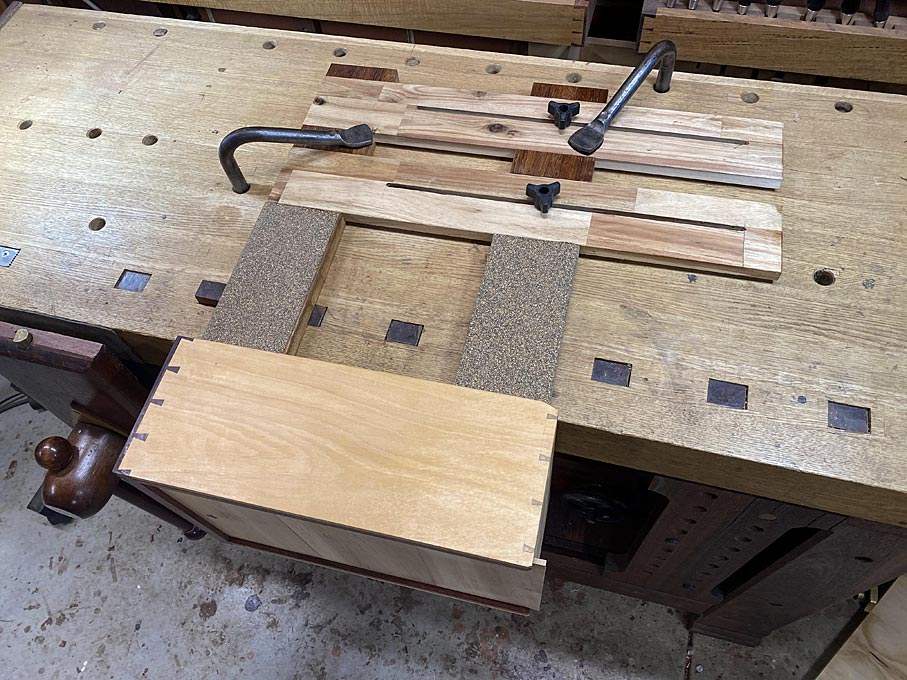


    In use ...


    Regards from Perth


    Derek

  2. #2
    Another good idea Derek. I have something similar but nowhere near as nice.
    "All that is necessary for the triumph of evil is that good men do nothing."

    “If you want to know what a man's like, take a good look at how he treats his inferiors, not his equals.”

  3. #3
    Thats not something I would have thought of. I like it, may need to steal the IP for my own use.

  4. #4
    Join Date
    Dec 2016
    Location
    South West Ontario
    Posts
    1,503
    You could use your front vise. The basic jig is made of two pieces of wood (pads) sized to match your front vise holding area. The thickness of each piece matches the two most common drawer front or side thicknesses you use.
    Next you make a third piece, the left side matches your vise area plus extends up half an inch above and half an inch below on the pads. The right side extends out, say 6”.
    Glue the pads each side of the central piece, leaving the 1/2” protruding top and bottom. When placed in the front vise you can capture the inside edge of the drawer against the bench, it will sit up 1/2” for planing. The jig can be flipped over for the two thicknesses to be used and flipped right to left also. You can line the holding part with grubber.
    Different drawer side thicknesses can be accomodated with shims held on with dowels. Make a bunch of shims clamp them all with the pads and drill together, glue short dowels in each shim to match. Each shim will do double duty depending on the side it is used so you don’t need that many!
    I previously used something like this on an old bench with a simple front vise, very simple to build and takes up very little space and works fine. Make it with some substance to the wood for holding power.
    Last edited by William Fretwell; 05-24-2020 at 8:20 AM.
    ​You can do a lot with very little! You can do a little more with a lot!

  5. #5
    Join Date
    Feb 2004
    Location
    Perth, Australia
    Posts
    9,492
    William, I am struggling to visualise this. Can you sketch it?

    Regards from Perth

    Derek

  6. #6
    Join Date
    Dec 2016
    Location
    South West Ontario
    Posts
    1,503
    ​You can do a lot with very little! You can do a little more with a lot!

  7. #7
    Join Date
    Feb 2004
    Location
    Perth, Australia
    Posts
    9,492
    William, I get it now. That is clever. But I see an issue for concern.

    In your fixture, the drawer is only supported at the one end. Will this not place extra stress on it when planing?

    Regards from Perth

    Derek

  8. #8
    Join Date
    Dec 2016
    Location
    South West Ontario
    Posts
    1,503
    Drawers are not generally that heavy and with the bottom in they are structurally very stiff. I have no issues just holding one end in my tail vise. The planing is light finish planing with a sharp blade.
    In your case you can slide your dead man behind the drawer, it will stop any deformation of the drawer.
    ​You can do a lot with very little! You can do a little more with a lot!

  9. #9
    Join Date
    Jun 2010
    Location
    twomiles from the "peak of Ohio
    Posts
    12,171
    Ash Box 2, bottom clamped up.JPG
    Not all are big....some fit rather nicely in a vise...
    cleaned up.jpg
    And...sometimes they fit a bit differently
    Ash Tote, adjusting edge.JPG
    And, sometimes a non-drawer needs planed...
    Computer desk drawers, 31 front clean up.JPG
    Mainly, I can simply rotate the drawer as needed, and plane things smooth..
    Computer Desk drawers, 4 done.JPG
    Until they fit...
    Computer Desk Drawers. #3 clean up.jpg
    Fronts and sides....

Posting Permissions

  • You may not post new threads
  • You may not post replies
  • You may not post attachments
  • You may not edit your posts
  •