Results 1 to 8 of 8

Thread: Doing inlay with the Lee Valley inlay cutter head

  1. #1
    Join Date
    Apr 2007
    Location
    Columbus, Ohio, USA
    Posts
    3,441

    Doing inlay with the Lee Valley inlay cutter head

    There I was minding my own business, when the Lee Valley temptress raised its head in the form of a special offer with the introduction of their router plane box. Their medium and large router planes are on sale as well, along with the blades. They have the inlay cutter head on sale. Hmmm...

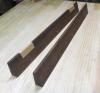
    I have never done inlay, and my first thought was "hey, I can spend under $50 for the inlay cutter head and try doing inlay"..... The problem is that I don't think that it is that easy.

    Has anyone ever used this head?

    I assume that if I just want to run a straight line parallel to an edge, I can cut the profile, but I think that there is more to it.

    They also sell:

    Veritas String Inlay Scrapper, inlay chisel sets, compass center for their inlay tool system, etc. It just seems like there is much more to it so I should resist the urge.

  2. #2
    Join Date
    Jan 2018
    Location
    Vancouver Canada
    Posts
    716
    I'm looking at the same thing, and my worry is the same as yours.
    Stay strong!
    Young enough to remember doing it;
    Old enough to wish I could do it again.

  3. #3
    Join Date
    Apr 2007
    Location
    Columbus, Ohio, USA
    Posts
    3,441
    Quote Originally Posted by Aaron Rosenthal View Post
    I'm looking at the same thing, and my worry is the same as yours.
    Stay strong!
    Not sure there is any "strong" when I am resisting a Lee valley purchase :-)

  4. #4
    Join Date
    Mar 2015
    Location
    SE Michigan
    Posts
    3,225
    I own and have used the inlay cutter head. Once set up, it does an excellent job cutting the side walls for inlay. Obviously, you need to have the router plane guide.

    The tool comes with a variety of shims and the two cutters. The cutters are razor sharp and have points at both ends, so they can be reversed prior to needing any sharpening. The cutters are beveled on one side in order to get a square wall.
    A chart is included that provides what shims are to be used in order to get a specific width of cut. It is a little finicky to set up the cutters and shims onto the head, but a little patience and following the instructions works.

    I have found that while the thickness chart is pretty accurate, you will want to check it against the actual piece of inlay...a test cut on scrap is advised. You may need to add or subtract shims as necessary. It’s not that the shims are not accurate, but instead the inlay itself may be a few thou off from a standard measurement.

    Using the router guide, running it along to make the cut is pretty straight forward. Instructions recommend that the groove be scored to final depth with one pass. I don’t find that necessary, and it’s fairly easy to reengage into the same cut lines for progressively deeper cuts.

    Keep in mind that this cutter only cuts the side walls. It does not “clean out the groove”. After cutting the side walls, the cutter head can be replaced with the proper router blade. When you remove the cutter head, and install the router blade, the router blade will not be aligned to the cut lines. You will need to readjust the guide. It’s important the router blade is exactly between the cut lines. Depth setting is also critical. The router blade will want to cut (or tear out) to the depth of the cut lines, so the initial cut lines and subsequent router plane blade needs to be accurate to the depth of the inlay material.

    Alternately, you can use the inlay tools to clean out the groove.

    I use a test board to set everything up throughout both cutting the side walls, and setting up the router plane. I have had good success using these tools. It just takes some patience and time to get things set up.

    Happy to answer any other specific questions you may have...
    Last edited by Phil Mueller; 05-12-2020 at 6:54 AM.

  5. #5
    Join Date
    Aug 2006
    Location
    Eastern TN
    Posts
    264
    I purchased the set some time ago and tried to use it once. I had less patience than Phil in trying to set it up accurately so it sits in the bottom of the drawer waiting for me to either spend more time practicing or put it up for sale. One of my few disappointments with LV merchandise.

  6. #6
    Join Date
    Feb 2011
    Location
    Carlsbad, CA
    Posts
    2,230
    Blog Entries
    2
    +1 to what Phil said. Test piece is essential to get good fit inlay-groove.

    Don't give up- inlay can be really fun way to add some "sparkle" to projects. Dremel plunge router base is good option for curves in the middle of the piece where you don't Have a curved edge to follow- it has "compass point" attachment.

    Phil can you do curves with the router cutter? String inlay tools make this pretty easy but the cutter width is limited to "stringing" thin dimensions.

  7. #7
    Join Date
    Apr 2007
    Location
    Columbus, Ohio, USA
    Posts
    3,441
    SO this is a decent way to try and get started doing this... Hmmm.

  8. #8
    Join Date
    Mar 2015
    Location
    SE Michigan
    Posts
    3,225
    Mike, you can do curves as long as the router guide has a curved edge to follow. I’ve done that successfully on a few occasions. But, in order to do internal curves you would need to make a custom router base with a trammel type guide (and I don’t think it would be possible for relatively tight curve work given the size of the LV router). For that kind of work, I use the LN tool designed by Steve Latta (I assume that is what you use as well?).

    You can go fairly wide with the inlay cutter (can’t remember the maximum width with all the shims) following a curved edge. And yes, the Latta tool is pretty limited in width, however, I wonder if you couldn’t gradually widen the cut by lengthening the rod in small increments...need to give that a try.

Posting Permissions

  • You may not post new threads
  • You may not post replies
  • You may not post attachments
  • You may not edit your posts
  •