Results 1 to 5 of 5

Thread: Lamp from old sewing spool.

  1. #1
    Join Date
    Feb 2009
    Location
    Bucks County, PA
    Posts
    975

    Lamp from old sewing spool.

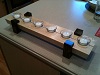
    My wife picked up this old sewing spool a while back, and we decided to make a lamp out of it.

    lamp1.jpg

    I started by grabbing a chunk of wood (most likely poplar) that I've had for a while and drawing some circles on it so we could judge a size for the base. After picking a size (7 inch circle), I roughly cut that on the bandsaw.

    lamp2.jpg lamp3.jpg

    I used the router table to get to final dimension, and also to cut the "steps" profile that mimics that from the spool (minor tearout there, unfortunately). A combination of router table w/ template and a handheld router was used to make feet on the bottom by removing excess material. You can also see the hole I drilled for the lamp hardware, and the recessed screw holes for attaching the spool to the base.

    lamp4.jpg lamp5.jpg

    My wife then stained the base (no separate pic there), and then I attached the spool and the non-wired part of the lamp hardware. The lamp hardware included threaded rod that fit really well inside the spool, with me only having to drill out one little section. The overall length also turned out perfect, with the rod stopping just short of the bottom of the base. I then wired up the socket and installed a bulb and the harp.

    lamp6.jpg lamp7.jpg

    Finally, we attached a lampshade and installed the lamp in our foyer. This was a fun little project.

    lamp8.jpg
    And there was trouble, taking place...

  2. #2
    Join Date
    Mar 2003
    Location
    SE PA - Central Bucks County
    Posts
    65,891
    Great project...and always nice to repurpose/upcycle nice materials!
    --

    The most expensive tool is the one you buy "cheaply" and often...

  3. #3
    Join Date
    Feb 2003
    Location
    McKean, PA
    Posts
    15,649
    Blog Entries
    1
    Nice recycling job. An illuminating project for sure.

    For future use here is how to use a router to cut profiles where you encounter curved surfaces to avoid tear out.
    Routing curves.JPG
    Last edited by Lee Schierer; 05-11-2020 at 11:25 AM.
    Lee Schierer
    USNA '71
    Go Navy!

    My advice, comments and suggestions are free, but it costs money to run the site. If you found something of value here please give a little something back by becoming a contributor! Please Contribute

  4. #4
    Join Date
    Feb 2009
    Location
    Bucks County, PA
    Posts
    975
    Quote Originally Posted by Lee Schierer View Post
    Nice recycling job. An illuminating project for sure.

    For future use here is how to use a router to cut profiles where you encounter curved surfaces to avoid tear out.
    That tearout actually occurred when I was initially cutting the circle to final dimension on the router table. I had made a little jig to hold the piece in a way where it could rotate, and I could adjust the distance in-between routes to make the circle smaller. Basically a reverse router trammel. I could climb cut during this as well if I wanted to, but I was also taking light cuts to attempt to avoid issues.

    What happened was that I had raised the router bit to get more of the circle's height. While rotating the piece, the bit grabbed a bit too much material and the piece slipped from my grasp and spun on its own. When it hit that reverse grain it caused a nice big tearout. I was hoping that all the tearout would get removed when I did the stepped portion, but a little bit remained.

    After this tearout occurred I switched tactics and made two circles out of MDF using a fly cutter on the drill press. I attached them to the top and bottom of the piece with double-stick tape and used a pattern bit in the router table instead. That allowed me to route with the grain in all cases just by flipping the piece over, and it's what I should have done initially.

    Note that when I cut the stepped portion I did that by having the router fence stick out further than the straight bit I used, and then I just rotated the piece against the fence. The fence provided a lot of stability and let me make the cuts the exact size that I wanted.
    And there was trouble, taking place...

  5. #5
    Join Date
    Dec 2004
    Location
    Cincinnati, OH
    Posts
    924
    Nice project and appreciate the guidance on avoiding tear out. Router is one of my least favorite tools. It spins faster than my brain works any more.
    Rustic? Well, no. That was not my intention!

Posting Permissions

  • You may not post new threads
  • You may not post replies
  • You may not post attachments
  • You may not edit your posts
  •