
-
Removed the clamps, today...and cleaned to box up.....test fit?
Block Plane Box #2, tight fit.JPG
#118 was a bit tight fit....I was going to pare the insides for a looser fit....bit storms came through the area..heavy rain....
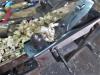
Dungeon Creek, looking downstream.JPG
And the Dungeon Creek rose up....heading for the floor drain back in the corner...
Dungeon Creek, floor drain.JPG
Where the washer also drains....had to make sure the drain wasn't plugged up....then went back upstairs....there is always tomorrow...
-
Steven, all the best for the Dr. visit, hope things go well.
From your comment above, it sounds like today may be your birthday, if that is the case, happy birthday to you.
Stew
-
May 15th.....turned 67
All the bone doctor did was drain the "goose-egg" on the knee....one syringe full....
Hasn't helped much. Bump is still there....shin-splint like pain down the side of the leg.
Rains have made the shop a pain to work in, since I don't have webbed feet.
I guess I could just sit a while....until maybe the leg does get better....
Tried to cut parts for a lid, for Box#2....and that was about it. Tried out the two "new" planes....414c works great....the No.4 will need some time at the stones....has a few nicks in the edge.
Stay tuned..
-
Lid for box #2?
Block Plane Box #2, last side.JPG
Don't look now....that be a vintage "Handy Andy" chisel....had to sharpen it up a bit...
Block Plane Box #2, other 3 sides.JPG
Got 3 sides done. laid out for the 4th.....
Block Plane Box #2, tight joints.JPG
Nice tight joints, too.....no need for sawdust & glue filler.
Finally, got the 4 sides all jointed, and glue and clamps installed..
Block Plane Box #2. lid glued up.JPG
Then trimmed a "topper" to fit...glue and clamps..and a caul
Block Plane Box #2, topper installed, too.JPG
Had a bit of trouble...3 out of 4 corners would go in place...then the 4th wanted to go...elsewhere....got that back in place, and another wanted to leave...almost like herding cats... .finally got all 4 in place.
I also worked on the second "Birthday" chisel......had a cambered edge....now? A straight edge, honed to 30 degrees, and the back flat....as is the bevel.
Rehabbed Fulton Special chisel.JPG
It was stamped as a Fulton Special.....
Then called it a day.
Let the glue up sit a day...then clean it up to fit the inner box...and, figure out what a Shelton No. 118 label looked like.
Stay tuned
-
Clamps came off today. Needed to trim the inside of the lid a bit
Block Plane Box #2, lid pared.JPG
Hand and a chin pressure only. 1-1/2" Stanley....didn't take too long to do..
Block Plane Box #2, pared insides.JPG
Checked the fit a few times...
Block Plane Box #2, piston fit.JPG
Piston fit! Was almost a shame to close up the vent in the lid..
Block Plane Box #2, piston fit vent.JPG
Then a coat of the Witch's Brew...
Block Plane Box #2, stained,side view.JPG
Need to add a Shelton No. 18 label to one end..
Block Plane Box #2, needs a label.JPG
As for Block Plane Box #3....need to fit it to this plane..
Block Plane Box #3, next plane.JPG
I think it is a Stanley No. 18...later model?
Block Plane Box #3, back end.JPG
And not a Stanley No. 9-1/2.....will work on a label for Box #2 first...after the stain dries.
Stay tuned...
Last edited by steven c newman; 05-21-2020 at 4:28 PM.
-
I'm not the best label marker, but...
Block Plane Box #2, completed.JPG
Will have to do....
-
Will end this thread here.....next batch of little boxes use a different corner joint, and a different style lid.
Thanks for looking in...
 Posting Permissions
- You may not post new threads
- You may not post replies
- You may not post attachments
- You may not edit your posts
-
Forum Rules


 Reply With Quote