Another thing I sometimes do is screw blocks of scrap to my benchtop, just a little away from the assembly to be glued up, and drive wedges between the the blocks and the assembly to tighten the joints.


 Contributor
Another thing I sometimes do is screw blocks of scrap to my benchtop, just a little away from the assembly to be glued up, and drive wedges between the the blocks and the assembly to tighten the joints.
"Anything seems possible when you don't know what you're doing."
 Member
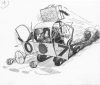
I'm surprised no one's mentioned band clamps. I've used the Jorgensen's for years to clamp large mitered corner boxes. From the pic I would think that would work
Just yesterday, I picked up a Bessey band clamp to try and it's got it all over the Jorgensen's.
A reel for the band and fine adjustment with an additional handle.
 Friend of the Creek
I started saving stout angled cutoffs a few years ago and spray painting them my typical jig yellow (so I dont throw them out) and marking the angle. I use them for taper jigs and clamping.
Regards,
Tom
Contributor
Have a look at this video around the 10 min mark, he does a glue up very similar to yours. https://www.youtube.com/watch?v=DIh_sXuv1QY
Contributor
I used the technique Edwin shows, but found that the clamp away from the joint would sometimes slide. So now I extend the arm until i can add a hook that wraps around the end of the workpiece.
Contributor
Here's a pic. I'm gluing up the long miter joint that forms a waterfall end on a countertop. Down at the floor, you can see the hooks that wrap around the end of the work.
waterfallglueup.jpg
Contributor
Jamie, did the sliding happen even if using coarse sandpaper glued to the underneath of the caul?Originally Posted by Jamie Buxton

I like the extended arm and hook for a really demanding situation though. What your photo shows will not allow for any movement no matter how hard you clamp. Nice looking work!
Last edited by Edwin Santos; 04-30-2020 at 3:05 PM.
Contributor
I don't remember. I changed to the hook a long time ago.
To compare with and without the hook... Without, you get a block you can keep and use on many pieces of furniture -- well, as long as the miter angle is the same. With the hook approach, you need a new clamp device for each clamping situation. I usually just cut them crudely out of whatever scrap is hanging around, and put throw them back in the scrap bin when I'm done.
 Member
Dedicated cauls with geometry that directs the clamping pressure to bisect the joint angle is often my go to and if the glue up is a bear I glue the cauls with newsprint in the joint so the hold well enough but pop off and clean up easily.
There is no such thing as a ruined inner tube around me, I cut then into a continuous strip along the radius and these long rubber bands can be used to clamp any shape that you can create. And the price is right!
 Member
There are different strengths of painters tape. The beige one is the strongest. If you use that on the surface of the wood and then glue another cut-off to that it would hold pretty strongly. The you can pair it off and remove the tape.
[OP]
Member
i bought a band clamp a few months ago and have yet to take it out of the package. I guess I should check it out.
[OP]
Member
that looks a lot like the photo Edwin posted. I will try it on the arms this weekend.
[OP]
Member
I will keep that in mind. Someone else mentioned roughing up the surface a little, so I will try that too.
Contributor
I've used the blocks and they work well. I glue them with cardboard between the surfaces, then it's easy to knock them
off and scrape the remaining paper.
[OP]
Member
I just used the standard blue tape I had on hand, I will look for the beige tape.
 Posting Permissions


 Reply With Quote