Page 1 of 3 123 LastLast
Results 1 to 15 of 38

Thread: Bench Hook Supreme :)

  1. #1
    Join Date
    Feb 2004
    Location
    Perth, Australia
    Posts
    9,492

    Bench Hook Supreme :)

    I thought it might be a nice idea to post a few fixtures for hand tools. Feel free to post yours here.


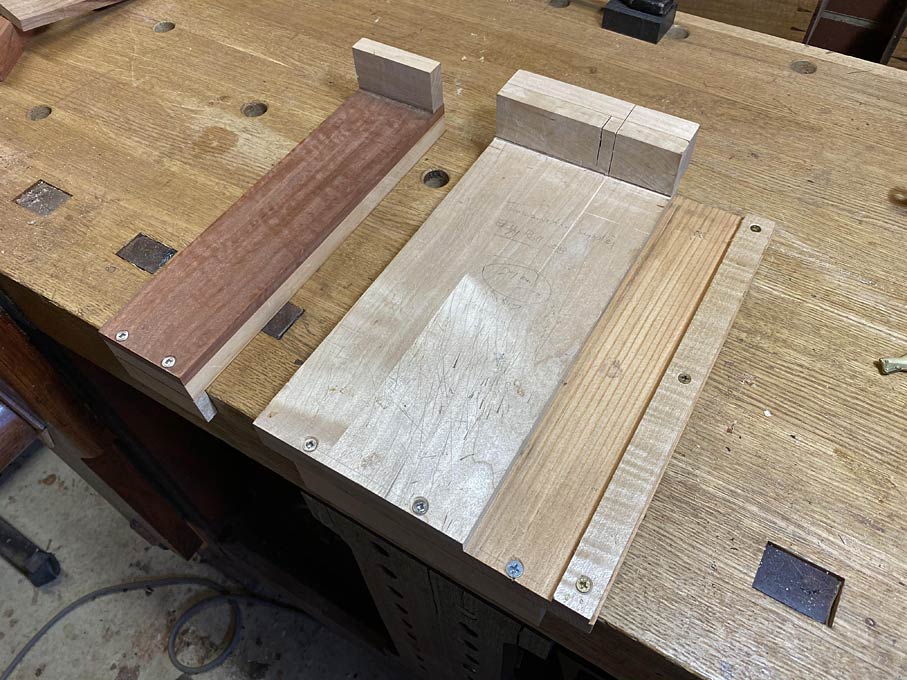
    This is a bench hook I made. It is made from a few scraps, took all of 10 minutes to put together, and I consider it a consumable. That is, it will get used up and then thrown away. And I'll make another.


    The design for this one occurred to me several months ago, at a time when the bench hook I was then using, needed to be replaced as it was worn out.


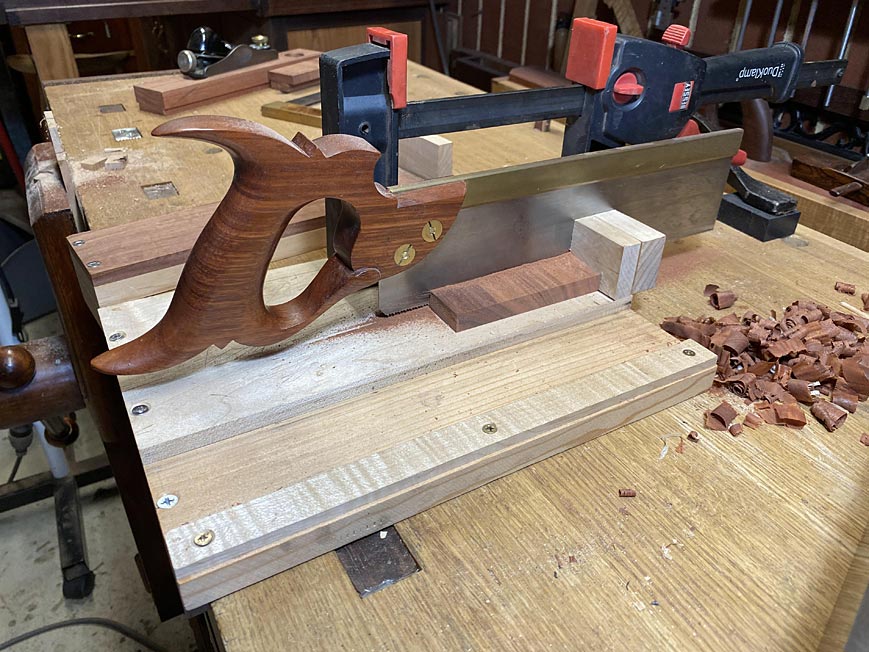
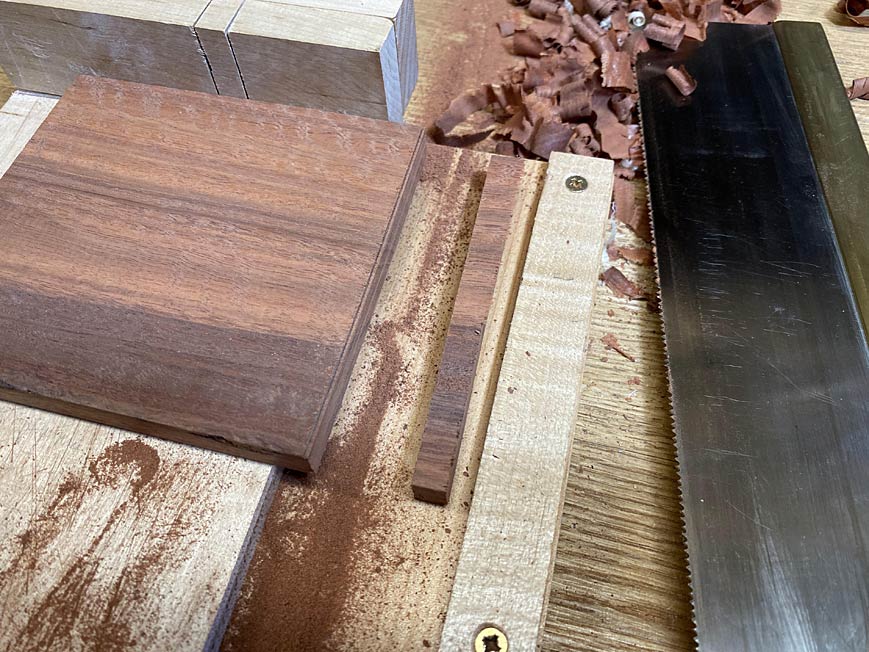
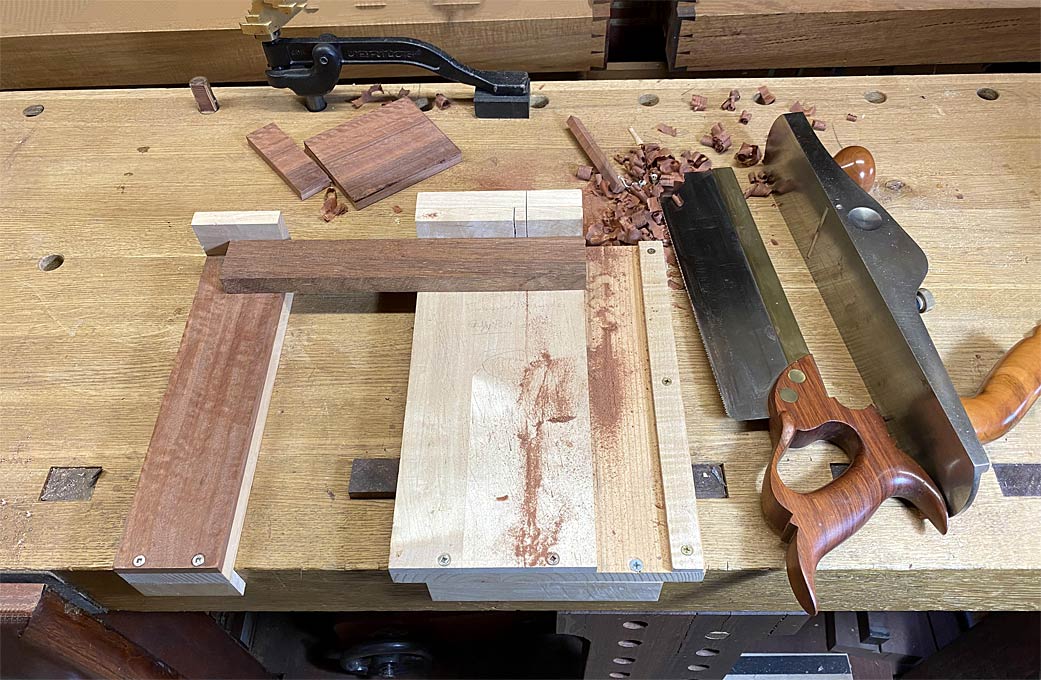
    What we have is a combination cutting board, chopping block, bench hook and shooting board - with extension ...


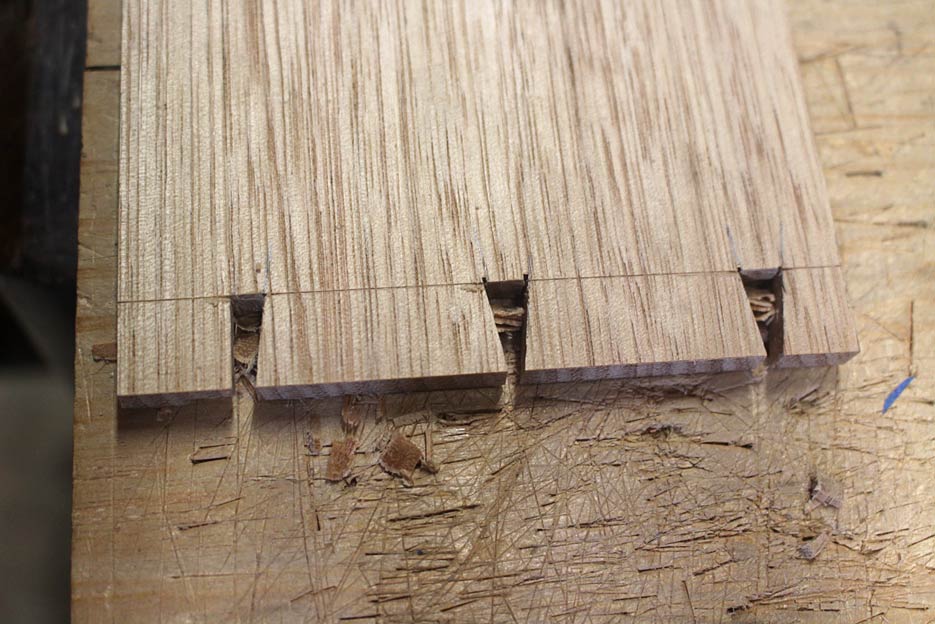
    Before this version, the bench hook was available to chop tails ..


    .. and through pins ...


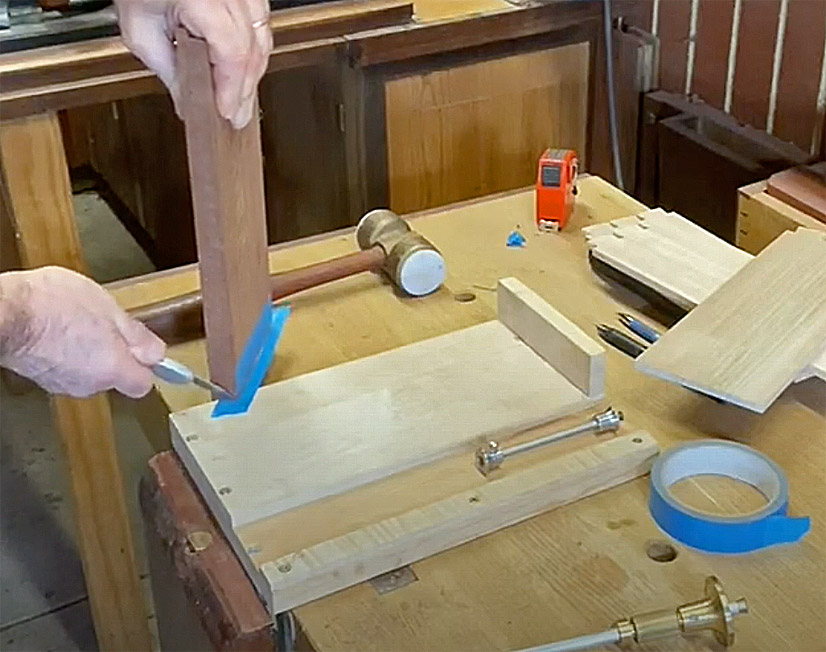
    In the recent video I posted, the new one was being cut up trimming blue tape ...


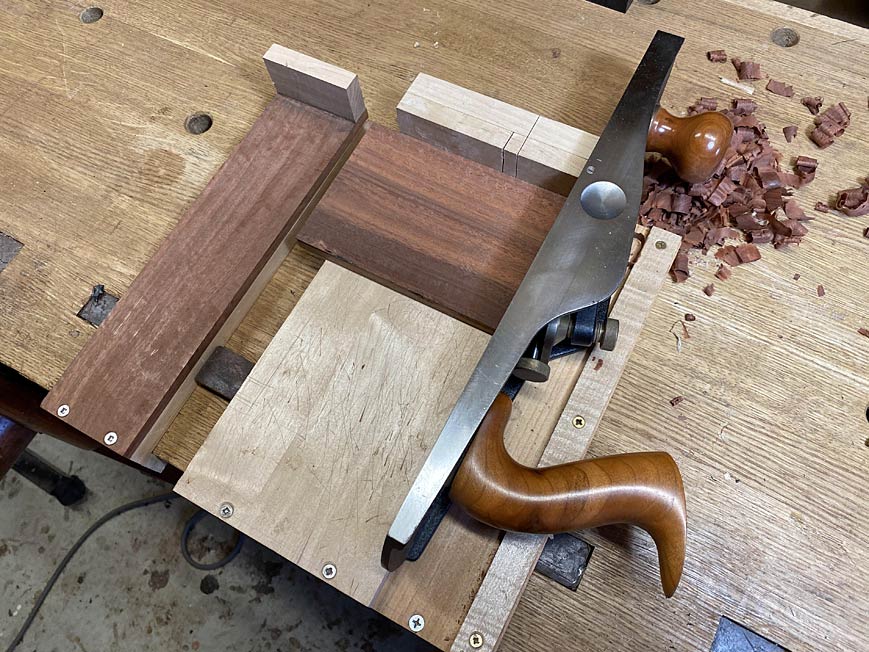
    This is not my main shooting board however, as this bench hook is on my bench all the time, it is convenient to use.


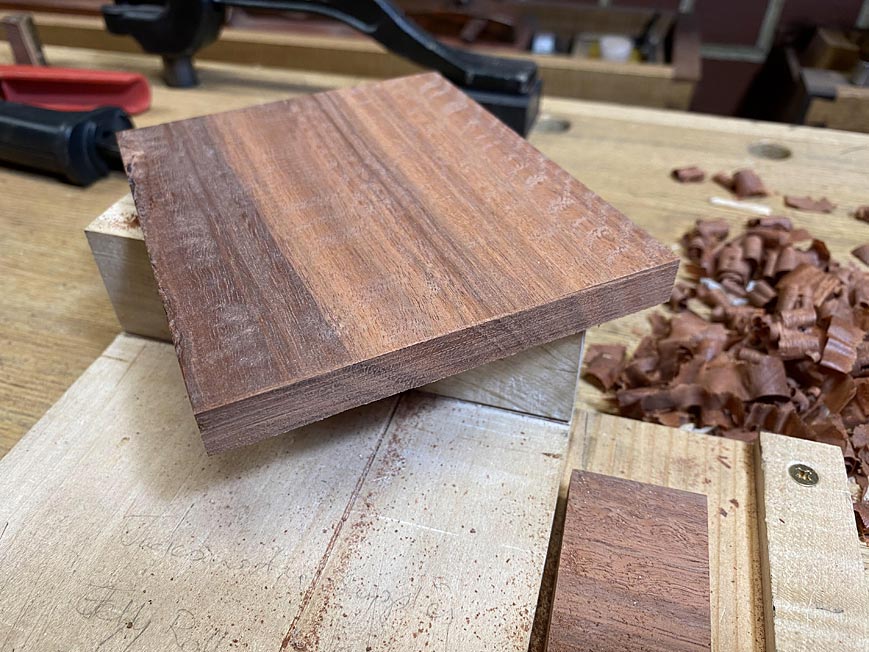
    The runway with side fence fits the Veritas LA Jack ...


    It does not take any extra effort to ensure the fence is square, and so produce square ends ...


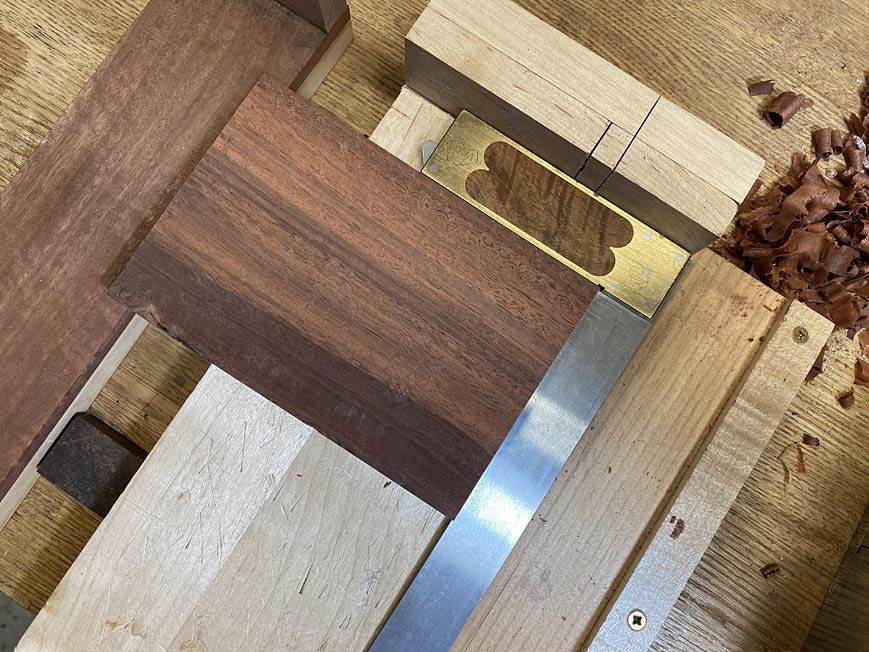
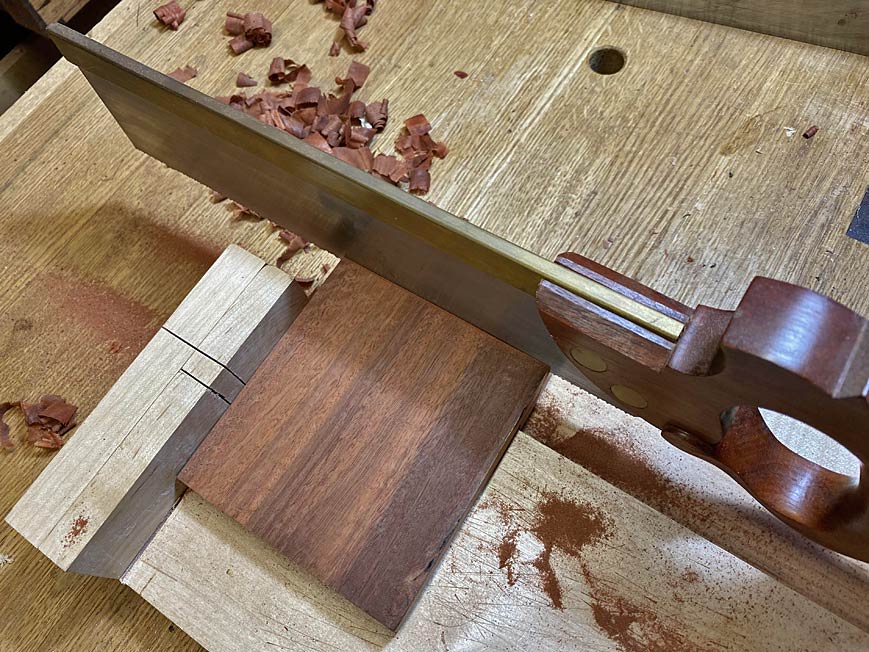
    The fence is deepened to ensure that the kerf will guide the saw to perfectly square crosscuts ...


    This is an 11" long blade and 14 tpi carcase saw I built. It leaves a good finish (looking closely, I can see that I have written notes to myself on the surface as well ) ...


    Alternatively, just mark and saw to the line ...


    The most useful fixture. It gets used on every build ...


    I've mentioned this to others, and they were horrified at the idea that I would deliberately destroy the bench hook, etc, etc (supreme! hah!) with chisels and saws. The whole idea is to make this bench hook as quickly and as efficiently as possible ... with spot-on accuracy for the shooting board thrown in. It must be cheap - using scraps - otherwise we will not see it as a consumable and feel comfortable chopping on it.


    How to make:


    1. flat board (pine, MDF, ply). I used a scrap of maple.


    2. glue or screw another smaller piece on top to become the main platform. Leave space at one side for the runway.


    3. Run the shooting plane down the runway against the platform. This will straighten it and also create a ledge for the sole of the plane to ride against.


    4. Add the fence: use a little glue to attach a fence square to the runway. Align with a square. Keep the square against it until it dries. Once dried, you can add screws if you want. I don't bother. Note that I glued on a second fence section. I just did not have a thick enough piece.


    5. Add the side fence: place the shooting plane on the runway at one end and position the side fence against it. Move the plane back-and-forth until the side fence is positioned. I screwed it down, which enables it to be moved, if necessary.


    6. Add the kerf for sawing: mark the vertical and horizontal square lines across the fence, and saw this with the saw you plan to use (I saw the two lines at the same time. Or you could also use a knife to scribe the likes deeply to act as a kerf for the saws blade to run in). That will keep the kerf tight and prevent the saw from wandering in the cut. You could also clamp a square block against the fence to act as a guide to get this cut made accurately. It is worth the few extra seconds to get it square.


    7. Lastly the extension: Plan ahead - make the board about 3" wider than you need, then take it to the table saw and rip a 3" strip from the side opposite the runway (no, I did not do this here - I wasn't planning ahead enough!). That will become the extension.


    All this should take 10-15 minutes, tops. The bench hook should last several months. Don't be afraid to chop on it. Use it up! You can/will make another.


    Regards from Perth


    Derek
    Last edited by Derek Cohen; 04-20-2020 at 1:30 AM.

  2. #2
    Join Date
    Jun 2010
    Location
    twomiles from the "peak of Ohio
    Posts
    12,171
    A jig to use when chopping a mortise,,,or hold an assembly while you "assemble".

    Just 3 pieces of scrap..
    Plane Til Doors,Mrotise jig.JPG
    Mine just gets a couple screws to hold it in place. One could add a cleat that the vise could hold onto, instead,
    Plane Til Doors, tenons made, jig.JPG
    I use a pair of Visegrips finger clamps to hold the part in place...clamp against the Pine "jaws"....
    Plane Til Doors, mortise set up.JPG
    I can slide the part forward a bit, do the layout markings, then slide the part back into the jig, and chop away
    For dry fits ..
    Plane Til Doors, dry fit no. 2.JPG
    Acts as a 3rd hand....and even during a glue up..
    Plane Til Doors, left door glued up.JPG
    Jig is easy to build...a scrap of drawer side, and the two 1xs for the jaws....clamp the part and the two jaws into the vise ( custom fit each time, if needed) and add a couple screws to each jaw, by screwing down through the "base" of the jig.....just refresh the jaws as needed...in about 10 years, so far..I'm on my 5th set...

  3. #3
    Join Date
    Feb 2011
    Location
    Carlsbad, CA
    Posts
    2,230
    Blog Entries
    2
    Derek, Super practical idea. Consider sand paper glued to bottom helps keep things from sliding around when over enthusiastic.

    thanks for the reminder - probably about time for me to replace my bench hook too.

    Mike

  4. #4
    Join Date
    Feb 2004
    Location
    Perth, Australia
    Posts
    9,492
    Sandpaper! Good idea, Mike.

    I generally hook it into my leg vise.

    Regards from Perth

    Derek
  5. #5
    Join Date
    May 2015
    Location
    Ingleside, IL
    Posts
    1,417
    I use these bench horses all the time. For glue ups, clamping odd shapes, raising the work up to my old eyes, assembly, etc. The drop into the dog holes on my bench.

    20200123_162510-2.jpg

    Also have several of these neoprene covered blocks that keep my chisels safely in one place.

    20200214_151615.jpg
    Stand for something, or you'll fall for anything.

  6. #6
    Join Date
    Jan 2017
    Location
    Santa Cruz, CA
    Posts
    158
    Like it-think I'll make one, maybe today...thanks for sharing Derek!

  7. #7
    I love my bench hook. Cheap, easy, I try out new things on each new release. Last version I got tired of T-Track and started using threaded inserts, which I love because I can screw on widgets, and new widgets happen weekly. The problem is bench hook adaptations take on a life of their own, and you stop making boxes and start making bench hook widgets. Put threaded inserts on a Moxon vise, and a black hole appears.

  8. #8
    I have one fixture that provides three important functions at my bench. At my age, I need all the light I can get on the bench. I added a strip on the back of the bench similar to what Roubo shows in one of his benches, but instead of being used to hold chisels I made a bracket to hold my bench light. I stole this idea from Rob Cosman, and while my design differs somewhat from his, they function the same. I just slide the light back and forth on the rail to put light where I need it or to get it out of the way. It will lift off if I need to remove it entirely.

    The light does double duty as a hex key holder for the small hex wrenches need to adjust the stop on the mouth of my block plane and one to adjust the countersink on my drill bits. Small rare earth magnets on the beam keep them within reach, when before I was always searching for the hex keys I needed.

    The rail on the end of the bench makes a great spot to house my three most commonly used hacksaws. Lots of utility from this add-on! Nice topic Derek.
    Attached Images Attached Images

  9. #9
    Join Date
    Sep 2007
    Location
    Longview WA
    Posts
    27,441
    Blog Entries
    1
    They can be real handy when built in pairs or other multiples:

    Bench Hooks.jpg

    The one at the bottom of the image is my first one. It is over a decade old and close to needing replacement. It was made so either side could be used as a bench hook and a simple miter guide. The end was left for making cut offs to keep the saw from hitting the bench.

    My father was the first to tell me about bench hooks. He didn't have a bench at the time. He used them on his side of his deck.

    jtk
    "A pessimist sees the difficulty in every opportunity; an optimist sees the opportunity in every difficulty."
    - Sir Winston Churchill (1874-1965)

  10. #10
    Join Date
    Jan 2007
    Location
    On the edge of Pisgah National Forest
    Posts
    236
    Quote Originally Posted by J. Greg Jones View Post
    I have one fixture that provides three important functions at my bench. At my age, I need all the light I can get on the bench. I added a strip on the back of the bench similar to what Roubo shows in one of his benches, but instead of being used to hold chisels I made a bracket to hold my bench light. I stole this idea from Rob Cosman, and while my design differs somewhat from his, they function the same. I just slide the light back and forth on the rail to put light where I need it or to get it out of the way. It will lift off if I need to remove it entirely.

    The light does double duty as a hex key holder for the small hex wrenches need to adjust the stop on the mouth of my block plane and one to adjust the countersink on my drill bits. Small rare earth magnets on the beam keep them within reach, when before I was always searching for the hex keys I needed.

    The rail on the end of the bench makes a great spot to house my three most commonly used hacksaws. Lots of utility from this add-on! Nice topic Derek.
    That's brilliant! Stealing your idea right away.

  11. #11
    Join Date
    Mar 2009
    Location
    central tx
    Posts
    592
    Quote Originally Posted by Derek Cohen View Post
    I thought it might be a nice idea to post a few fixtures for hand tools. Feel free to post yours here.

    7. Lastly the extension: Plan ahead - make the board about 3" wider than you need, then take it to the table saw and rip a 3" strip from the side opposite the runway (no, I did not do this here - I wasn't planning ahead enough!). That will become the extension.

    I started making one last night and I don't know why I've never seen this piece of advice anywhere, certainly a time-saving method. I think I might have enough width to do this. Thanks!

  12. #12
    Join Date
    Jan 2007
    Location
    On the edge of Pisgah National Forest
    Posts
    236
    Quote Originally Posted by bill epstein View Post
    That's brilliant! Stealing your idea right away.
    And I did, although quite a bit less lovely.

    IMG_4898.jpg
    OK, more than a bit, but it works great, especially after I sanded and waxed the particle board tool tray that I have intended to replace with BB for some time.

  13. #13
    Looks nice to me! Hope you find it useful.

  14. #14
    Join Date
    Feb 2004
    Location
    Perth, Australia
    Posts
    9,492
    The problem with better light is that it lets you see all your mistakes ..

    Regards from Perth

    Derek
  15. #15
    Join Date
    Jun 2017
    Location
    Raleigh, NC
    Posts
    210
    Is chopping dovetails directly on the workbench bad form? It's what I've been doing so far, figured the work bench won't suffer in usability from a few chisel marks...

Posting Permissions

  • You may not post new threads
  • You may not post replies
  • You may not post attachments
  • You may not edit your posts
  •