On December last year I posted in Neanderthal Haven I decided to construct a new workbench (link here) well, I did it. Using part of my time in quarantine I decided to complete it.
Follow my remarks and impressions.


 [OP]
Member
[OP]
Member
On December last year I posted in Neanderthal Haven I decided to construct a new workbench (link here) well, I did it. Using part of my time in quarantine I decided to complete it.
Follow my remarks and impressions.
Last edited by Osvaldo Cristo; 04-15-2020 at 11:23 AM. Reason: Including link reference
All the best.
Osvaldo.
[OP]
Member
For 30 years I have worked non-professionally with wood. I started when constructing our house and assumed some tasks instead to use contractors either because I couldn´t find anyone available working with a decent quality or because I spent a few months unemployed I used that time to do something productive.
I made our house´s roof (and a half dozen for relatives and friends), a relatively complex staircase, a patio, hardwood flooring, hardwood ceiling, and so on. I liked to make stuff and I went also for European style cabinets (kitchen with raised panels doors, bathroom, dormitories, garage, panty and laundry room), a full library (lots of bookshelves, cabinet files, work desk), outdoor furniture for the garden, a big table for our dining room (actually only the mahogany base for a big travertine marble table top), side desks and a lot of minor pieces in the following years.
I used engineered woods but some S4S solid hard wood local species and mahogany. I also used a few pieces of rough mahogany and surfaced them by myself using hand power planer and belt sander.
All the best.
Osvaldo.
[OP]
Member
As years went by, less and less I was using my small workshop. First because I had a couple of very active small children and a wife, all demanding a lot of attention. Afterwards I found other excuses, including the career and a discovered passion for landscape and wildlife Photography.
A few years ago, I decided to return to woodworking (although I never really left it). It would be not so much more expensive than a gyn and it would be way funnier to exercise my not so young body and to prepare myself to the upcoming retirement.
I reviewed all my tools, cleaned and made maintenance of them as well replaced most of power tools as none of them had variable speed and some demanded parts replacements that were more expensive than new tool. My battery powered driller still used NiCd old batteries. I also added some other tools, both manual as powered but, fortunately for my pockets, I have a serious space limitation as my workshop is only around 10 square meters.
I decided to maintain my faithful workbench – a French style reasonably solid and stable one I purchased when just starting in woodworking. I liked it except for two things: it wasn´t heavy enough for manual woodworking and it had a couple of very crap vises. Non-problems for power centric woodworking.
In my return to woodworking I started to discover some joy also in manual tools and as consequence the limitations of my workbench started to be more serious and, finally, I decided to make a new workbench by the end of last year.
Last edited by Osvaldo Cristo; 04-15-2020 at 10:40 AM. Reason: Typo as usual
All the best.
Osvaldo.
[OP]
Member
I couldn´t find decent vises locally – just cheap crap. Although I travel professionally abroad frequently, it is out of consideration to bring a couple of vises from Germany or the US in my luggage – the thing is heavy and big, especially for the medium and high-quality stuff. Additionally, they cost a serious money.
I discovered a local supplier for handmade forged holdfasts and ordered four of them for tests, and I decided to go for a viseless English Nicholson type workbench.
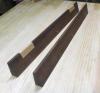
The idea was to make one with very heavy local stock. I went to massaranduba as it is more dense than typical pine. The bench resulted to weight 99.5kg (220 pound). Add to it a drawer full of stuff, four holdfasts, a couple of car jacks, a 2-in, a 4-in and an 8-in metal vises “living” at the shelf under it and you will go beyond 120 kg (265 pound). It is three times the weight of my previous workbench!
This wood species is also easier to work than most local hard woods and accept well most glues. Also, my local lumberyard (less than two kilometers away from home) has a decent stockpile at an honest price.
The wood was very seasoned but after to mill them to (approximated) size I let them to stabilize for a couple of months before to (re)size them and effectively start to make the new workbench.
Last edited by Osvaldo Cristo; 04-15-2020 at 8:59 AM. Reason: Typo as usual
All the best.
Osvaldo.
[OP]
Member
- To work with big pieces of high-density wood demands lots of physical effort. I had previous experience working roofs with hardwoods but this time it was a lot more difficult. Do you think my 30-year older muscles could explain that?
- A workbench is a great tool to construct a workbench. Without a workbench the new construction would be much more difficult
- Sliding dovetails are great for solid wood bench top. No glue required between the tabletop and its support base and the wood is free to work although maintained flatness but to make four matched of them is not so easy. It will require to work at high precision
- I used my 1-in dovetail bit to create the slide dovetail. There is no way I know to make dovetail slots incrementally with the same router bit. I used a gifted 12 mm straight router bit to remove most of material before to use the dovetail bit. To work with two different routers of the same model and with the same size for its bases is very convenient when using multiple passes with different bits
- I tested several hole diameters to discover the best fit for my holdfasts. Theoretically they were made for ¾-inch or even 20 mm for thicker tops. I tested 18, 19 and 20 mm, using the actual thickness of my bench top (and sides), and all of them worked: 19 mm looked the best fit, but I preferred to start all holes at 18 mm. Time will tell me if I need to enlarge them. Anyway, it is easier to enlarge those holes than to decrease their size
- Although I used new, sharp and from a good brand drill bit, my heavy duty corded Makita driller died after around 80 holes, mostly at 18 mm and a few 25 mm (all 2-in deep in hard massaranduba). The last few 25 mm holes were done using my (battery powered) impact driver
- Coronavirus motivated a local quarantine closing my lumber supplier I needed some more wood to make the base for the workbench. I decided to use the base of my existing workbench and just reinforced it for the new task. I hope it will support the new bench for another 30 years
- I couldn´t purchase material for a big sledge to plan the slabs either in my thickness box planer or router, so I had to plan one side manually using my LN Jack plane. It was the first time I plan a so big piece manually. It is a difficult wood, but I got a good result IMO. Both parts of tabletop are deadly flat. There is a lever difference around 1 mm between the front and the back piece of the tabletop but I will live with that until have disposition to take off that difference from the front piece. I started to understand why hand tool fans praise so much their hand planers
- Classical project put the front plank under the top plank. When using steadfast in the front plank and the working piece in the side of the top plank, it results in a lot of stress to pull back the front plank. To avoid it I used the front plank in front of the side of the top plank
- I think I do not need a crochet but it is quite easy to construct a removable one
- The bottom of the well separating the front and the back parts of the tabletop is saved from my previous workbench as I cannot purchase another piece of it anywhere for the quarantine. I decided just to fit it closely to the available space to remove it if necessary: it could be a welcome feature if I need to clamp some odd shaped stuff, boring or cut some pieces...
- I used only linseed oil for finish. The wood is low permeable, so the oil did not penetrate deep or fast
- It cost me the equivalent to US $200: $50 for four holdfasts, $50 for raw lumber, $80 for the dead driller and $20 in miscellaneous stuff well, perhaps the driller isn´t a total loss: I will look for the price for a fix after quarantine.
Last edited by Osvaldo Cristo; 04-15-2020 at 10:52 AM.
All the best.
Osvaldo.
[OP]
Member
Last edited by Osvaldo Cristo; 04-15-2020 at 9:15 AM. Reason: Including link reference
All the best.
Osvaldo.
Contributor
Nice workbench with a good narrative
Ron
Contributor
Thank you very much for the build photos and the bench build story. Good stuff for bad days Osvaldo and I wish the very best for you and your family during these trying times. Have fun with the bench and send in more photos of the bench in use when you can.
David
 Friend of the Creek
Congrats on the new bench! Looks great and Im sure youll appreciate that extra weight. Beefing up your existing base was a smart way to get more years out of it. Enjoy it!
Contributor
Your narration of the bench build is appreciated. Thanks for sharing the photos, too. Your comment about 30-year older muscles hit home; I recently recognized that challenge myself. Enjoy your new bench.
Contributor
Your new bench looks like a really good user Osvaldo.
And it fits perfect in it's setting. I enjoyed your story of it's journey to this point too.
Thankyou for posting.
Member
Thanks for sharing those pictures and the story of your bench.
[OP]
Member
Total cost dropped to (around) US$ 120.Originally Posted by Osvaldo Cristo

I received today my Makita driller repaired after "only" three weeks at a local authorized repair shop. Even the warranty is two years finished they repaired it at no charge. They told me it was only a contact that had displaced.
Great. Thanks, Makita.
Member
Great job!
Member
Great price and great bench. I like your whole shop.

 Reply With Quote