Originally Posted by
Tom Trees

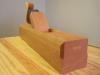
Honed a rounded profile about 70 degrees, sharpened up again and went to work.
I profiled my iron so I could get the cap closer than shown, but not quite a 64th", somewhere in between.
I instantly didn't like it, there was extra effort it seemed, maybe I should have played around a bit and set further away
but I rehoned the cap instead to 45 or 50 degrees and put the iron back in at the same distance as before.
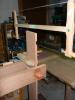
It was tough stuff but easier going I reckon.
The timber was nearly at dimension so could not get a conclusive result.
It felt like more downforce was at play, along with added resistance,
When the bevel terminates at a steep angle (70-80 on a common pitch plane), the cap iron tends to work within a narrower range than if the bevel were 50-ish. Thus, the difference (in distance from the cutting edge) between maximum effect and no effect is comparatively small. As I have written before, it is a little like operating the clutch on a sports car vs a sedan (for those who are old enough to know how to drive stick).
Some increase in resistance is good; it tells you the cap iron is working. If you feel a great deal of resistance, it may be that the cap iron is too close. But if the cap iron is not particularly close, then the cause (of excessive resistance) is elsewhere--a flat on the edge is one possibility.
As a general comment, I'm finding this thread slightly depressing. It feels like the collective knowledge here has slipped. I'd encourage anyone new to this topic to research the huge volume of stuff that's been written in the last eight or so years. The "links of interest" tab on my website is an easy way to find some of that stuff (sorry if that comes across as shameless self-promotion).
"For me, chairs and chairmaking are a means to an end. My real goal is to spend my days in a quiet, dustless shop doing hand work on an object that is beautiful, useful and fun to make." --Peter Galbert


 Reply With Quote