Results 1 to 15 of 15

Thread: Double Mitre Gauge for slider

  1. #1
    Join Date
    Feb 2004
    Location
    Perth, Australia
    Posts
    9,494

    Double Mitre Gauge for slider

    Between furniture builds I either build a tool, such as a hand plane or cutting gauge or something, or tune up equipment. In the current situation, I tuned up a fixture I built. This was posted at an earlier time, but I have made a few changes, and now it is perfect! I offer the ideas for others who wish to make their own.

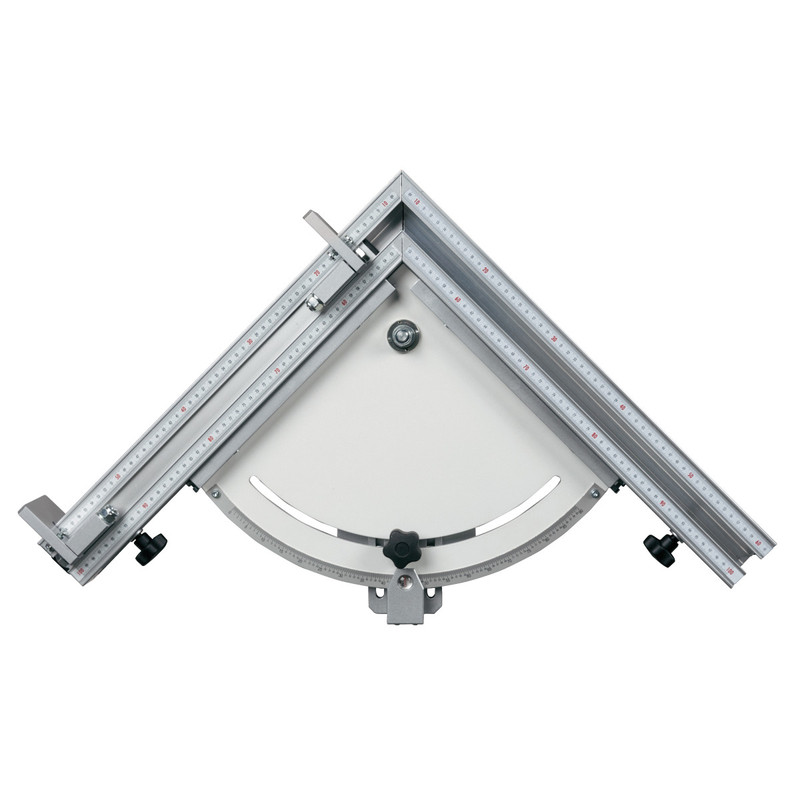
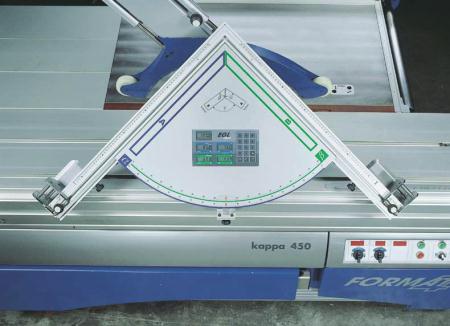
    The model for the double mitre gauge is the Felder EGL 1350 ...


    Or, as Felder term it, "Electronic Double-Cut Mitre Gauge". Is that over-kill, or is that over-kill!


    That is some serious double mitre gauge!

    Well, mine is not electric, but it is accurate.

    One of my early inspirations to build my own manual version was this shop made version ...


    The one I built is significantly easier to set up. However, I do like how this version works. He did a good job.

    The key element in a gauge such as this is that the corner is a perfect 90 degrees. Not a smidgeon less or a smidgeon more. The aim is to make the two sides of the apex complimentary, that is, they will add up to exactly 90 degrees. When this is the case, it does not matter if one side is set to 44 degrees as long as the other measures 46 degrees. When added together, the corners end up a square 90 degrees.

    The corner must not only be 90 degrees, but the sides of the gauge must also be 90 degrees to the table (of the slider), otherwise one produces compound angles. That would not end up well.

    This is my version for the Hammer K3 ...


    Here is a close up for the parts ...


    The obvious parts include the side fences with sliding stops (these were purchased as accessories for a router table, drill press table, or similar). As we know, the stops are important to repeat measurement. These stops can be set to 0.05mm.

    The left fence is attached in a permanent position. The right fence is adjustable. The internal braces can move back-and-forth (on lengthened bolt holes) to adjust the angle at the corner (if you cannot build it exact, made it adjustable). The right fence can also slide to position the black UHMW block. This block is attached to the right side, perfectly flush with it, and is then moved to be perfectly in line with the left side.


    The block becomes a zero clearance mark for each cut.

    The other controls include the forward lever, which secures a pivot in the slider slot. The rear lever secures the outside of the gauge. Together, these set the adjustment for the angle of the mitre.


    This gauge is centred on 90 degree mitres, and setting it up demonstrates how to achieve the precision needed.

    First both sides are set up to be perfectly square to the table ...


    Then the left side is set to a perfect 45 degrees to the saw blade ...


    Followed by the right side ...


    Tighten it all down. And then you go through it all again to ensure nothing has moved.

    It should be square ...


    Regards from Perth

    Derek
    Last edited by Derek Cohen; 04-05-2020 at 12:22 PM.

  2. #2
    Join Date
    Jul 2013
    Posts
    552
    Blog Entries
    1
    Very nice! And a great way to save bucks off of the EGL...

  3. #3
    Join Date
    Mar 2003
    Location
    SE PA - Central Bucks County
    Posts
    65,885
    Derek, thanks. This is something on my "hit list" as I'm getting a little more framing type work and similar to do at this point and my slider is my go-to for such precision cuts. The normal miter fence on my (the short fence) is pretty accurate but for things that have to match up with perfect 90ºs like framing, an alternate side, matched angle jig like this is essential because the alternate side cut is ALWAYS dead compliment of the other side once the jig is properly setup as you show.
    Last edited by Jim Becker; 04-05-2020 at 5:37 PM.
    --

    The most expensive tool is the one you buy "cheaply" and often...

  4. #4
    Join Date
    Jul 2003
    Location
    Winterville, NC (eastern NC)
    Posts
    2,366
    Beautifully done. Hope you don't mind if I use yours as inspiration for my own version.

  5. #5
    Ok, showing my ignorance here. Why do you need this (it is beautiful though!)? Doesn’t the crosscut fence go to 45 degrees? Ignorance is bliss; that’s why I’m the happiest guy in my neighborhood!

  6. #6
    Join Date
    Mar 2003
    Location
    SE PA - Central Bucks County
    Posts
    65,885
    Quote Originally Posted by Bob Hardin View Post
    Ok, showing my ignorance here. Why do you need this (it is beautiful though!)? Doesn’t the crosscut fence go to 45 degrees? Ignorance is bliss; that’s why I’m the happiest guy in my neighborhood!
    It's a good question. Swinging a miter fence can certainly make for 45º cuts. But with even the best machine, that may not be precise enough for something like framing where the two sides of a bisected 90º angle have got to go together "dead-nuts" 90º for square. The jig shown accomplishes that in the same way that north American style saw users would create a sled to do the same on their cabinet saws. It's about extreme, repeatable precision.
    --

    The most expensive tool is the one you buy "cheaply" and often...

  7. #7
    Join Date
    Feb 2009
    Location
    Cedar Park, TX - Boulder Creek, CA
    Posts
    840
    I'll add, on a Felder slider the graduations for angling the fence back are far coarser then moving it forward. And neither one is eyeball it and go for a perfect miter.

  8. #8
    Ok, thx for the explanation.

  9. #9
    Quote Originally Posted by Bob Hardin View Post
    Ok, showing my ignorance here. Why do you need this (it is beautiful though!)? Doesn’t the crosscut fence go to 45 degrees? Ignorance is bliss; that’s why I’m the happiest guy in my neighborhood!
    Also, not every 90 degree miter is made with two 45s. A double miter gauge sets up perfect complimentary angles for both sides of the joint with a single adjustment.

  10. #10
    Join Date
    Feb 2004
    Location
    Perth, Australia
    Posts
    9,494
    Jim and Johnny .. I could not have explained it better.

    Wes, could you say more about the Felder. I’ve only seen photos of one, never mind not used one.

    Regards from Perth

    Derek

  11. #11
    Join Date
    Feb 2009
    Location
    Cedar Park, TX - Boulder Creek, CA
    Posts
    840
    Quote Originally Posted by Derek Cohen View Post

    Wes, could you say more about the Felder. I’ve only seen photos of one, never mind not used one.

    Derek
    I may not have made it clear, I was referring to the standard crosscut fence, not the double miter gauge. I couldn't quite talk myself into 'investing' in that. I'm currently inspired by what you've done, however. Nice work. I'm curious about the wood base though, re changes with humidity.

  12. #12
    Join Date
    Feb 2004
    Location
    Perth, Australia
    Posts
    9,494
    Quote Originally Posted by Wes Grass View Post
    I may not have made it clear, I was referring to the standard crosscut fence, not the double miter gauge. I couldn't quite talk myself into 'investing' in that. I'm currently inspired by what you've done, however. Nice work. I'm curious about the wood base though, re changes with humidity.
    Wes, I was concerned, too, that there may be change. However, I have not noticed anything so far (over a year). It is highly laminated, and they may be the reason. It anything does show up, I will find some high quality ply. Ply would have been my first choice, but the quality here in Oz is terrible.

    Regards from Perth

    Derek

  13. #13
    Join Date
    Mar 2003
    Location
    SE PA - Central Bucks County
    Posts
    65,885
    I will likely be building mine primarily from wood products....because that's what I have...but I can see doubling a lot of things up to attain greater stability. I'm going to cut the most of the components on my CNC which will help with absolutely accuracy.
    --

    The most expensive tool is the one you buy "cheaply" and often...

  14. #14
    Join Date
    Feb 2004
    Location
    Perth, Australia
    Posts
    9,494
    Jim, these are the occasions when I wish for a CNC!

    Looking forward to your version ...

    Stay healthy.

    Regards from Perth

    Derek

  15. #15
    Join Date
    Mar 2003
    Location
    SE PA - Central Bucks County
    Posts
    65,885
    I think there are some things where you could benefit from having a CNC available, Derek, just like any other power tool. It doesn't take away from the finesse work that makes the project shine, but there are some tasks that really work nicely because of the repeatability and extreme precision available. In this case, for making fixtures, I can get an absolute 90º (or any other angle) cut in material that would take some considerable work to do "manually". One of the things I'm going to be exploring more closely now is machining aluminum and brass for things like hardware and so forth. It's already helped with plastics/composites, too.
    --

    The most expensive tool is the one you buy "cheaply" and often...

Posting Permissions

  • You may not post new threads
  • You may not post replies
  • You may not post attachments
  • You may not edit your posts
  •