Block Plane Box, inside view.JPG
Block Plane Box, complete.JPG
Will need to print a better label...
Block Plane Box, labeled lid.JPG


 Contributor
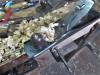
Block Plane Box, inside view.JPG
Block Plane Box, complete.JPG
Will need to print a better label...
Block Plane Box, labeled lid.JPG
[OP]
Contributor
How did you print on your box? It looks "computer" printed, but it also looks like it is on the box directly. Label maker?
<edit>
Never mind, I can tell from the pictures in your other post about the box. Looks like you wrote with a marker.
Last edited by Andrew Pitonyak; 05-14-2020 at 10:16 AM.
Contributor
Black sharpie....SUPPOSED to have been a Fine point....so...I make a paper label to cover that mess...then add a finish over it. For right now, it will show me what is inside the box....will try for something like this..
Block Planes, New in Box.JPG
Yellow..or green label?
Waiting for an appointment, to get the knee, elbow, and shoulder looked at...and fixed.
Member
Getting back on topic, I Just keep mine in my floor standing tool cabinet, Veritas Large and Medium, and a Lie-Nielsen Small router plane. What I do like is this small tool roll that perfectly holds the blades and fence for the Veritas planes. Made in Nevada by a fellow that goes by the name Yotie on a different forum.
 Member
The exposed plywood edges I was not a fan of, but it seems like I'm always building things to build and store things, rather than the things I want to build... so I bought it.
Also got a chance to try out GF "Milk" Paint. I like my Veritas Router Plane Box much better now.
2020-05-27 10.40.40.jpg
2020-05-27 15.50.53.jpg
PS. I spent 10 minutes trying to figure out how to rotate the images... but all the image editors I have on my Windows PC always display the image correctly and I don't see a way to rotate. Oh well.
I can't wait until SMC updates the forum software to something that respects rotation metadata.
Contributor
Nice!
Great color choice too.
[OP]
Contributor
Wow, very nicely done I like the colors on the look
if you need a graphics program that allows you to rotate any way you want search for product called GIMP. it is free and we'll do what you want. I've used it for a long time for a lot of very complicated things. That includes simple things like cutting bits and pieces out and rotating and similar.
Member
Originally Posted by Rob Lee

Thanks. I'm happy with it.
Now that I added a Veritas medium router plane to my kit I need to modify the box slightly for it. (I see on another thread a couple of wood blocks to box it into the corner should do the trick). I will say I'd like suggest having storage for the Medium plane pre-configured. (Perhaps another cutout? Just a thought).
Contributor
First, all these branches make it confusing to follow the thread. I read several posts before I realized this thread started months ago.
Next, Erich, those photos:
1. Email the photo from your phone to yourself.
2. Open the email and click on the photo.
3. Move the photo to somewhere you can find it, and rename it to make things easy. I have a SMC folder on my desktop.
4. Open the photo file and rotate it 90º enough times to make it land right side up, EVEN IF it starts out looking correct! (If it does you'll need four 90º rotations.)
5. Save the file and close it.
6. Finally, start a post and when you attach the file (from your new folder) it will be right side up.
OK, check me on that. Below I have a vertical and a horizontal photo. Let's see if they both come out right.
Now, finally, to my post: I am relieved that Derek's post is so many back because most people won't compare it with my storage method (no jarrah here). My goals were 1) to get the thing off the bench where it had been floating around for literally 18 months. I also needed 2) to store the irons. Next, 3) I wanted everything at arm's length. Finally, 4) it needed to take up minimal space. Solution: cradle for the French cleat wall. All four goals met. I used under 5" of width on the wall and about 8" of height (and no floor, shelf, or cabinet space!). It's right over my table saw when the saw is wheeled away against the wall. And the little cradle is movable; I can just take the whole thing off the wall and put it on the bench when I use the plane. Now for the photos:
router plane box 1.jpg router plane box 2.jpg
Hey, it worked! Photos right side up.
By the way, an eye for detail will note that you don't need a recess under the tool; you just raise the iron a bit off the "floor."
I love this thing. I would perhaps love it much more if it was made of jarrah with fine joinery. Maybe some day. Now I have only about three remaining tools to usher up and off my bench.
Derek, avert your eyes.
Last edited by Bob Jones 5443; 07-16-2020 at 1:38 AM.
Contributor
Hi Erich,
Astute observation...and a running change we have already made (Cutout)! Fortunately, its an easy user mod - either blocks or recess....
Were also working on some other boxes (skew rabbets and blocks, small plow.....).
As long as we can get them to market for close to material costs, we do others.
Have also thought or just providing templates for those that do make all their own stuff, jarrah or other other....
Cheers,
Rob
Contributor
Bob,
I like the cleat solution!
We prototyped a cleat based wall for the Veritas displays in our stores, but ended up going a different route. I think it’s great for shop use....flexible, strong, and versatile.
Better than pegboard or slatwall, and good for tools, hardware, supplies....
Cheers,
Rob
[OP]
Contributor
No shame in a utilitarian design. I do like the cleat, but I lack the wall space for it. I like, and dislike, how you stored your cutters. Especially if the cutters will not be often used, they are highly protected from both rust and dust. On the other hand, it takes longer to get to them.
Looks good to me!
This would be me too.
"A hen is only an egg's way of making another egg".
Samuel Butler
 Contributor
Rob, I read that! A template would be most welcome! I would indeed be tempted to make one from Jarrah ....Have also thought or just providing templates for those that do make all their own stuff, jarrah or other other....
Regards from Perth
Derek
Contributor
Why french-fitted on a slab of Kaizen foam of course!
 Posting Permissions

 Reply With Quote