Results 1 to 12 of 12

Thread: Removing glue squeeze out from under clamps and cauls?

Hybrid View

Previous Post Previous Post   Next Post Next Post
  1. #1
    Join Date
    Sep 2009
    Location
    Amite, LA
    Posts
    91

    Removing glue squeeze out from under clamps and cauls?

    I want to glue up some 3/4" alder to make wider boards. I've read about removing excess glue (squeeze) once it has become rubbery by scraping it off. But with a bar clamp every 10-12" how do you do this? Is it best to remove the bar clamps one at a time to scrape and wipe with a wet cloth, then replace the bar clamp and move to the next one? I see the advantage of removing the glue before it dries, for sure, but all this jostling of the workpiece must have an effect after carefully aligning pieces and even clamping gluing cauls to keep the piece nice and flat. My imagination is lacking on how to accomplish the goal. What is recommended? Thanks, in advance for any tips.

  2. #2
    I elevate the bars off the piece - especially if using pipe clamps. This give you enough clearance to push a putty knife under. Don’t aim for complete removal, just enough so your subsequent planing or sanding is easy once dry.

    Elevating is advised also because pipes can stain the wood, and glue on cabinet clamps will over time impede the slide.

  3. #3
    Join Date
    Sep 2009
    Location
    Amite, LA
    Posts
    91
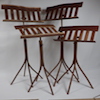
    Thanks for this idea. I already had some stands made for the clamps so, after reading this, I made a few plywood bars 3/4" x 1-3/4" and 28" long that sit in slots in the stands. I'll put packaging tape on these bars and let the project rest on them while the clamps will be almost 1/2" lower. This creates the clearance you mention for the putty knife.

  4. #4
    Join Date
    May 2015
    Location
    Ingleside, IL
    Posts
    1,417
    I remove what glue I can, but I don't remove the clamps or cauls. After the clamps are removed, I use a Stanley 85 scraper to get the big chunks off, and then a card scraper over all the joints, and a #4 plane if needs be. Make sure you put packing tape on the cauls or you'll wind up with some weird ornamental thing when the cauls are glued to the boards. I'm speaking from experience here - it was not pretty.
    Stand for something, or you'll fall for anything.

  5. #5
    Be careful applying glue. Use a brush or even better a roller. With practice you will be able to apply the right amount so you just get a few little beads of glue that will scrape off easily even when hard.

  6. #6
    Join Date
    Feb 2003
    Location
    McKean, PA
    Posts
    15,635
    Blog Entries
    1
    With regard to applying glue, it is pretty easy to tell when you used too much and not enough. The proper amount of glue should result is squeeze out looking like a bunch of evenly spaced 1/16 to 1/8" in diameter beads on both sides of the joint. Too little glue will show no, or almost no, glue squeeze out. If you have amounts of glue in continuous lines, along the joint line you are using too much glue. When joining 3/4" boards in an edge joint, I run a bead of glue along the full length and then use an old tooth brush perpendicular to the length of the board and tilted about 45 degrees with the bristles away from the direction of movement, I spread the glue across the edge of the board making sure all of the surface is evenly coated. I've been doing this for 50 years and have never had a joint failure.
    Lee Schierer
    USNA '71
    Go Navy!

    My advice, comments and suggestions are free, but it costs money to run the site. If you found something of value here please give a little something back by becoming a contributor! Please Contribute

  7. #7
    Cool tip about the toothbrush. Thanks, Lee... I use acid brushes - great for mortises because they swish, but not quite firm enough for long panel edges. They shed too. Excuse to change my toothbrush.

  8. #8
    Join Date
    May 2015
    Location
    Ingleside, IL
    Posts
    1,417
    Started using this about a year ago - works great.

    2020-02-06_07h48_34.jpg
    Stand for something, or you'll fall for anything.

  9. #9
    Join Date
    Feb 2014
    Location
    Suffolk, Va.
    Posts
    208
    I always put a piece of masking tape on any clamp I am using right where the joints are. I don't stick it so it's hard to get off just enough to catch the glue. I do this with bar clamps, pipe clamps and parallel clamps.
    Michael Dilday
    Suffolk, Va.

  10. #10
    Join Date
    Feb 2003
    Location
    McKean, PA
    Posts
    15,635
    Blog Entries
    1
    Quote Originally Posted by Prashun Patel View Post
    Cool tip about the toothbrush. Thanks, Lee... I use acid brushes - great for mortises because they swish, but not quite firm enough for long panel edges. They shed too. Excuse to change my toothbrush.
    The other nice thing about tooth brushes is that you can put them in a jar with water and they self clean and are ready for the next time, just shake out the water.
    Lee Schierer
    USNA '71
    Go Navy!

    My advice, comments and suggestions are free, but it costs money to run the site. If you found something of value here please give a little something back by becoming a contributor! Please Contribute

  11. #11
    Join Date
    Sep 2009
    Location
    Amite, LA
    Posts
    91
    Thanks to all for the thoughts and ideas. I created a little clearance under the sash clamps using plywood strips and I'll certainly be rounding up a couple toothbrushes to help me with glue distribution!

  12. #12
    I either remove or slightly raise the clamp to give enough clearance underneath.

    Doing this one clamp at a time is not going affect anything.

Tags for this Thread

Posting Permissions

  • You may not post new threads
  • You may not post replies
  • You may not post attachments
  • You may not edit your posts
  •