Results 1 to 12 of 12

Thread: Entry hall table for a niece: Part 6 1/2

  1. #1
    Join Date
    Feb 2004
    Location
    Perth, Australia
    Posts
    9,497

    Entry hall table for a niece: Part 6 1/2

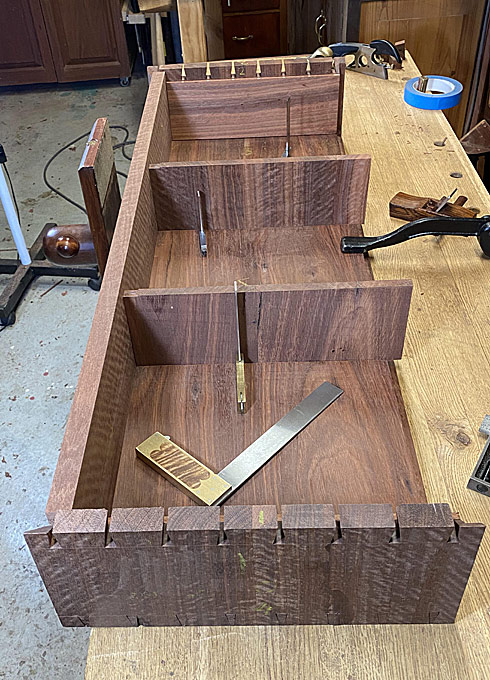
    The case was glued up yesterday, with everything tight and square as one could wish, but I did not sleep well. I was haunted by the thought that there was a problem that would come to a head some time in the future.


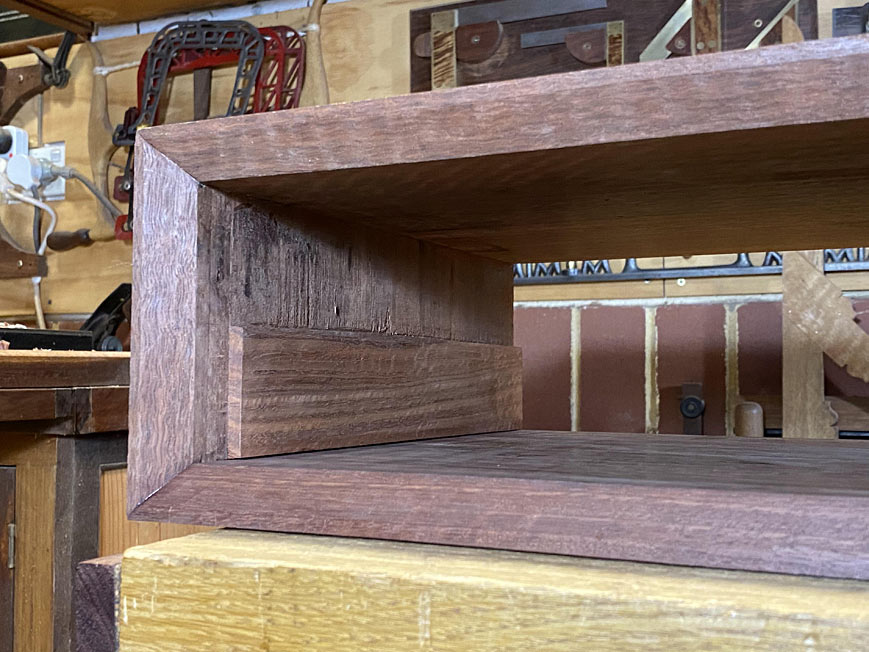
    If you look at the grain direction of the two centre drawer dividers, you notice that the grain is vertical. That is the way it should be. Wood moves, expands and contracts. It does this in reaction to moisture in the air. When it moves, it does so across the grain. That is why solid wood drawer bottoms have grain across the width - allowing the drawer bottom to move towards the back of the drawer, rather than towards the sides (where it will be blocked and then buckle).


    These drawer dividers will be butted up against the rear of the drawer lips and act as drawer stops. The front third of the divider will be glued in the dado, forcing any expansion towards the rear of the case. All good.


    The two spacers at the inside ends of the case have the grain running horizontally. I glued this in before I realised that I had cut them this way. I had done the same with the internal dividers, but re-cut them, as shown in the previous article. The end spacers will expand vertically, and to allow for this, I provided a 2mm gap below and above the panels. That is what kept me awake.


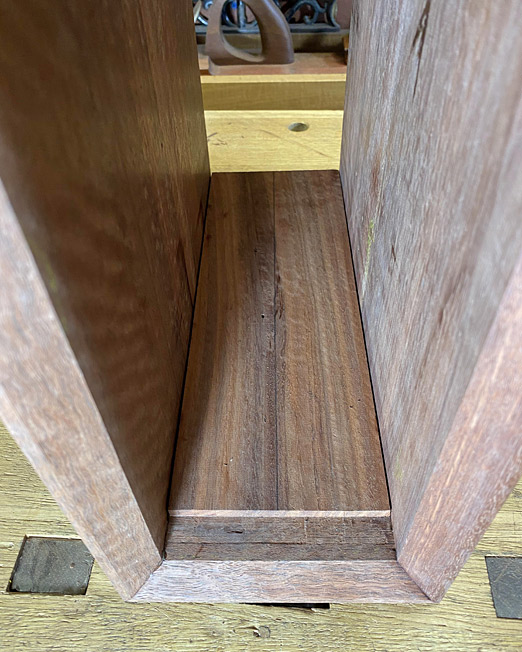
    The end spacers are 6mm thick. The case, to which they are glued, is 20mm thick and about 40mm wider. Initially I was concerned that the spacer would be overwhelmed by the case moving, and buckle. Having thought some more about this, I am no longer concerned that this will occur. Why? Because movement in the case would instead "stretch" the spacer length-wise. I started to breath again.


    In the end, I decided to reduce the height of the spacers by half. This would allow them plenty of space to expand, when necessary, as well as reducing their impact inside the case.


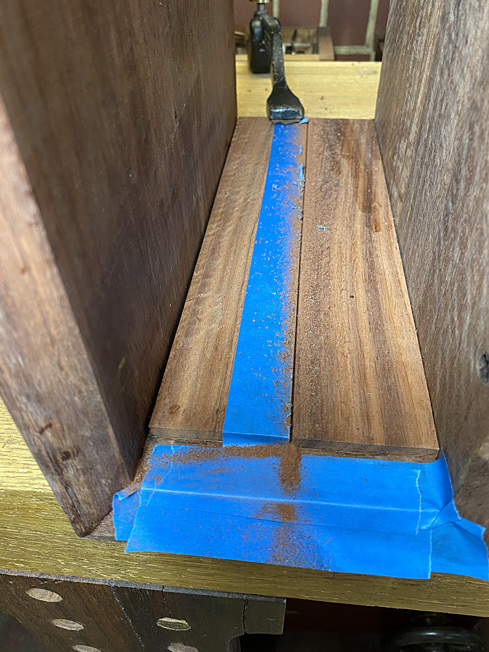
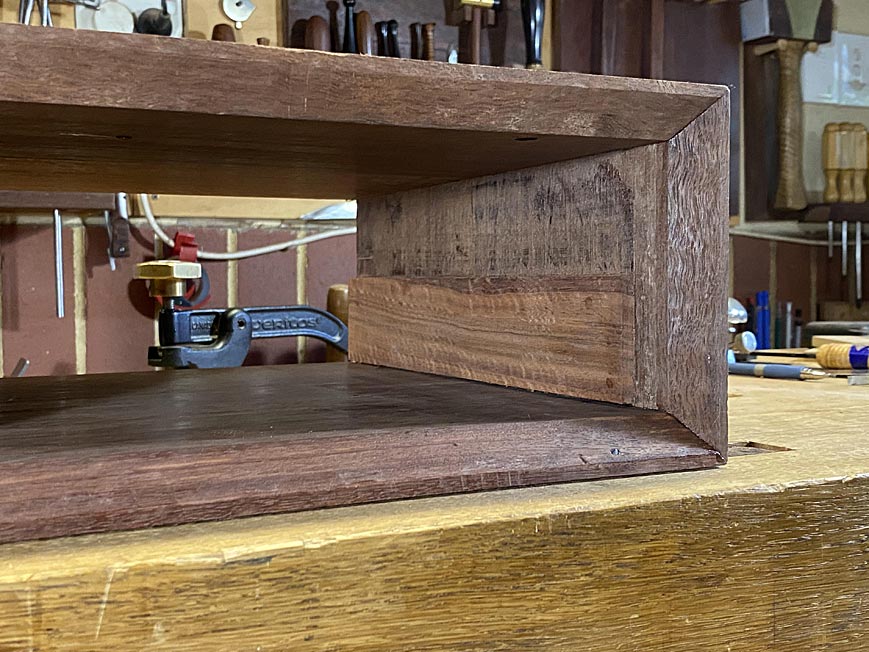
    Here is one side ...


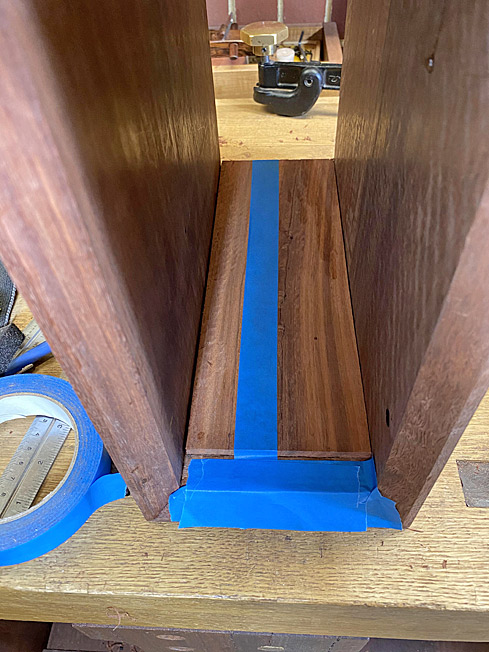
    Taped for visibility and protection ...


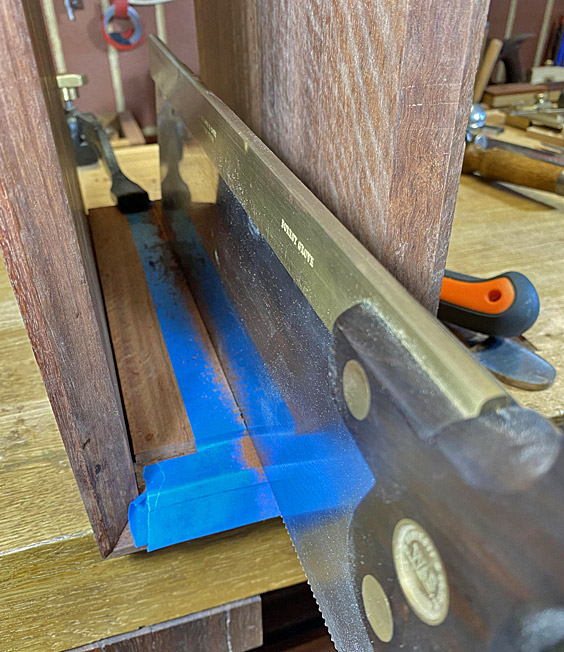
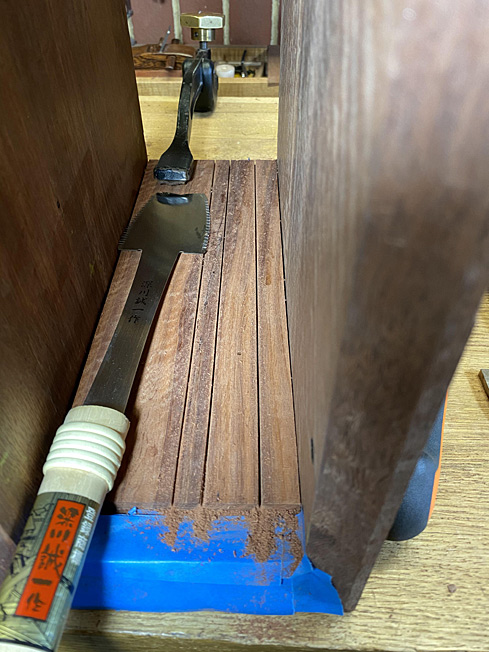
    The saw is a 16" Wenzloff & Sons tenon saw (10 tpi) ...


    Three kerfs ...


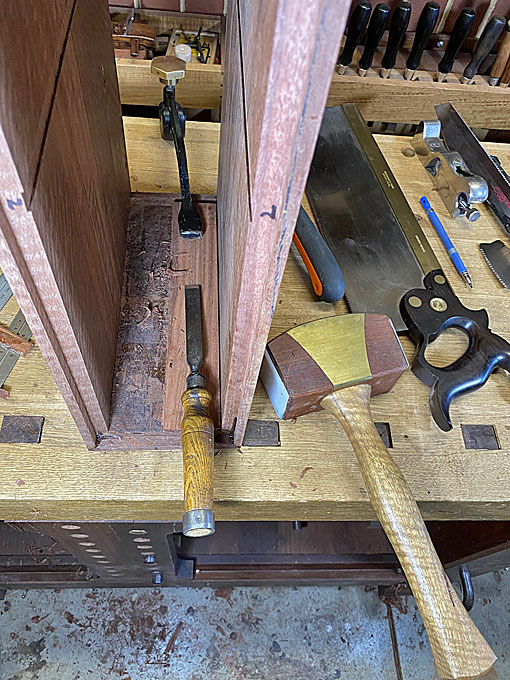
    Deepened with a Japanese Azebiki ...


    ... and split out with a firmer chisel ...


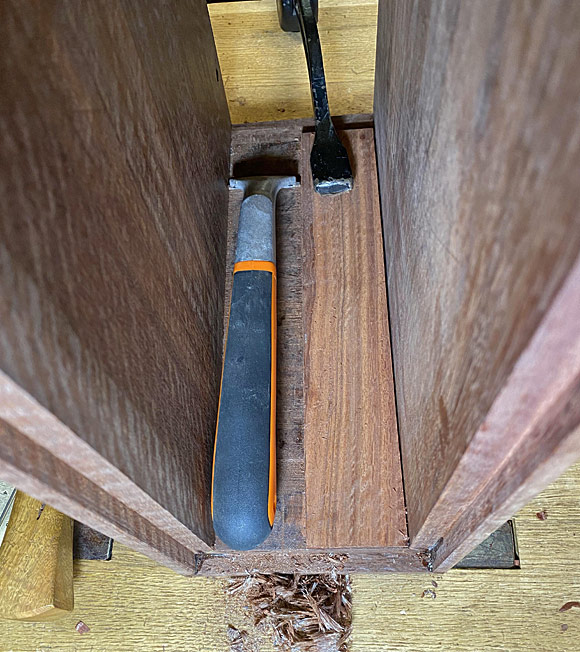
    A Bahco carbide scraper cleans up ...


    The result ...


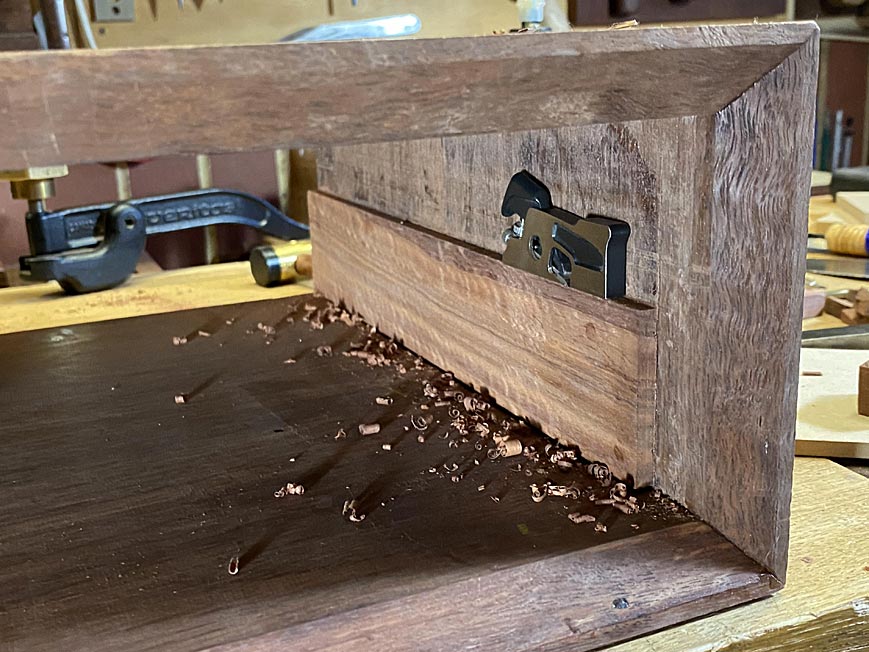
    Final cleanup was aided by the only shoulder plane that fitted inside the space ...


    Regards from Perth


    Derek

  2. #2
    Join Date
    Dec 2019
    Location
    The old pueblo in el norte.
    Posts
    1,906
    Very nice recovery Derek, and nice catch

    I'm sort of curious, about the choice to mitre the dovetails front and rear. Is this because of a potential to be viewed from both angles, or simply because you decided to?
    ~mike

    happy in my mud hut

  3. #3
    Join Date
    Feb 2004
    Location
    Perth, Australia
    Posts
    9,497
    Mike, the mitering creates a clean look in most cases. In this case, the front bevels could not be made without mitres. Another advantage, is the rear of the case is easier to plane through rebates (a non-mitred case would require two stopped rebates).

    Regards from Perth

    Derek

  4. #4
    Join Date
    Dec 2019
    Location
    The old pueblo in el norte.
    Posts
    1,906
    Quote Originally Posted by Derek Cohen View Post
    Mike, the mitering creates a clean look in most cases. In this case, the front bevels could not be made without mitres. Another advantage, is the rear of the case is easier to plane through rebates (a non-mitred case would require two stopped rebates).

    Regards from Perth

    Derek
    Derek, Ahhhhh thanks The fronts make complete sense. The reason I ask, is the next major project for me will be a mid-century studio cabinet. Most of those the I have seen have the mitre only on the front. Which makes adjusting any left over gap a lot easier.
    ~mike

    happy in my mud hut

  5. #5
    Join Date
    Sep 2008
    Location
    N. Idaho
    Posts
    1,621
    Derek,

    You have revealed the secret sauce that makes your work stand out:

    "... but I did not sleep well. I was haunted by the thought ..."

    Nice save!

    Best,
    Chris
    "You can observe a lot just by watching."
    --Yogi Berra

  6. #6
    Join Date
    Apr 2015
    Location
    Bay of Plenty, New Zealand
    Posts
    110
    Been there, done that. Don't know what glue you used but PVA and derivatives are flexible and will allow some movement. Once had a desk from pine and the movement was noticeable but did not crack the timber. Perhaps allow a few mm space at the front to allow for movement.

  7. #7
    Join Date
    Sep 2007
    Location
    Longview WA
    Posts
    27,480
    Blog Entries
    1
    Perhaps allow a few mm space at the front to allow for movement.
    If this is for the drawer stops, the dividers could be set back a bit and then use a flat head screw in them for adjustable drawer stops.

    jtk
    "A pessimist sees the difficulty in every opportunity; an optimist sees the opportunity in every difficulty."
    - Sir Winston Churchill (1874-1965)

  8. #8
    Join Date
    Aug 2007
    Location
    Dickinson, Texas
    Posts
    7,655
    Blog Entries
    1
    Showoff

  9. #9
    Join Date
    Feb 2004
    Location
    Perth, Australia
    Posts
    9,497
    Quote Originally Posted by Jim Koepke View Post
    If this is for the drawer stops, the dividers could be set back a bit and then use a flat head screw in them for adjustable drawer stops.

    jtk
    That is a way, Jim.

    What I planned to do was position the drawers, and then slide the dividers up against the backs, before glueing them in.

    Regards from Perth

    Derek

  10. #10
    Join Date
    Sep 2007
    Location
    Longview WA
    Posts
    27,480
    Blog Entries
    1
    Quote Originally Posted by Derek Cohen View Post
    That is a way, Jim.

    What I planned to do was position the drawers, and then slide the dividers up against the backs, before glueing them in.

    Regards from Perth

    Derek
    My thought was with an adjuster you wouldn't have any worries about wood movement in the dividers.

    jtk
    "A pessimist sees the difficulty in every opportunity; an optimist sees the opportunity in every difficulty."
    - Sir Winston Churchill (1874-1965)

  11. #11
    Join Date
    Feb 2004
    Location
    Perth, Australia
    Posts
    9,497
    Jim, since the dividers will be glued at the front - and loose at the rear - there should not be any movement forwards, only towards the rear.

    Regards from Perth

    Derek

  12. #12
    Join Date
    Sep 2007
    Location
    Longview WA
    Posts
    27,480
    Blog Entries
    1
    Quote Originally Posted by Derek Cohen View Post
    Jim, since the dividers will be glued at the front - and loose at the rear - there should not be any movement forwards, only towards the rear.

    Regards from Perth

    Derek
    Doh! That one got by me.

    jtk
    "A pessimist sees the difficulty in every opportunity; an optimist sees the opportunity in every difficulty."
    - Sir Winston Churchill (1874-1965)

Posting Permissions

  • You may not post new threads
  • You may not post replies
  • You may not post attachments
  • You may not edit your posts
  •