Results 1 to 9 of 9

Thread: Entry hall table for a niece: Part 4

  1. #1
    Join Date
    Feb 2004
    Location
    Perth, Australia
    Posts
    9,492

    Entry hall table for a niece: Part 4

    Having completed the dovetailing of the case, the next step is to bevel the front face, and rebate the rear for a back panel.


    I had been considering a cove in place of a bevel, however when I mocked this up it came across as appearing too busy. So, back to the bevel.


    The angle for the bevel was finalised at 55 degrees. This enabled a 6mm (1/4") flat edge and a bevel that ran to roughly 4mm of the first dovetail. A 45 degree bevel would run into the dovetail.


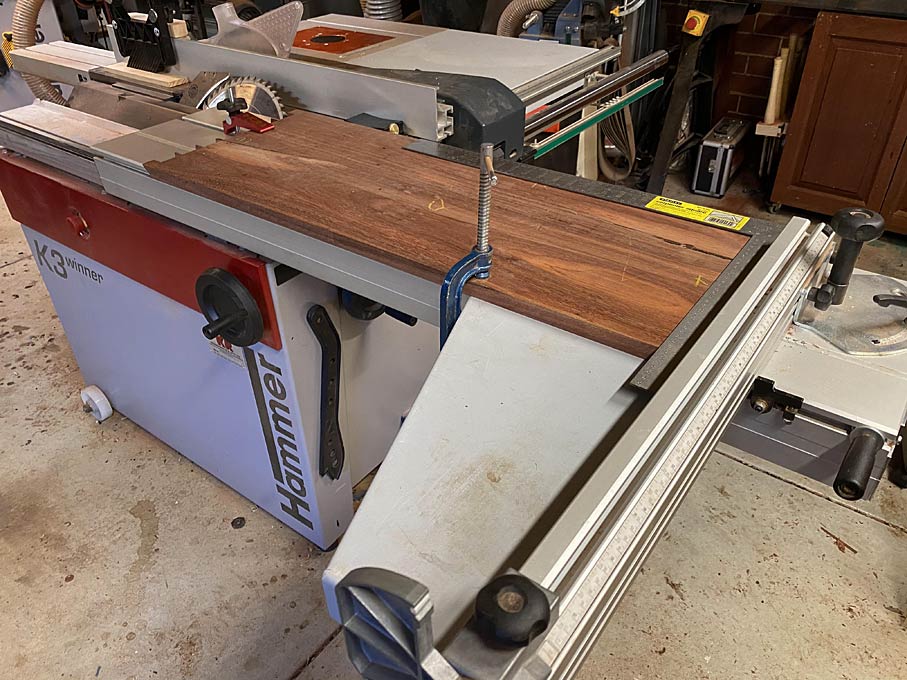
    The lines for the bevel were marked and then roughed out on the table saw ...


    The table saw is a slider, and the rip fence was used to position spacers, before clamping a panel for cutting the bevel.


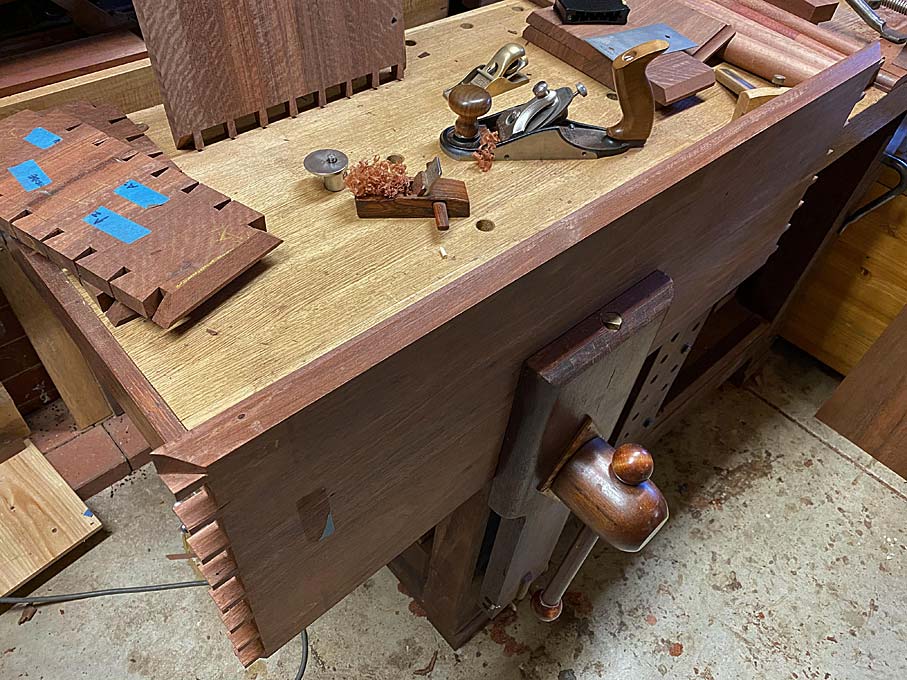
    The bevel was then finished with a hand plane ...


    This Jarrah is particularly interlocked but planes well with both a high cutting angle (the little HNT Gordon palm smoother) and a close set chipbreaker (the Veritas Custom #4).


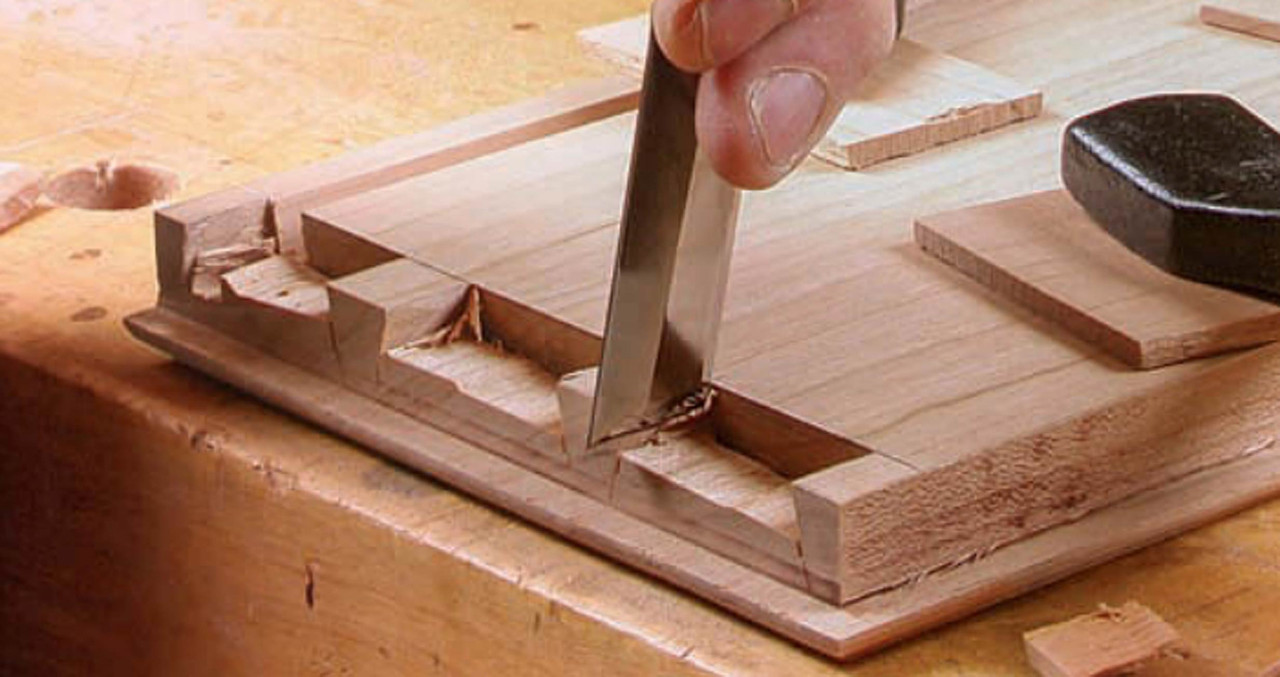
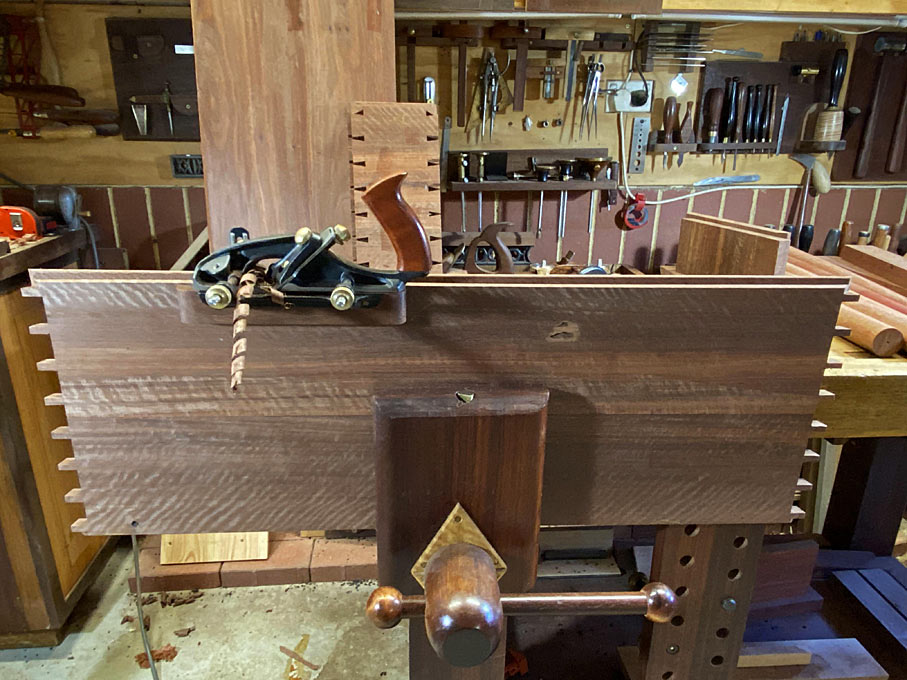
    Once the bevels were completed, the rear rebate was ploughed ...


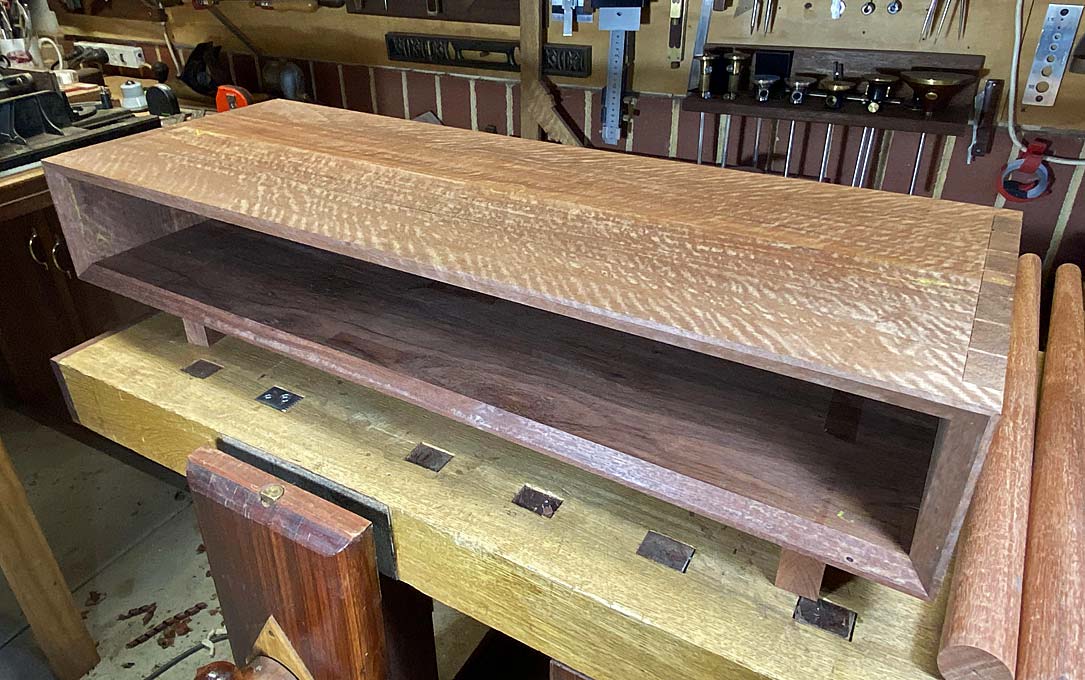
    Now the panels could be assembled into a case once again, and the work examined for tuning.


    Three of the bevels needed tuning. This ranged from a smidgeon here ...


    ... to a largish amount ...


    The case was dissembled and the bevelled edged planed down, re-assembled, checked, pulled apart again, planed ...


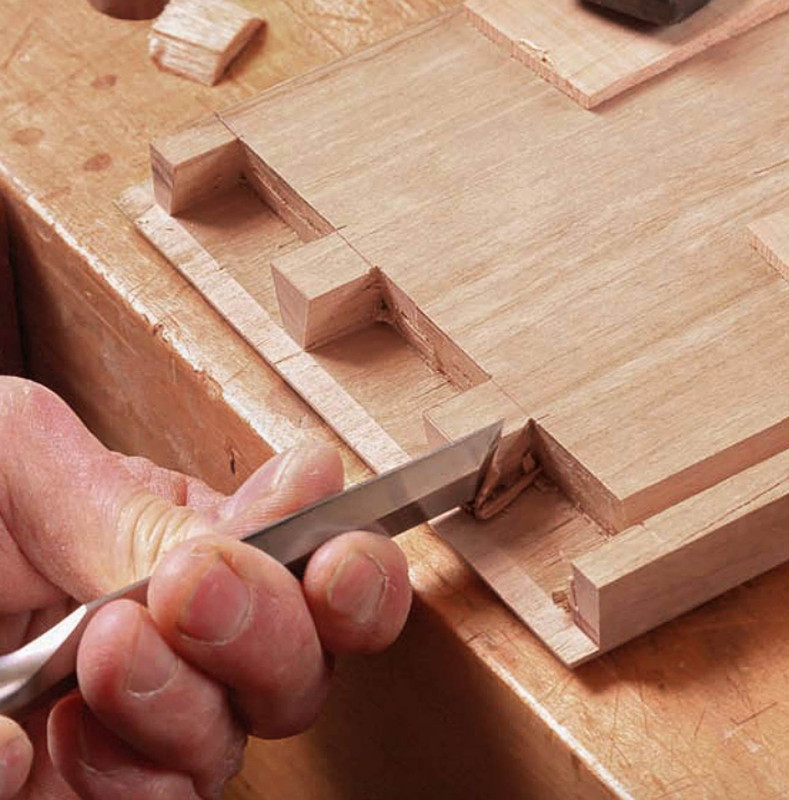
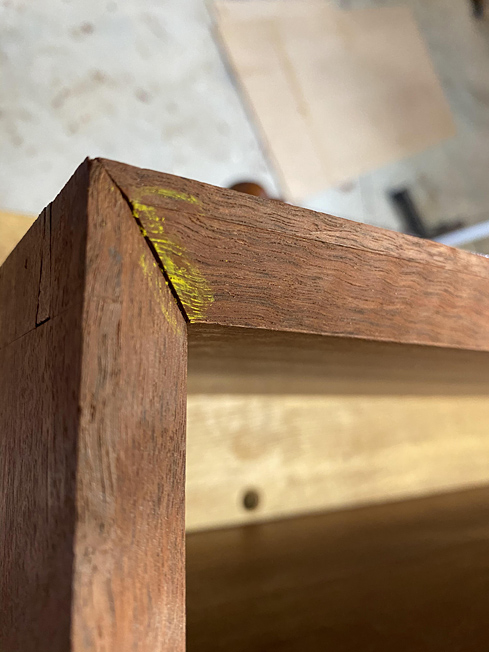
    The rebates at the rear turned out to not require any tuning, with the exception of one corner ...


    ... where I had obviously forgotten to plane! :\


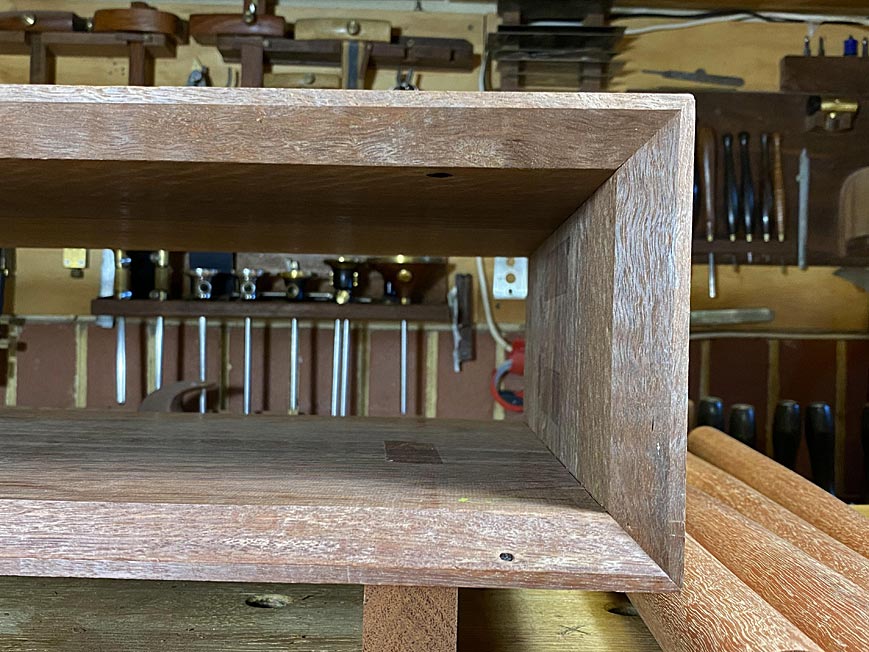
    That was easily rectified ( ... but the case had to be dissembled again). Finally, this is the rear of the case and the completed rebates ...


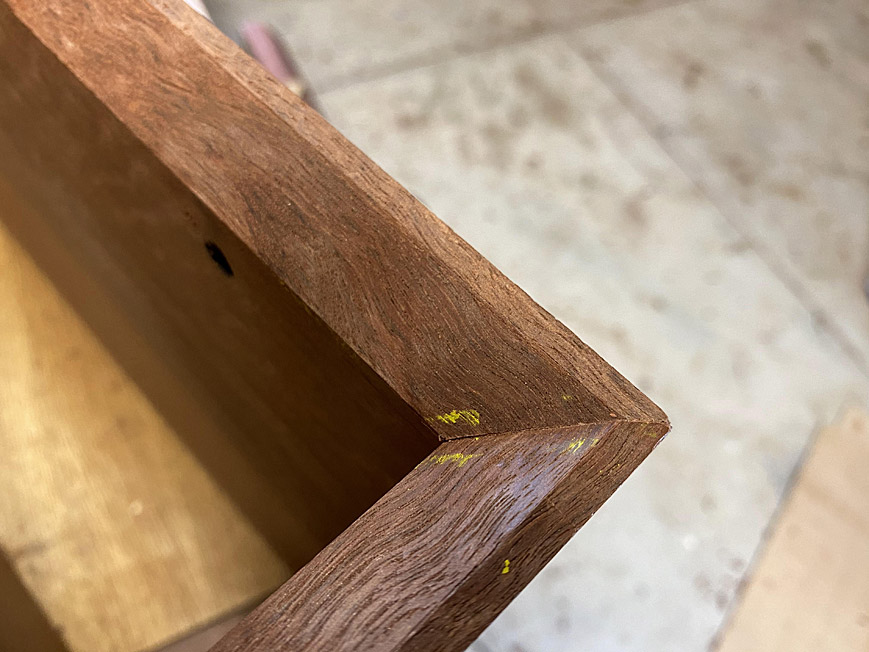
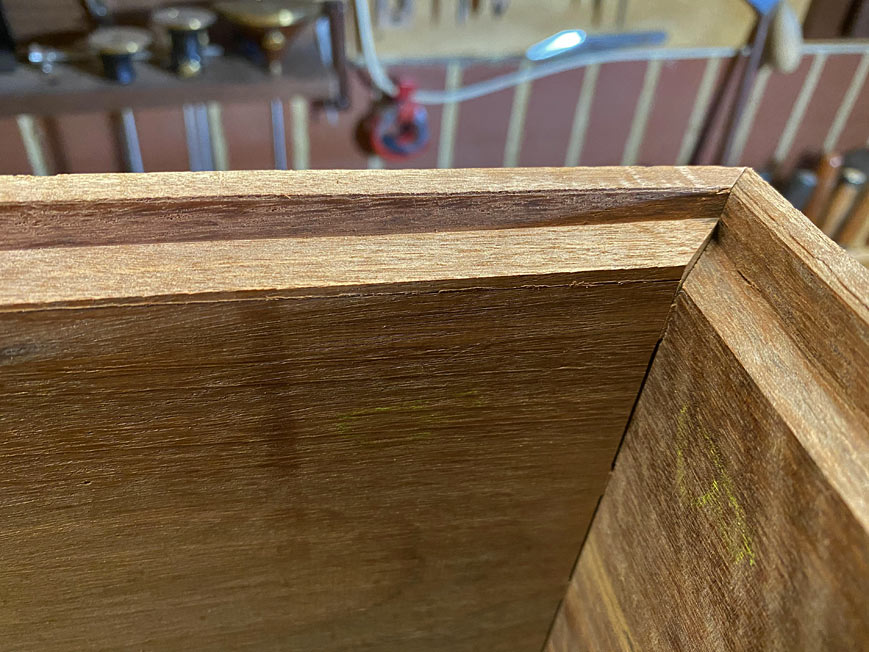
    This is a rebated corner ...


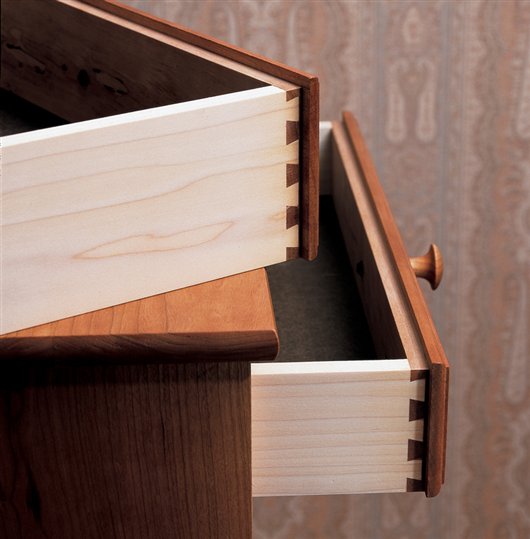
    Here are the front bevelled corners ...


    This illustrates by the mitres on the corners of the dovetailed case needed to be perfect. Any undercutting would show here.


    Next, the drawer dividers need to be done. I'll mention here - since I would appreciate the thoughts of others - that this area has been my biggest headache.


    The reason is that my niece would like the drawers to have the appearance of a single board. However, to achieve this, because of the bevels, is quite complicated.


    First of all, the table cannot have just two drawers. The width of the drawers will be greater than their depth, and this would likely lead to racking. Consequently, I plan to build three drawers, which will be more favourable for the width vs depth ratio..


    Secondly, if the drawers have dividers between them, which they need (since I do not do runners), then there will be a gap between the drawer fronts (which will not flow uninterrupted).


    As I see it, there are two choices: the first is to build the drawers with planted fronts. This is not a method I like (but it may be expedient). The second option is to set the dovetailed drawers sides back (recess them) to account for the internal drawer dividers.


    Thoughts?


    Regards from Perth


    Derek
    Last edited by Derek Cohen; 01-25-2020 at 12:13 PM.

  2. #2
    Join Date
    Jan 2016
    Location
    Longmont, CO
    Posts
    810
    3 drawers with a single planted front that opens all of them? all the rails will keep it from racking.

    the case looks amazing. sliding dovetails for the dividers?

  3. #3
    Quote Originally Posted by Derek Cohen View Post
    ...to build the drawers with planted fronts. This is not a method I like (but it may be expedient). The second option is to set the dovetailed drawers sides back (recess them) to account for the internal drawer dividers.


    Thoughts?


    Regards from Perth


    Derek
    Enjoying following along! ...even if I'm on the wrong side of the electrical revolution.

    Not certain I follow your 'set back' method, but I wanted dove-tailed drawers once, on very large file drawers - so wanted to use drawer guides to handle the weights. I cut a rebate on each side of inset drawer fronts equal to the guide's setback, then cut half-blind DTs.

    Drawer fronts hid the guides when closed.

    I left the drawer fronts a little large to allow tuning to the openings once the guides were installed.
    Last edited by Malcolm McLeod; 01-25-2020 at 1:29 PM. Reason: disrememberation remediation ;)

  4. #4
    Join Date
    Feb 2004
    Location
    Perth, Australia
    Posts
    9,492
    What I need are lipped drawers.The question was whether I make them the easy way, which is by planting (glueing) on fronts. Or, whether I build them out of one piece, which is a lot more work as it requires creating half blind dovetails in a rebate.


    For those unfamiliar with lipped drawers ..


    This is the work of Christian Becksvoort ...


    At this point, I am going to do it the hard way and make half-blind sockets in a rebated front. This is similar to building a secret dovetail.


    To do this for all the drawers, the insides of the case at each end will require a spacer, essentially a 6mm panel glued to the insides. Each side will be half the thickness of the two middle drawer dividers (each 12mm). The centre dividers will be attached in a dado top and bottom.


    Regards from Perth


    Derek

  5. #5
    Join Date
    Nov 2009
    Location
    Ellsworth, Maine
    Posts
    1,808
    I personally much prefer the hard way, creating a dovetail in a rebate to make a lipped drawer front. I'm also not a fan of the false drawer front but I have seen scenarios where this is not even noticeable. I've done dovetails in a rebate once in my life and this is probably the most time consuming dovetails I've ever done. Getting the lines knifed in ends up being difficult as the lip actually gets in the way depending on what knife you use. Sawing out the sockets also becomes painful, just means a lot more cleanup with chisels.

    Either way you choose Derek I'm sure it will turn out amazing.

  6. #6
    Join Date
    Sep 2007
    Location
    Longview WA
    Posts
    27,437
    Blog Entries
    1
    Having never done dovetails in a rebate, a question comes to mind.

    Would it work to cut or at least mark out and make the saw kerfs before cutting the rebate?

    jtk
    "A pessimist sees the difficulty in every opportunity; an optimist sees the opportunity in every difficulty."
    - Sir Winston Churchill (1874-1965)

  7. #7
    Join Date
    Feb 2004
    Location
    Perth, Australia
    Posts
    9,492
    Jim, interesting idea, but I do not see it helping - you end up with more to chop away ... unless you have a different method in mind?

    There are pros and cons with the rebate. The negative is, as you imply, sawing is trickier. The positive is that it is easier to register the tail board (which is cut first).

    Regards from Perth

    Derek

  8. #8
    Join Date
    Sep 2007
    Location
    Longview WA
    Posts
    27,437
    Blog Entries
    1
    Jim, interesting idea, but I do not see it helping - you end up with more to chop away ... unless you have a different method in mind?
    The process on this would be to mark the piece, cut all the kerfs, then cut the rebate before chopping the waste.

    Then the kerfs could be finished with your kerf cutting chisel tool or an old saw blade or other tools folks might have for extending a saw kerf.

    jtk
    "A pessimist sees the difficulty in every opportunity; an optimist sees the opportunity in every difficulty."
    - Sir Winston Churchill (1874-1965)

  9. #9
    Join Date
    Aug 2012
    Location
    Missouri
    Posts
    2,152
    Hi Derek, I’ve done lots of these. I saw the tails,,then the rabbet both ways. Knock off the end pieces then clear the waste. Not too hard. You could also use your router trick by hand or power. You can also may the tail sockets shallower to ease clean up if you wish and clean up the rabbet with a shoulder plane.

Posting Permissions

  • You may not post new threads
  • You may not post replies
  • You may not post attachments
  • You may not edit your posts
  •