I've been away from the workshop for a month, travelling around a few cities in Austria and Germany, as well as Prague. It was a good trip, but it's great to be home.
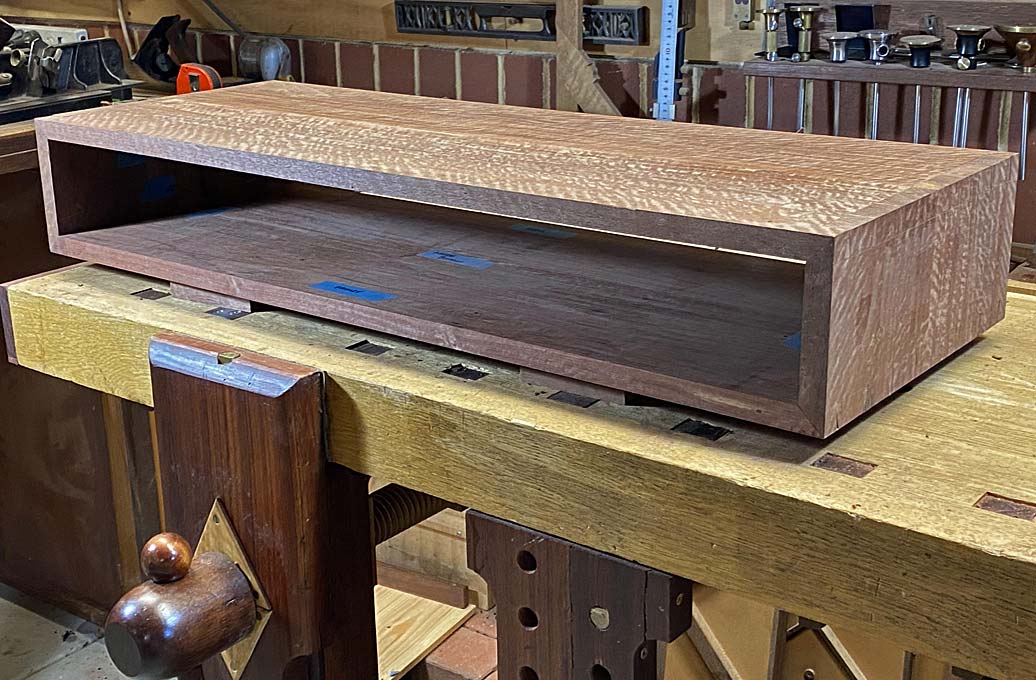
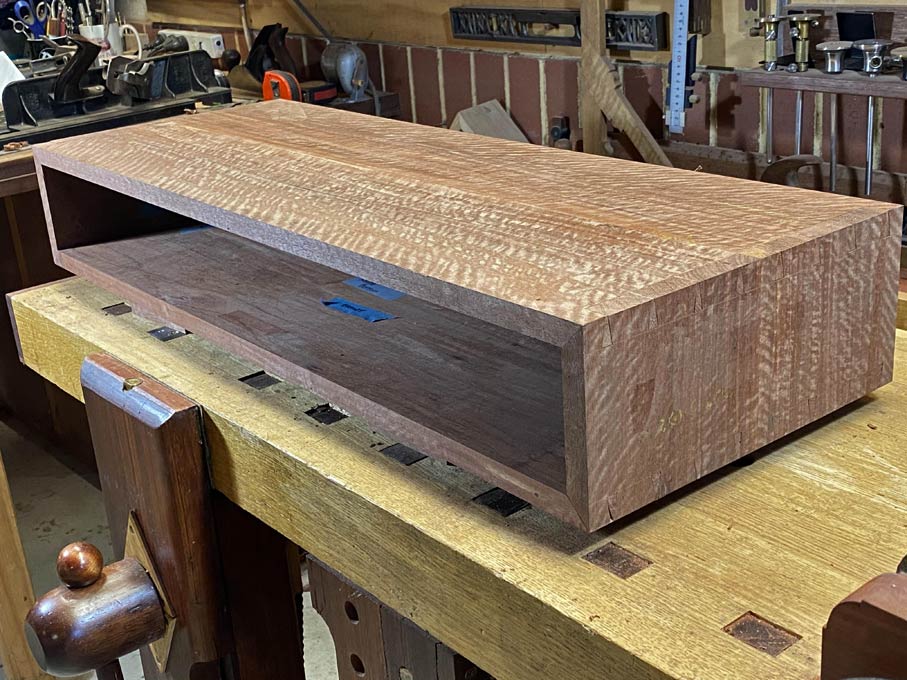
The current build was on hold. This is the entry hall table my niece asked me to build ...
... and this is where we left off last time - ready to fit the first corner ...
Past builds:
Part 1: http://www.inthewoodshop.com/Furnitu...orANiece1.html
Part 2: http://www.inthewoodshop.com/Furnitu...orANiece2.html
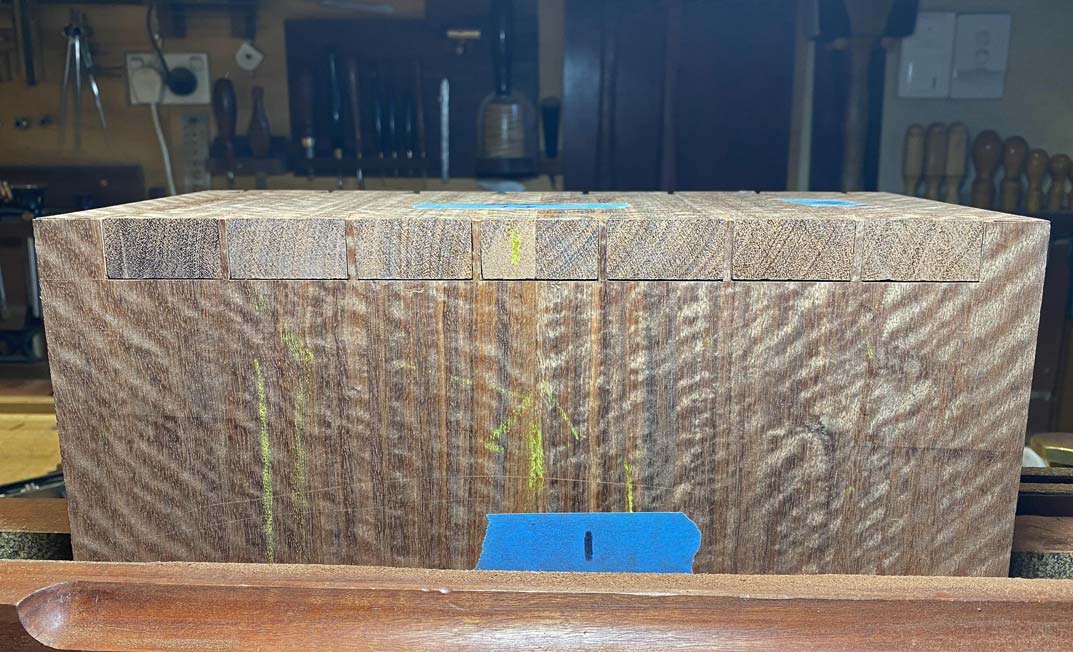
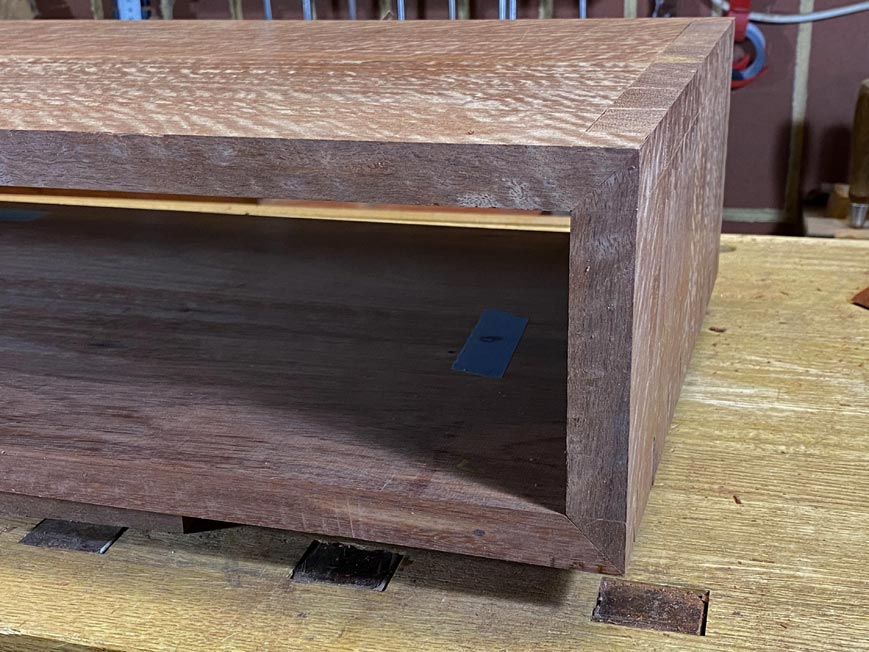
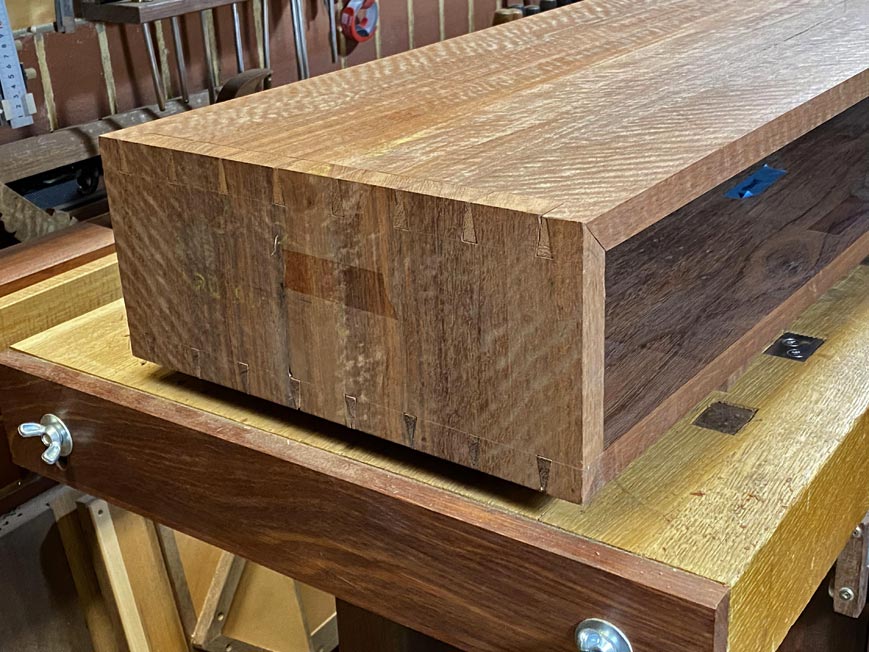
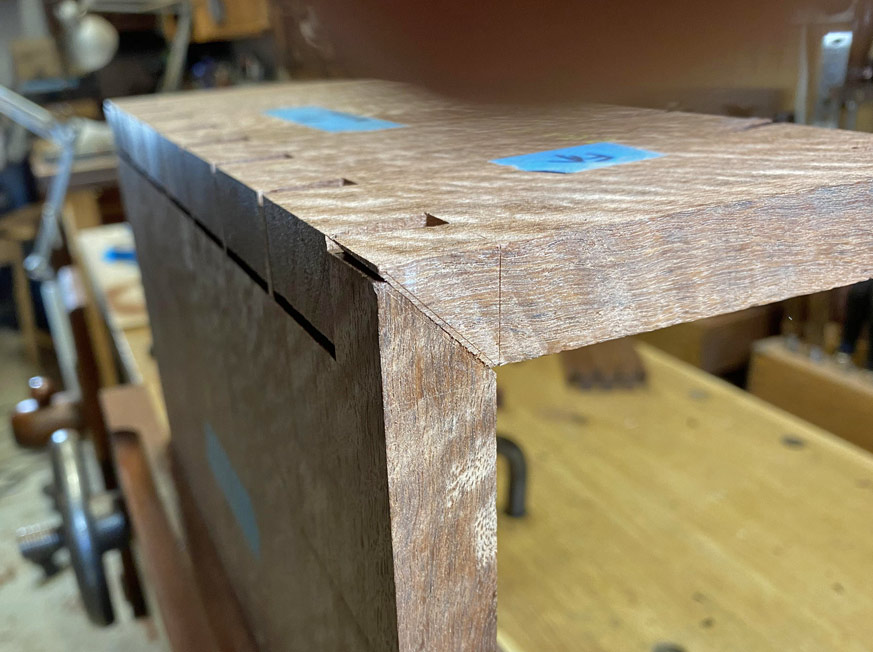
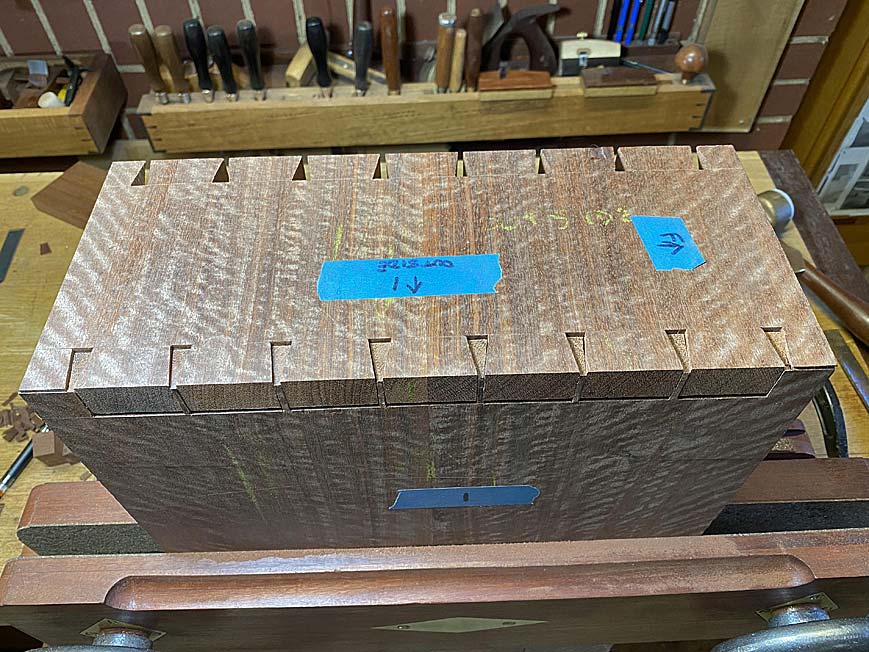
Today we shall put the complete case together. What I wish to focus on is the dovetailing. Not just any dovetailing, but mitred through dovetailing in unforgiving hardwood (here, Fiddleback Jarrah).
Of all the commonly used dovetails, I consider the through dovetail more difficult than the half-blind dovetail. Why ... because two sides are exposed against the single face of the half-blind.
In my opinion, by mitering the ends, the level of complexity is tripled .. at least. Not only are there three faces now, but each needs to be dimensioned perfectly, otherwise each is affected in turn.
This is more difficult than a secret mitred dovetail, where mistakes may be hidden.
I have posted before on building the mitred though dovetail, and it is not my intention to do this again. Instead, what I wish to show are the tuning tricks to get it right.
This is the model of the tail- and pin boards
In a wide case, such as this, it is critical that the parts go together ideally off the saw or, at least, require minimal adjustment. The more adjustments one makes, the more the dovetails will look ragged.
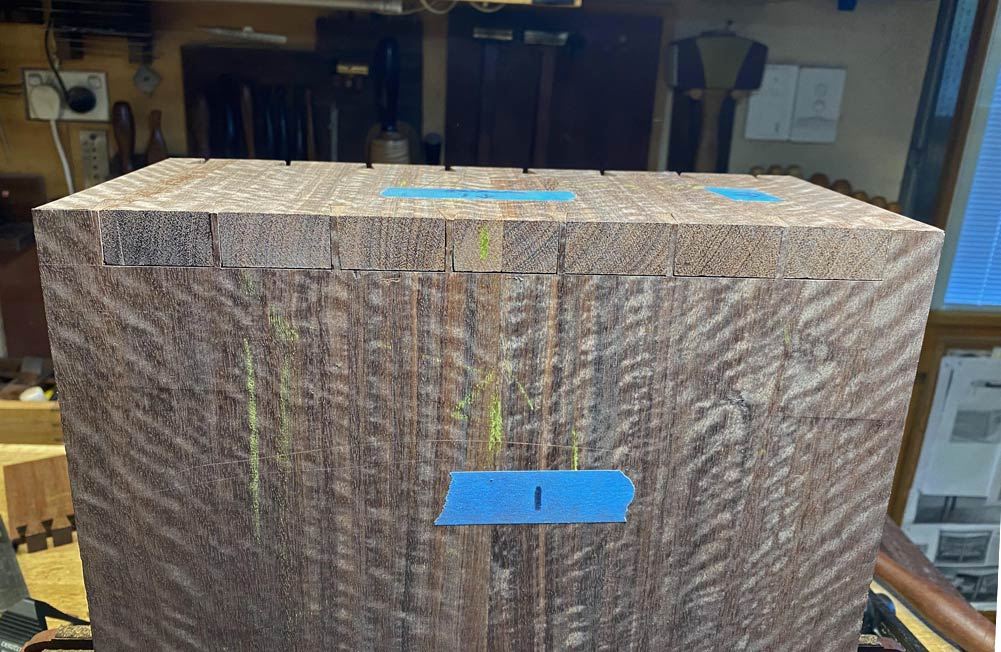
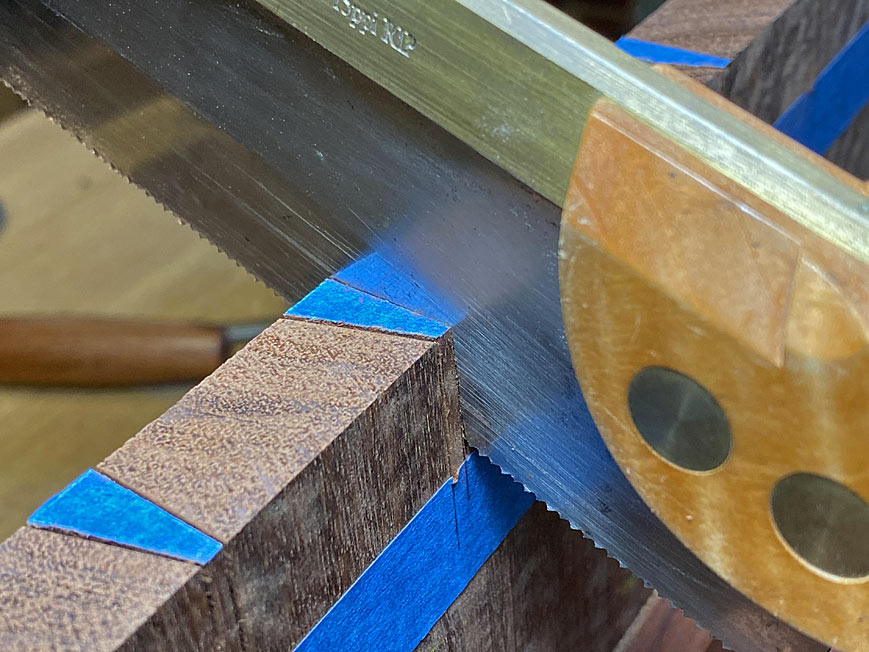
Tail boards are straightforward. Lets consider this done. Once the transfer of tails to pins is completed, the vital area is sawing the vertical lines well, perfectly vertical.
I use blue tape in transferring the marks. The first saw cut is flat against the tape. Note that the harder the wood, the less compression there will be, and so the tail-pin fit needs to be spot on. Where you saw offers an opportunity for ensuring a good fit: if you hug the line (edge of the tape), you get a tight fit. If you encroach a smidgeon over the line, you loosen the fit slightly.
Saw diagionally, using the vertical line as your target
Only then level the saw and complete the cut
I do not plan to discuss removing the waste. That was demonstrated in Part 2.
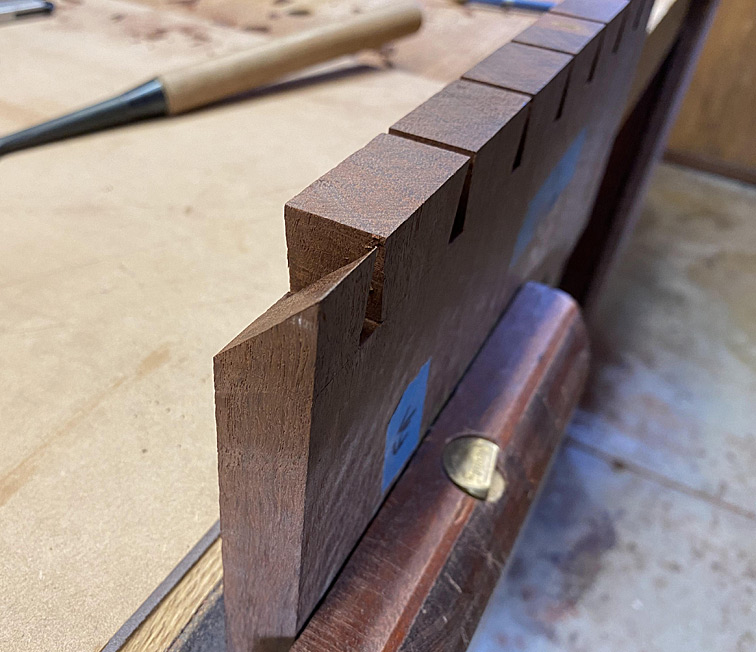
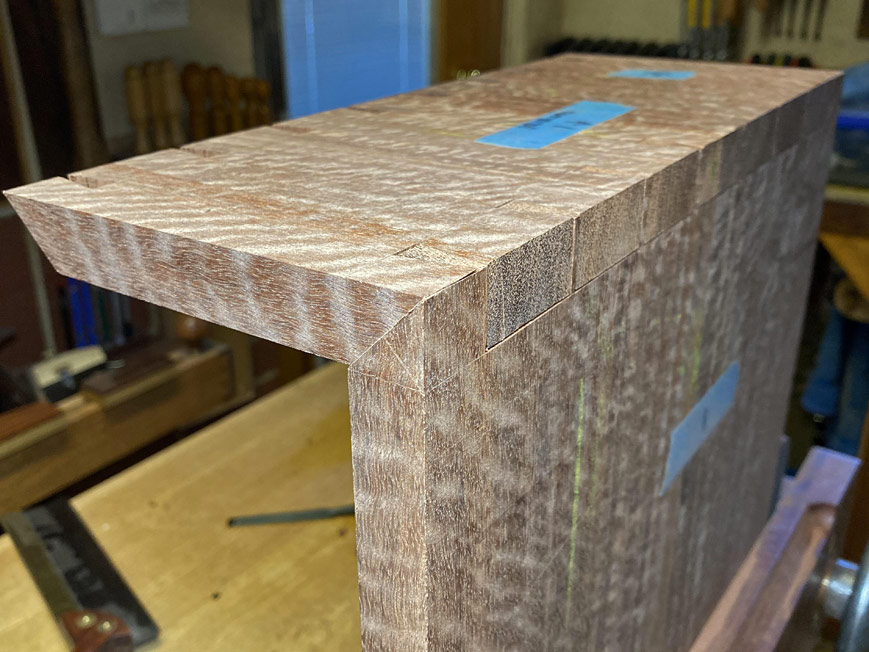
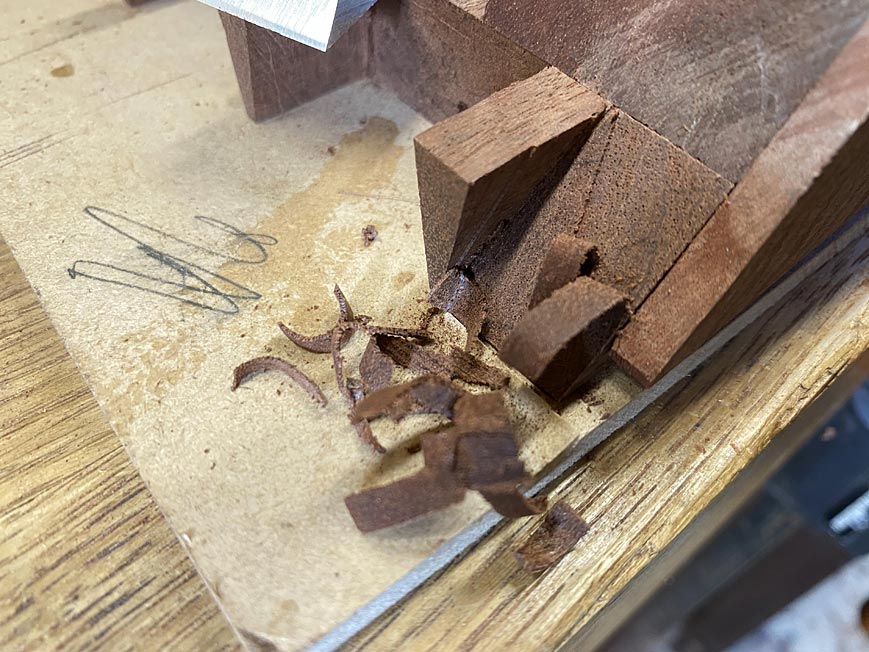
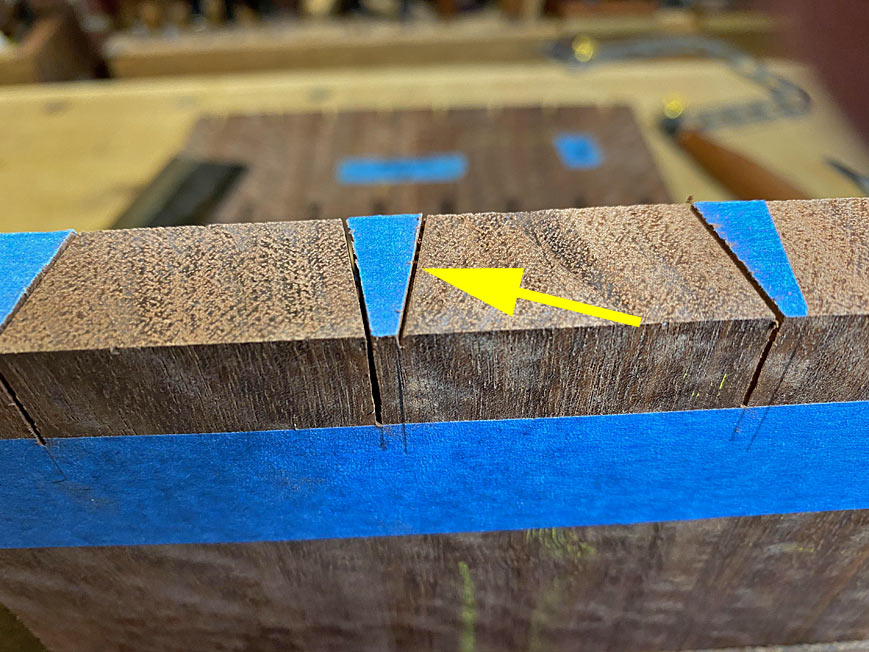
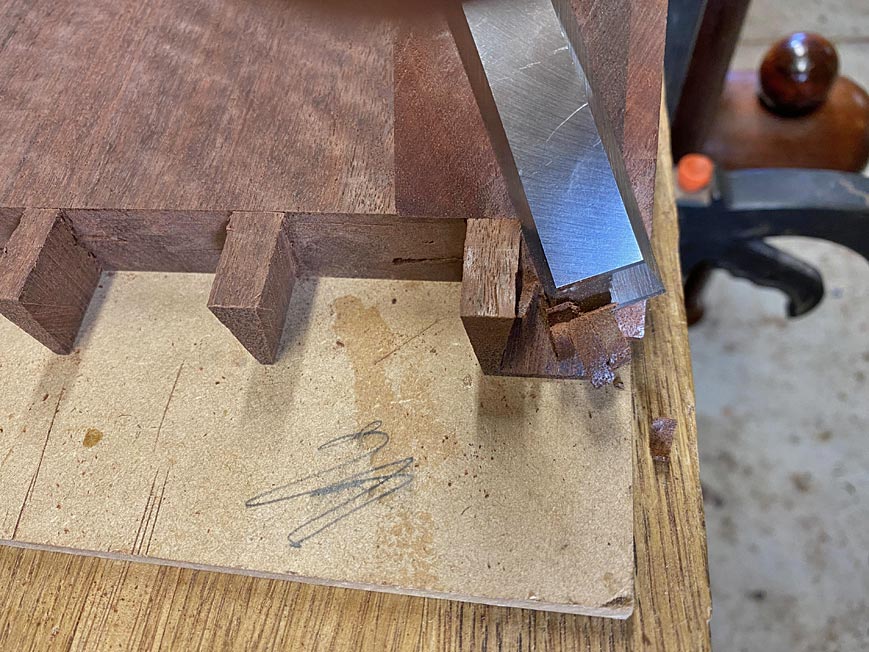
So, the next important area is the mitre. These are scribed, and then I use a crosscut saw to remove the waste about 1mm above the line on both the tail- and pin boards
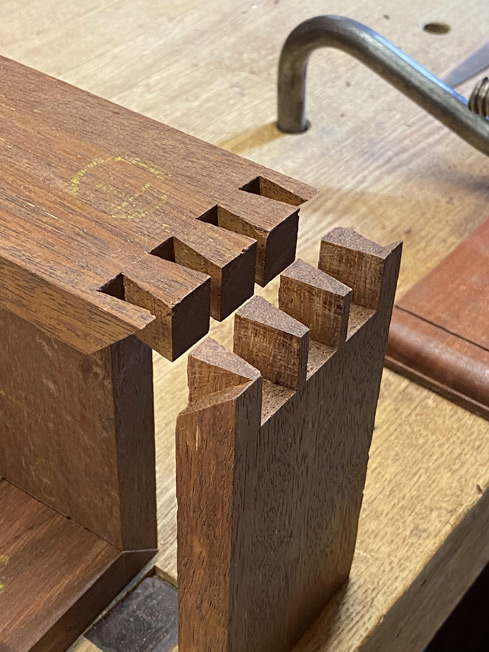
Now we are ready to test-fit the boards
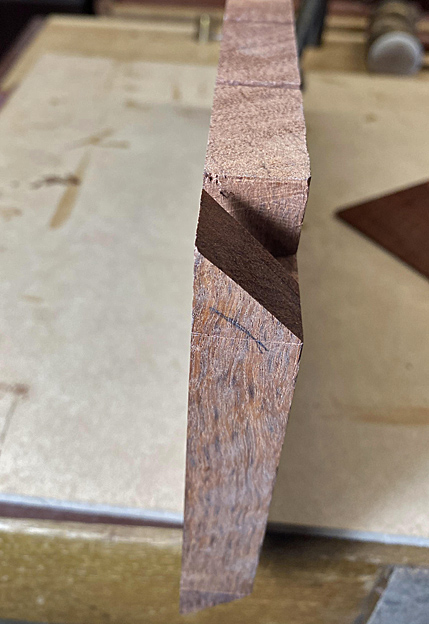
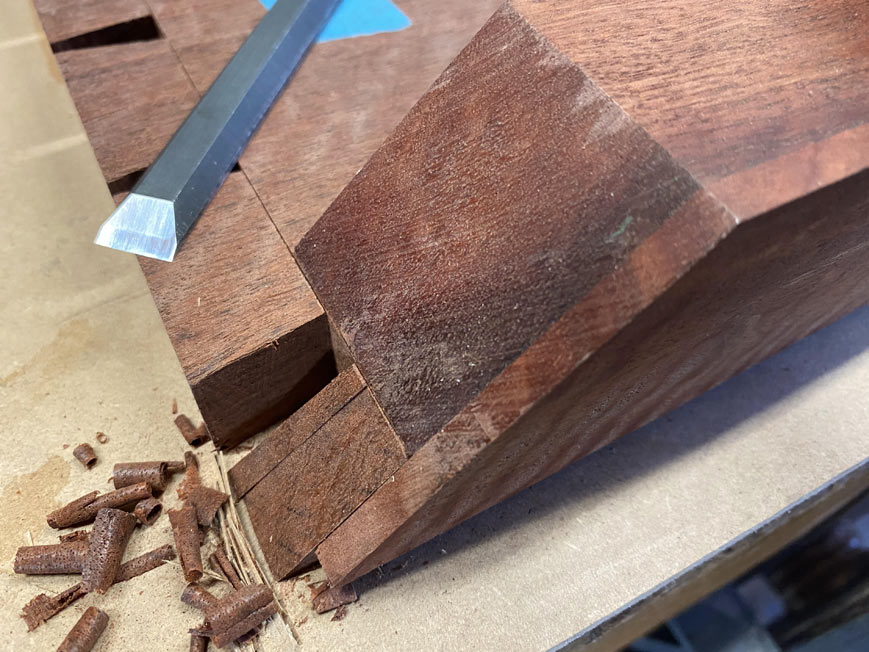
Mmmm . not a great fit
even though the mitres at the sides are tight
The problem is that the mitres are fat, and the extra thickness is holding the boards apart
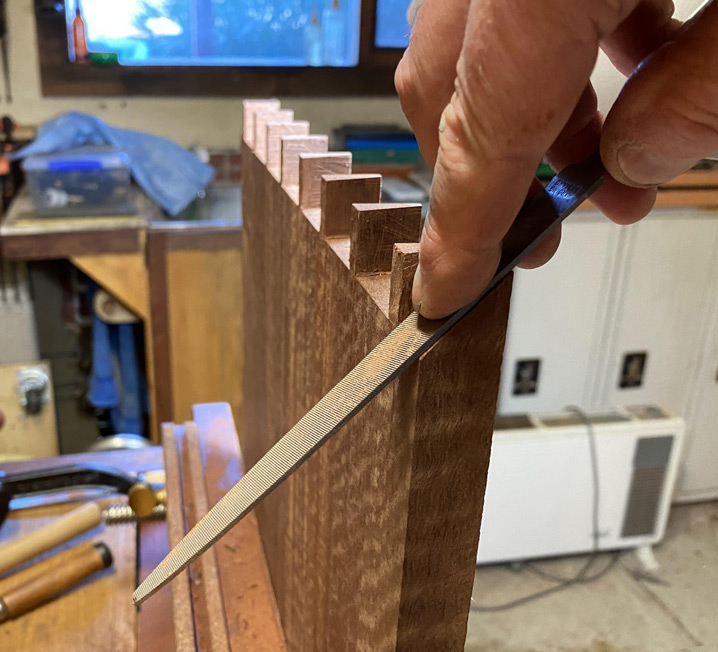
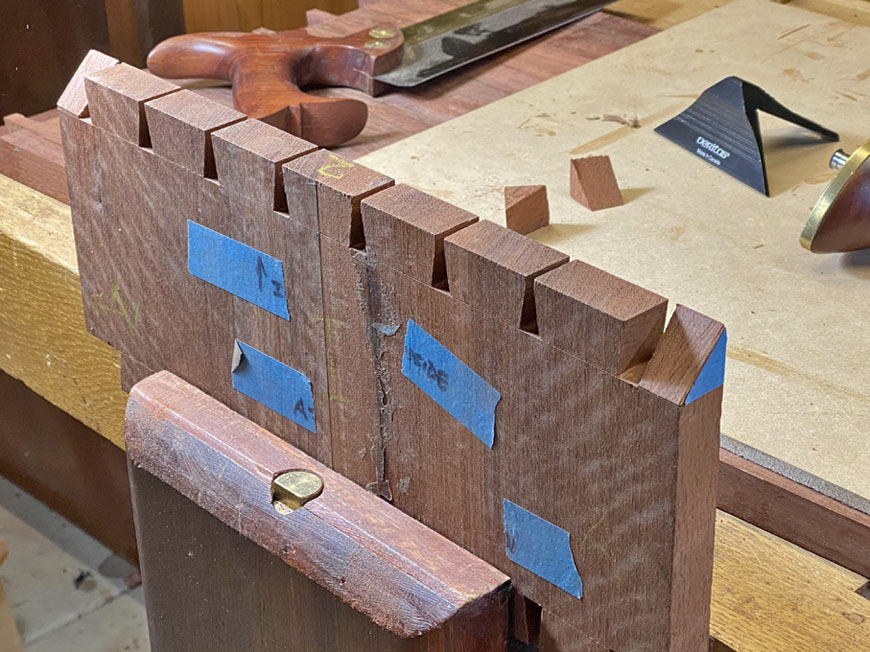
Even sawing to the lines here is likely to leave some fat, which is why it is a waste of energy to try and saw to the line in this instance. It needs to be pared away with a chisel, using a 45-degree fixture.
As tempting and logical as it seems to pare straight down the guide
what I experience is that the chisel will skip over the surface of the hard wood rather than digging in and cutting it away. What is more successful is to pare at an angle, and let the corner of the bevel catch the wood


 Reply With Quote