Page 1 of 4 1234 LastLast
Results 1 to 15 of 49

Thread: Federal Style Sideboard Build – Lots of Pics

  1. #1
    Join Date
    Feb 2011
    Location
    Carlsbad, CA
    Posts
    2,230
    Blog Entries
    2

    Federal Style Sideboard Build – Lots of Pics

    This is a build thread for a federal style sideboard I plan to use as a bar, based on a Thomas Seymour original as described in Glen Huey’s excellent book “Building 18th-Century American Furniture”, which I highly recommend. Dimensions are roughly 46” long by 40” high by 24” deep.


    The only significant change to the original design was to increase the height of the part of the carcass intended to hold bottles – apparently liquor bottles in the 1700s were 3 – 4 inches shorter than current examples. Primary woods are mahogany (Sapelle at my local lumberyard) and curly Maple with some ebony accents. Mahogany was a dream to work with hand tools as usual, and personally I find the figure on the curly Maple strikingly attractive, although it required very sharp, higher frog angle planes to avoid tear out.


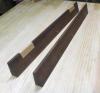
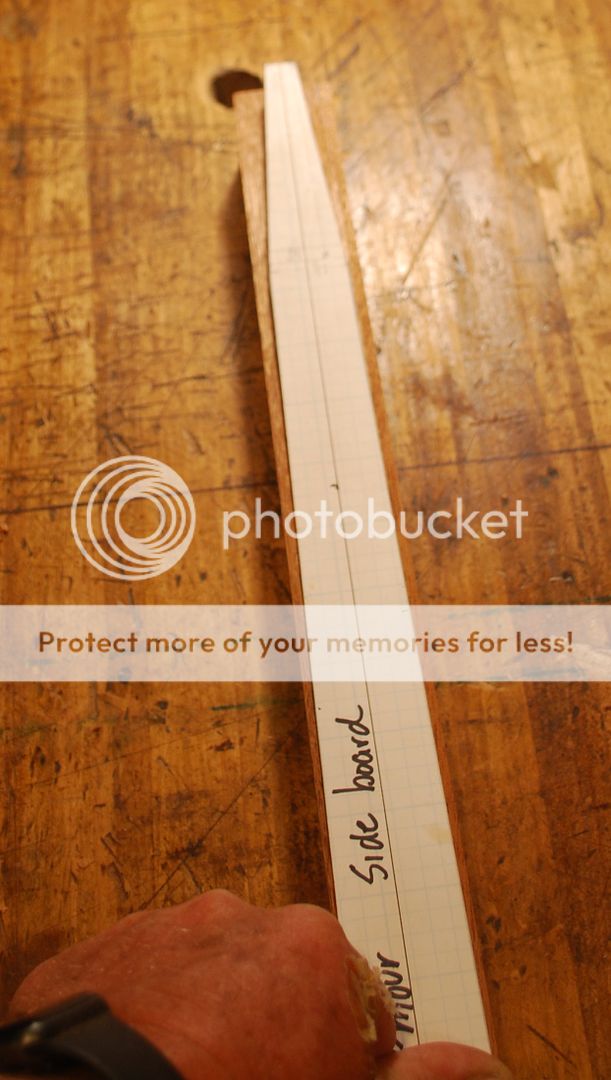
    First step was glue up, dimensioning and surfacing mahogany carcass sides. To lay out the tennons that will join the carcass sides of the legs I like to use a story stick for consistency.


    Shop made rabbit plane creates Tennon shoulders.


    Next was tapered legs. I made a poster board template of the taper. Key learning for me was reference placement of the template and layout against centerlines of the legs, rather than surfaces. Because I work primarily with hand tools, rough dimensions of table legs earn not entirely consistent, but if you reference off the centerline that doesn’t matter.


  2. #2
    Join Date
    Feb 2011
    Location
    Carlsbad, CA
    Posts
    2,230
    Blog Entries
    2
    I sawed the most extreme part of the taper (foot of the leg) with back saw and panel saw and smooth the overall profile with block planes. Pics of completed mortises. When making this many mortises, I like to remove the bulk of the waste with a Forstner bit on the drill press, which along with the bandsaw are the only stationary power tools in my shop.


    Next was inlaying the Maple “line” inlay on the legs. I used a trim router with fence to create the grooves and as you can see promptly screwed that up. Good news about uniform grain wood like mahogany is repair was pretty much invisible.


    Next was M&T’s for front rail/styles. I’ve been trying to improve my speed/efficiency lately and giving a little extra attention to sawing Tennon shoulders allows for a good fit right off the saw. However I find a little final trimming with a sharp shoulder plane always helps result in a nice tight fit on the show face. Pic of Japanese mortising tool I find super helpful in cleaning out the bottom of mortises.


    [

  3. #3
    Join Date
    Feb 2011
    Location
    Carlsbad, CA
    Posts
    2,230
    Blog Entries
    2


    Here is glue up of carcass front. Because this is primary show surface, I invest a little extra time in relieving the back side Tennon shoulders to ensure a nice tight fit on the show surface.


    Here are some pictures of making the 3 horizontal “horizontal frames” out of secondary wood (I’m sure there’s a more appropriate term than “horizontal frames” but it escapes me now). Personally, I always enjoy working secondary wood – it’s not gonna show and it’s my opportunity to value speed/efficiency above appearance, which I think preindustrial woodworkers would appreciate.


    As an aside, I found this 27” inch beach Joiner plane in terrible, dehydrated condition last time I was helping my Dad clean up his shop. After some restoration work adding a brass inlay for a new mouth and making a new wedge it’s now officially one of my new favorite tools! The tapered iron takes an incredibly sharp edge. As a hand tool woodworker who places the highest possible premium on “sharpness”, I wish I knew more about metallurgy to better understand where this mythical, highly desirable “sharpness” trait comes from. I’m not that smart – all I know is this plane iron is awesome in the same way my favorite Japanese chisels are super sharp and my top-of-the-line, vintage hand saws just take a better cutting edge that yields a tangibly better result.


    One of the unique/complex aspects of carcass design is sliding tamboured doors that enclose a central storage area. I made a plywood template with the correct radius to use an electric router to route out groove for the tamboured doors to travel in.


    One of my favorite vintage hand tools is skewed dado plane for making through dadoes. For stopped dadoes I prefer electric router.


  4. #4
    Join Date
    Feb 2011
    Location
    Carlsbad, CA
    Posts
    2,230
    Blog Entries
    2
    Vertical dividers that define the central storage area call for breadboard ends, again one of my favorite hand tool jobs.


    Here’s some pictures of assembly of internal vertical dividers and horizontal frames. Kind of a complex glue up as the show front and side assemblies are glued up after – better hope it fits!


    Banding for table legs.


    Making miter joints for top show frame that captures stone carcass top. Getting a nice tight fit from hand tool joinery is easily doable. For me, plastic reference squares are super helpful/anxiety reducing during glue up. I fear sometimes folks shy away from hand tools because they think first class joinery requires “precision tolerances” only achievable by machines. I think we here in the cave all know that’s BS.


  5. #5
    Join Date
    Feb 2011
    Location
    Carlsbad, CA
    Posts
    2,230
    Blog Entries
    2


    Cleanup of carcass sides. I really like card scrapers for cleaning up areas like this with adjoining surfaces with opposing grain direction. For me, card scrapers are the easiest surfacing tool when final smoothing surfaces with directly adjacent opposing grain direction.


    Adding banding to top rail.


    I also like to sweat a little extra attention fitting flush drawer fronts to their openings. To me the smooth overall operation of the drawer and final fit of drawer front relative to adjacent surfaces is one of the true marks of fine handmade furniture. As I’ve gotten older, my tendency is to of course fit the drawer front as accurately/tightly as possible but narrow the width of the rear of the drawer so all the drama of a “piston fit drawer” happens in the last inch travel.


  6. #6
    Join Date
    Feb 2011
    Location
    Carlsbad, CA
    Posts
    2,230
    Blog Entries
    2
    Adding curly Maple banding to drawer fronts.


    Building rest of drawers. I favor narrow pins, but only within width that allows my narrowest marking knife to effectively fit between tales to accurately mark pins.


    I don’t have great technique for sawing half blind dovetails. My current practice is to work upright in face vice which helps me align saw plate with layout lines, but isn’t very stable. I would appreciate any suggestions about how I should do this better?


  7. #7
    Join Date
    Feb 2011
    Location
    Carlsbad, CA
    Posts
    2,230
    Blog Entries
    2
    Sawing out and inlaying escutcheons.


    Tall, bottom “bottle drawers” require a common federal design motif –ellipse surrounded by mitered frame. I depend on simple MS Word/PowerPoint software to create outline of ellipse templates which I can transfer to the work piece.


    Here’s the half blind dovetails for drawer fronts. This is probably old hat to most people, but for me, I always pair are the inside shoulders of dovetails prior to fitting to ease assembly.


  8. #8
    Join Date
    Feb 2011
    Location
    Carlsbad, CA
    Posts
    2,230
    Blog Entries
    2
    Finally, here’s some pictures of the sliding tambours and the completed piece absent stone. This was my first time with sliding tamboered doors and it was pretty straightforward gluing them on to canvas from the local fabric store. Highly recommend being really conservative with glue so you don't inadvertently glue adjacent timbers together (don't ask me how I know this!).


    Choice of stone/color/figure etc. clearly out of my pay grade – waiting for the boss to weigh in.

    Thanks for looking, Mike

  9. #9
    Join Date
    Apr 2017
    Location
    Clarks Summit PA
    Posts
    1,744
    Mike, really nice build and helpful display of hand tool technique. In a couple of areas, you create tenons by scoring a line, then cutting rabbets with your shopmade rabbet plane. Do you repeat scoring the line with your cutting gauge as you get deeper? I always have a bit of anxiety over tearout when planing crossgrain. If I knife the line again and again, my knife sometimes undercuts the shoulder. I have had success using a dado plane to get the crisp crossgrain cuts for breadboard tenons, then using a jack plane to clean up the material away from the dado. I just got a LV low angle rabbet plane with round cross grain scoring nickers, I am looking forward to trying that.

  10. #10
    Join Date
    Feb 2011
    Location
    Carlsbad, CA
    Posts
    2,230
    Blog Entries
    2
    Mark great question – personally I think it's really challenging to set up your rabbit plane to get clean, square shoulders. The cross grain "knicker" and outer edge of the iron need to line up exactly. If iron is outside the knicker, you'll get definite tear out on the show surface. Correspondingly if the iron is inside the knicker you'll end up with a sloped shoulder that isn't square.

    This is a hand tool job where I try really, really hard to line these two cutting cutting edges up as exactly as possible. However my eyes are as good as they used to be – sometimes it works, sometimes not so much. Consequently my "cheat", particularly on a obvious show surface, is to use a square and marking knife to establish a clear shoulder, and then set up fence on my rabbit plane so it's just short of the layout line. That way if my rabbit off the plane isn't perfect, I can use the super sharp shoulder plane, with the drawer held vertically in the vice to to plan exactly to the layout line with the perfectly square surface.

    The LV rabbit plane is an excellent tool and I would encourage you to get the rounded knickers in the iron super sharp and then practice getting them perfectly aligned. Getting a clean, perfectly square rabbit off a rabbit plane is one of those woodworking skills that looks really easy on YouTube/TV, but is really dependent upon getting the plane set up just right. Just my experience YMMV.

    Cheers, Mike

  11. #11
    Best thread I have seen here in years.

    Thanks so much this is why I love the internet.

  12. #12
    Join Date
    Mar 2006
    Location
    Austin Texas
    Posts
    1,957
    Many thanks for sharing Mike. This is a beautiful execution of an old design that you have recreated. I very much admire your inlay and banding work that always sets your work apart form many of the rest of us. I have that Huey book on my short list and believe it has just moved up to the top of the list.
    David

  13. #13
    Mike,

    As always your work leaves me speechless, Beautiful work, good job, and all those are about as good as "thoughts and prayers" but bottom line that is best I can do. Thanks for the photos,

    ken

  14. #14
    Join Date
    Mar 2015
    Location
    SE Michigan
    Posts
    3,225
    Mike, I’m a big fan of Federal style and you have done it proud. Really excellent work. It’s a real challenge for me to get an ellipse inlay looking good - nice job! I suppose some of your marquetry work has excelled your skill level. Beautiful choice of woods. Thanks for sharing.

  15. #15
    Join Date
    Nov 2007
    Location
    Goleta / Santa Barbara
    Posts
    968
    Again Michael, your work is stunning. Absolutely lovely. Patrick

Posting Permissions

  • You may not post new threads
  • You may not post replies
  • You may not post attachments
  • You may not edit your posts
  •