Page 3 of 4 FirstFirst 1234 LastLast
Results 31 to 45 of 49

Thread: Federal Style Sideboard Build – Lots of Pics

  1. #31
    Join Date
    Feb 2011
    Location
    Carlsbad, CA
    Posts
    2,230
    Blog Entries
    2
    Quote Originally Posted by Jerry Olexa View Post
    Nice work and GREAT pics,,I believe that is a G. Huey project...
    Jerry you are absolutely right, the design/plan for this piece came from Glen Huey's excellent book "“Building 18th-Century American Furniture”. I built for the pieces described in his book and the pictures and build descriptions are excellent. Everybody has a different idea of styles that appeal to them, but I think all the pieces in Glenn's book are classic designs and fun to build.

    Cheers, Mike

  2. #32
    Join Date
    Feb 2011
    Location
    Carlsbad, CA
    Posts
    2,230
    Blog Entries
    2
    Jim and Derek, thanks for your comments and suggestions regarding half blind dovetails. I have 2 challenges;

    1)how to orient the work piece on the workbench so that I'm able to align the saw plate with the layout lines. Currently I position the work piece vertically in my face vice and end up kneeling on the floor to try and get the saw plate aligned with layout lines. Aside from the uncomfortable posture, I'm hoping there is a better way to get a solid work piece with clear sightlines.

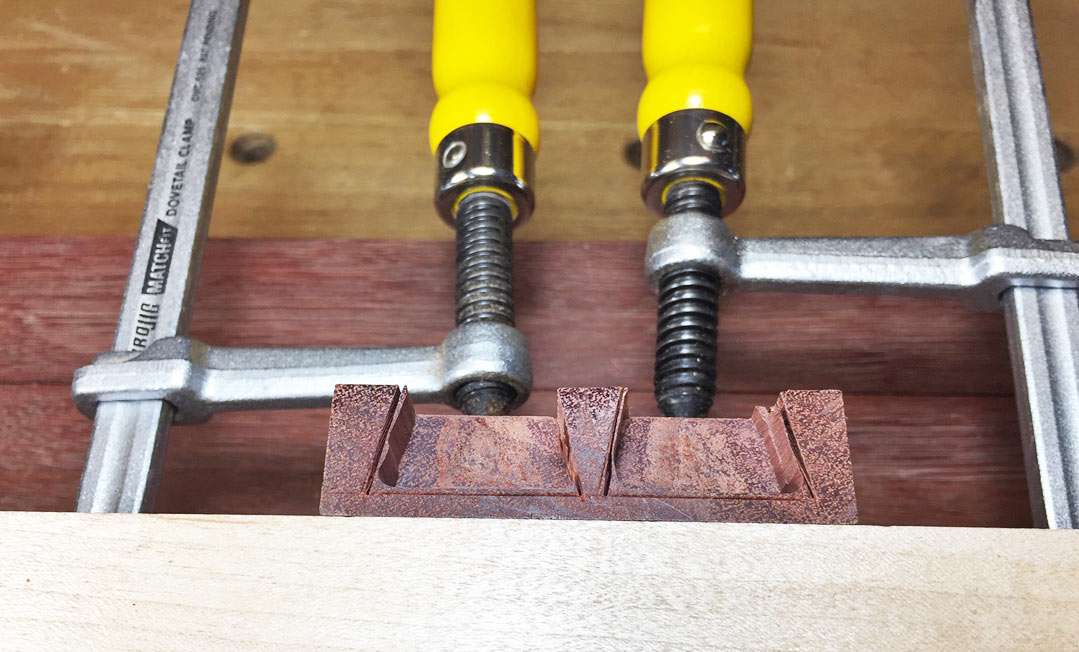
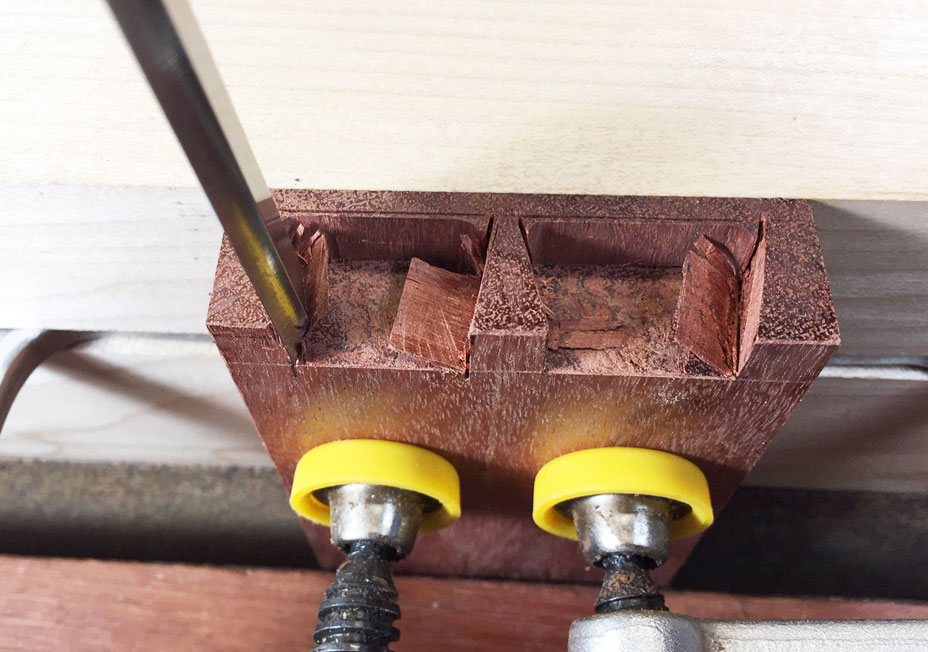
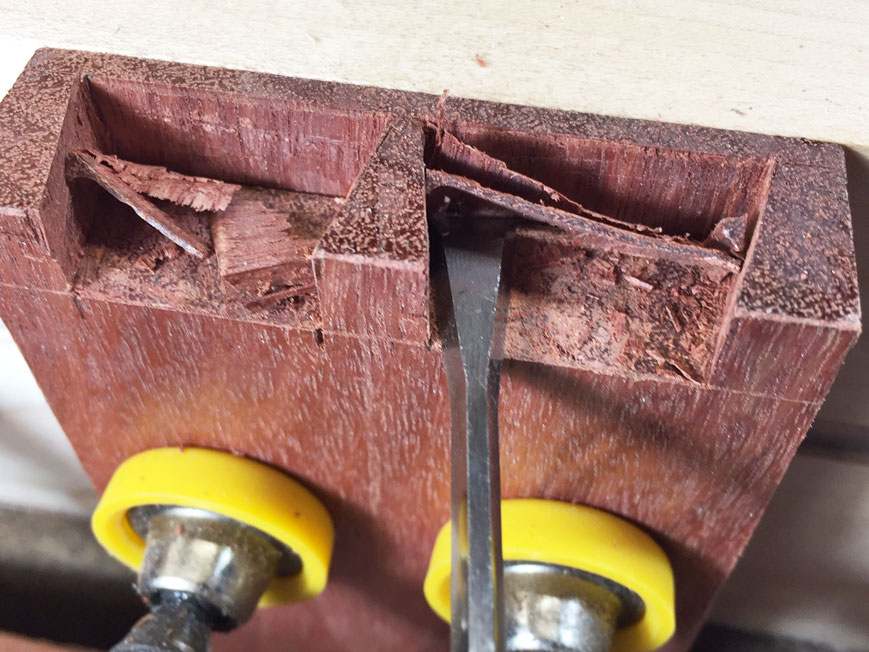
    2) removing the waste between tails is always time-consuming and fraught with the danger of inadvertently breaking through the show surface when chiseling. Currently I remove the bold waste with a Forstner bit in the drill press and then start chiseling. I think your suggestion about using a small router bit is interesting and something I will give a try.

    Thanks, Mike

  3. #33
    Join Date
    Feb 2011
    Location
    Carlsbad, CA
    Posts
    2,230
    Blog Entries
    2
    Quote Originally Posted by Jim Koepke View Post
    This is an old post of mine involving half blind dovetails:

    https://sawmillcreek.org/showthread.php?258465

    Two points on mine are sawing a kerf in the middle of the waste and using a tool to extend the kerf to the base of the socket of all three kerfs.

    jtk
    Jim thanks for sharing your very informative post on dovetails. Through dovetails for me are a lot easier/faster than half blind DTs. Your suggestion about making the dovetails 5/8 the thickness of the drawer front is a helpful guideline. I've had problems clearing the waste between tales and breaking through the show surface. I'll give your ideas a try. Thanks for sharing.

    Best, Mike

  4. #34
    Join Date
    Feb 2004
    Location
    Perth, Australia
    Posts
    9,491
    Quote Originally Posted by Mike Allen1010 View Post
    Jim and Derek, thanks for your comments and suggestions regarding half blind dovetails. I have 2 challenges;

    1)how to orient the work piece on the workbench so that I'm able to align the saw plate with the layout lines. Currently I position the work piece vertically in my face vice and end up kneeling on the floor to try and get the saw plate aligned with layout lines. Aside from the uncomfortable posture, I'm hoping there is a better way to get a solid work piece with clear sightlines.

    2) removing the waste between tails is always time-consuming and fraught with the danger of inadvertently breaking through the show surface when chiseling. Currently I remove the bold waste with a Forstner bit in the drill press and then start chiseling. I think your suggestion about using a small router bit is interesting and something I will give a try.

    Thanks, Mike
    Hi Mike

    1) This is a situation where a Moxon vise would change your experience forever. The Moxon vise will raise your work piece about 6". Better lighting always helps as well. Lastly, ageing eyes was the reason for using blue tape when transferring dovetail marks, and this makes such a difference, I cannot go back to not using it.

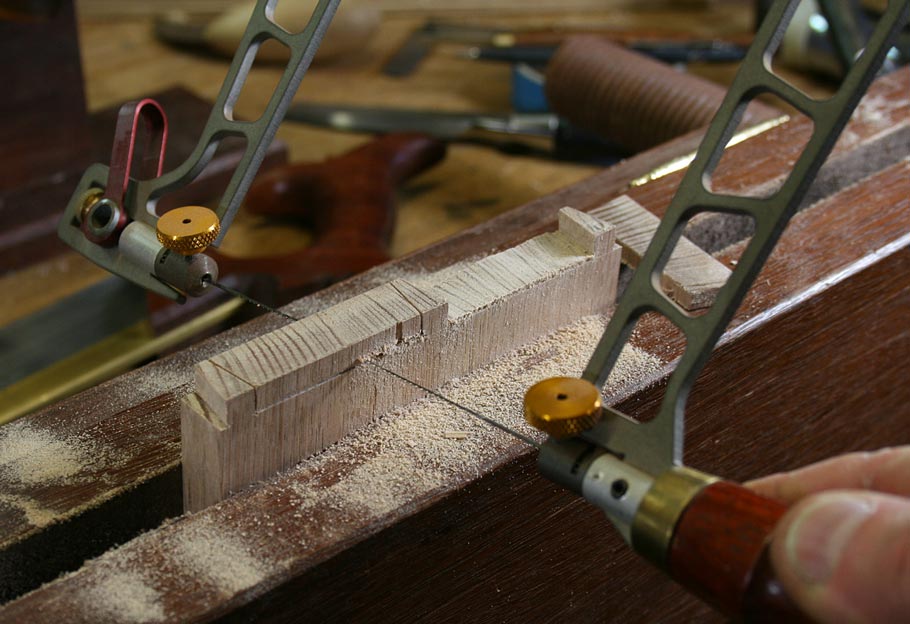
    2) Removing the waste on through dovetails: use a fretsaw to 1mm above the base line, then pare the last bit ...

    http://www.inthewoodshop.com/Furnitu...ovetails3.html


    Next I saw off the ends. Once again, as close to the line as possible. At best, there is no waste to pare away. At worst, this takes a couple of strokes.


    Half-blind dovetails: I have been using a router increasingly ..
    http://www.inthewoodshop.com/Furnitu...vingWaste.html


    Or, use a kerf chisel and drill the waste .... http://www.inthewoodshop.com/Furnitu...hBlueTape.html


    Split it out ...


    Regards from Berlin

    Derek

  5. #35
    Outstanding work Mike, thanks for sharing the details and pictures! I’m sure Glen would be very impressed with what you have created.

  6. #36
    Join Date
    Feb 2011
    Location
    Carlsbad, CA
    Posts
    2,230
    Blog Entries
    2
    Derek thanks much for the link to your website explaining how you router half blind DT's – like all your website content, super helpful! Your facility with tools is extraordinary – I'm surprised you're not an engineer (no disrespect to your chosen profession of pediatric psychology – definitely super impressive!).

    The results you achieve are exactly what I'm looking for – super efficient removal of bulk of the waste which allows for final pairing with chisels. I confess I couldn't 100% follow the associated tool/work holding jigs. I'm guessing if we had 5 minutes together in the shop something that would be intuitively apparent. Bottom line for me is I am going to try using a router next time I do half blind dovetails. I very much appreciate the inspiration and direction.

    All the best, Mike

  7. #37
    Join Date
    Aug 2012
    Location
    Missouri
    Posts
    2,152
    Beautiful work Mike.

  8. #38
    Join Date
    Sep 2008
    Location
    N. Idaho
    Posts
    1,621
    Mike,

    Many thanks for the New Year's treat! Your build threads are one of my favorite things on the site and you've taken it to a new level with this build. And I always pick up a good trick from all of your photos, so definitely not too many.

    I agree with Derek that a Moxon or similar arrangement would be a game changer for both getting the workpiece to the right height and also for stabilizing the end of the board.

    Now for the important question: what drink will be served first?

    Best,
    Chris
    "You can observe a lot just by watching."
    --Yogi Berra

  9. #39
    Join Date
    Feb 2011
    Location
    Carlsbad, CA
    Posts
    2,230
    Blog Entries
    2
    Quote Originally Posted by Christopher Charles View Post
    Mike,

    Many thanks for the New Year's treat! Your build threads are one of my favorite things on the site and you've taken it to a new level with this build. And I always pick up a good trick from all of your photos, so definitely not too many.

    I agree with Derek that a Moxon or similar arrangement would be a game changer for both getting the workpiece to the right height and also for stabilizing the end of the board.

    Now for the important question: what drink will be served first?

    Best,
    Chris
    Chris, thanks for the endorsement of the Moxon vice I guess I really need to give that a try.

    Regrettably, sideboard is still taking up space in the shop until the LOML can find time to find exactly the right piece of stone for the top. Personally, I just want it out of the shop and am ready slides some bricks in there and call it done.

    As for the first drink, I have a bottle of 30-year-old Lagavulin single malt I've been saving for one of the Boys to get married or maybe even grandkids. If I succeed in getting the boss to let me move this out of the shop and into the house, I might have to cracked the seal.

    Cheers, Mike

  10. #40
    Join Date
    Nov 2015
    Location
    Freiburg, Germany
    Posts
    223
    very nice Mike! thanls for sharing!

  11. #41
    Join Date
    Mar 2006
    Location
    SoCal
    Posts
    22,510
    Blog Entries
    1
    Wonderful work Mike. Thanks for taking the time to share your methods and all the pics.
    "A hen is only an egg's way of making another egg".


    – Samuel Butler

  12. #42
    Join Date
    Feb 2003
    Location
    McKinney, TX
    Posts
    2,064
    Wow. Impressive and very nice
    Steve Jenkins, McKinney, TX. 469 742-9694
    Always use the word "impossible" with extreme caution

  13. #43
    That is the neon sign of sideboards ! A wonderful example done perfectly.
    Fun Fact: before modern plumbing sideboard doors often concealed a pee bucket. The REAL reason the ladies went to
    another room to "allow the gentlemen to talk politics".

  14. #44
    Is that true.

    If so I’m putting a pee bucket in my dinning room sideboard.

    This had me so excited..

    Quote Originally Posted by Mel Fulks View Post
    That is the neon sign of sideboards ! A wonderful example done perfectly.
    Fun Fact: before modern plumbing sideboard doors often concealed a pee bucket. The REAL reason the ladies went to
    another room to "allow the gentlemen to talk politics".

  15. #45
    Yes, it's true. But I get the feeling you don't find it important. And that's OK. There were also urinals that were decorative
    and stayed out in a dining room corner all the time. And Samuel Pepys made a diary entry about coming home from work and walking through the dining room and
    seeing a lady friend of the family "doing something upon the pot".

Posting Permissions

  • You may not post new threads
  • You may not post replies
  • You may not post attachments
  • You may not edit your posts
  •