Page 1 of 2 12 LastLast
Results 1 to 15 of 22

Thread: Cockbeading on serpentine drawer

  1. #1
    Join Date
    Apr 2017
    Location
    Clarks Summit PA
    Posts
    1,744

    Cockbeading on serpentine drawer

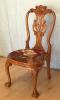
    I am working on some cockbeading on a serpentine drawer. I got a Dave's low angle shave many years ago, and got a Lee Valley flat spokeshave a year or two ago. Both have served me well, but I had trouble with concave curves. I recently bought a Brian Boggs curved spokeshave from Lie Nielsen, and it is a dream. I can use it on concave curves, but also flats and convex curves. beadingk a.jpgbeading 2.jpgbeading 3.jpgbeading 4.jpg

  2. #2
    Join Date
    Feb 2011
    Location
    Carlsbad, CA
    Posts
    2,229
    Blog Entries
    2
    Mark, I'm not exactly sure what you're asking. The concave drawer front in your pictures is really sophisticated work so you clearly know what you're doing. If you're trying to create a cock bead along the outer perimeter of the existing drawer front in the pictures (as opposed to frame surrounding the drawer opening), I've had the best luck establishing the shoulder with a marking knife (to limit potential for cross grain spelching) and then using a fenced bead scraper plane (I have an old Stanley model whose number I forget), to gradually create the desired profile, and shallow passes.

    If I understand your pictures correctly, looks like you have a of veneer show surface for the drawer front. That may not be thick enough to incorporate technique I'm suggesting. Alternative would be to create a shallow rabbit along all 4 sides of the drawer front that you could glue an added cock bead into. With the curved drawer front in your pictures that will be a real headache! You could create the rabbit easy enough with a fenced rabbit plane and lots of futzing around with a marking knife, but you still have to bend the cocked beading to the drawer front profile which is way over my head.

    Thanks for the feedback on spoke shave you're using – super helpful tools in my book. I suspect I misunderstood your question but look forward to seeing the results.

    Best, Mike

  3. #3
    Join Date
    Apr 2017
    Location
    Clarks Summit PA
    Posts
    1,744
    Quote Originally Posted by Mike Allen1010 View Post
    Mark, I'm not exactly sure what you're asking. The concave drawer front in your pictures is really sophisticated work so you clearly know what you're doing. If you're trying to create a cock bead along the outer perimeter of the existing drawer front in the pictures (as opposed to frame surrounding the drawer opening), I've had the best luck establishing the shoulder with a marking knife (to limit potential for cross grain spelching) and then using a fenced bead scraper plane (I have an old Stanley model whose number I forget), to gradually create the desired profile, and shallow passes.

    If I understand your pictures correctly, looks like you have a of veneer show surface for the drawer front. That may not be thick enough to incorporate technique I'm suggesting. Alternative would be to create a shallow rabbit along all 4 sides of the drawer front that you could glue an added cock bead into. With the curved drawer front in your pictures that will be a real headache! You could create the rabbit easy enough with a fenced rabbit plane and lots of futzing around with a marking knife, but you still have to bend the cocked beading to the drawer front profile which is way over my head.

    Thanks for the feedback on spoke shave you're using – super helpful tools in my book. I suspect I misunderstood your question but look forward to seeing the results.

    Best, Mike
    Thanks for the input Mike. I wasn't asking any specific question, just posting some pictures on some hand tool woodworking and commenting on my enjoyment of my Lie Neilsen spokeshave. I am going to cut a rabbet all around the drawer. The cockbead is already cut out in the shape needed - you can see it in the first photo and set in place in the last - but before I cut rabbet. In any event, I appreciate your extensive pictures and explanations in your recent build. It is so good to see hand tools at work in the Neander forum.

  4. #4
    Join Date
    Mar 2015
    Location
    SE Michigan
    Posts
    3,225
    Mark, looks like an amazing build. Please share when you can.

  5. #5
    Join Date
    Feb 2011
    Location
    Carlsbad, CA
    Posts
    2,229
    Blog Entries
    2
    My bad Mark - thanks for clarification- I get it now. Beautiful work. Agree with other posts, would love to see more pics.

  6. #6
    Join Date
    Apr 2017
    Location
    Michigan
    Posts
    2,769
    Nice work Mark

  7. #7
    Join Date
    Aug 2007
    Location
    Dickinson, Texas
    Posts
    7,655
    Blog Entries
    1
    You would have to show the Lie Nielsen shave, now I have to get one.

  8. #8
    Join Date
    Jan 2007
    Location
    Michiana
    Posts
    3,066
    Quote Originally Posted by lowell holmes View Post
    You would have to show the Lie Nielsen shave, now I have to get one.
    After the great tool purge of 2018 I purchased a flat and curved version of the Boggs shave. I'd struggled with shaves for years. My rationale was that if I couldn't get them to work, it wasn't because the tool was inferior. They are wonderful users, and surprisingly easy to set up.
    Sharp solves all manner of problems.

  9. #9
    Join Date
    Apr 2017
    Location
    Clarks Summit PA
    Posts
    1,744
    Thanks Tom. Lowell, the LN Boggs spokeshave is a beauty. Rob will testify to that. I am cockbeading serpentine drawers and the spokeshave is invaluable. Some more picksbead1.jpgbead2.jpgA 1/8 inch bandsaw veneer is placed under drawer front.bead3.jpg
    Attached Images Attached Images

  10. #10
    Join Date
    Apr 2017
    Location
    Clarks Summit PA
    Posts
    1,744
    The curve is traced on veneer bead4.jpgbead5.jpgbead6.jpgbead7.jpg

  11. #11
    Join Date
    Apr 2017
    Location
    Clarks Summit PA
    Posts
    1,744

    More work flow


  12. #12
    Join Date
    Apr 2017
    Location
    Clarks Summit PA
    Posts
    1,744

  13. #13
    Join Date
    Apr 2017
    Location
    Clarks Summit PA
    Posts
    1,744

    routing the rabbets by hand

    some final pics

    bead15.jpgbead16.jpgbead17.jpg

    3 drawers done, one more to go bead19.jpg

  14. #14
    Join Date
    Feb 2014
    Location
    NE Florida
    Posts
    304
    That is going to be a beautiful piece.
    Chris

  15. #15
    Join Date
    Sep 2008
    Location
    N. Idaho
    Posts
    1,621
    Impressive! And I love your parts holder in the second photo of your last post.

    What is the veneer? Mahogany?
    "You can observe a lot just by watching."
    --Yogi Berra

Posting Permissions

  • You may not post new threads
  • You may not post replies
  • You may not post attachments
  • You may not edit your posts
  •