Results 1 to 6 of 6

Thread: Another Japanese Style Toolbox

  1. #1
    Join Date
    Jan 2007
    Location
    Michiana
    Posts
    3,069

    Another Japanese Style Toolbox

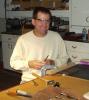
    The weather is promoting more time in the shop. I needed a place to store some recently acquired carving knives and gouges and I had small board of leftover QSWO. I resawed it on the bandsaw and wound up with grain matching sides and a bookmatched bottom. The top is a scrap of QSWO plywood, also a leftover from an old project. Construction is glued M&T for the sides, with the bottom and other parts attached with a little glue and tiny cut brads as is traditional. It's pretty rustic. Finish is a 24 Hour fuming with diazo print ammonia (30%) followed by natural danish oil, shellac to seal, and paste wax. I love fuming. It turned the oak a nice toasty brown except for a streak that runs through the center of the board that apparently was free of tannins.

    49132705118_ac8e001467_k.jpg 49133198171_8bfd702e4a_k.jpg
    Last edited by Rob Luter; 11-28-2019 at 6:32 AM.
    Sharp solves all manner of problems.

  2. #2
    Join Date
    Mar 2015
    Location
    SE Michigan
    Posts
    3,225
    Rob, well done. I like the sap wood stripe...nice feature. Seems you have the fuming figured out...great color.
    I have to get some of my tools organized one day...that would make a nice winter project.

  3. #3
    That’s a cool look. Can you share your fuming process?

  4. #4
    Join Date
    Jun 2008
    Location
    So Cal
    Posts
    3,765
    Looks good. I like it

  5. #5
    Join Date
    Apr 2017
    Location
    Clarks Summit PA
    Posts
    1,744
    Nice box Rob.

  6. #6
    Join Date
    Jan 2007
    Location
    Michiana
    Posts
    3,069
    Quote Originally Posted by Phil Mueller View Post
    Rob, well done. I like the sap wood stripe...nice feature. Seems you have the fuming figured out...great color. I have to get some of my tools organized one day...that would make a nice winter project.
    Thanks Phil. They're a good project for using up leftovers. The design is very simple, but you can get fancy if you choose. The nice thing is that the size is easily scaled to whatever you want. The stripe isn't really sapwood. It runs right through the center of the board. I studied up on fuming and read that White Oak will sometimes have areas that are free of the tannins that darken the wood when exposed to ammonia fumes. You can't see them or tell they're there until the fumes darken the surrounding wood. You also never know how dark the wood will get. The pic below is another box I made this summer in a larger size. I fumed and finished it the same way but it turned out a little different. I guess that's the fun part. You never really know what you'll get.


    Quote Originally Posted by Prashun Patel View Post
    That’s a cool look. Can you share your fuming process?
    Glad to. It's a pretty simple process. Just prep the wood as you normally would to receive a finish. In this case I sanded to 220 grit. Blow off or brush off the surfaces to get the sawdust out of the pores. I use a Rubbermaid storage tote as a fuming chamber. I just fill a shallow dish with a couple ounces of ammonia and place it in the bottom. I place the project on finishing pyramids to hold it above the bottom, clear of the dish of ammonia. I snap the lid on and let it soak up the fumes for 24 hours. I've seen folks make larger chambers out of refrigerator boxes to do finished casework. When I was at the original Stickley factory and museum last year the Docent told us back in the day they had an entire room dedicated to fuming. They'd fill it with finished pieces and pump in the ammonia fumes. It must have made a powerful stink.

    Note: Do this outside as the fumes are quite strong. It was cold here when I fumed this box so I did it in my garage as it's easy to ventilate. I use industrial strength Ammonium Hydroxide at 29.5% concentration. (see pic) You can get this stuff at Blueprint shops. There's a reason the label is covered with cautions. Please heed them. You can use the household strength stuff (3%) but it takes days to achieve the same look. What's nice is the wood is darkened well below the surface so light sanding after fuming is not a problem.

    Once you get the look you want, remove the workpiece and let it air out. It will stink of ammonia for a couple days. My standard finish after that is danish oil or BLO followed by shellac and wax.


    49142787577_693f6de44a_k.jpg

    48498087661_3e8daf8b29_k.jpg
    Sharp solves all manner of problems.

Posting Permissions

  • You may not post new threads
  • You may not post replies
  • You may not post attachments
  • You may not edit your posts
  •