Page 1 of 2 12 LastLast
Results 1 to 15 of 20

Thread: Entry hall table for a niece - Part 2

  1. #1
    Join Date
    Feb 2004
    Location
    Perth, Australia
    Posts
    9,492

    Entry hall table for a niece - Part 2

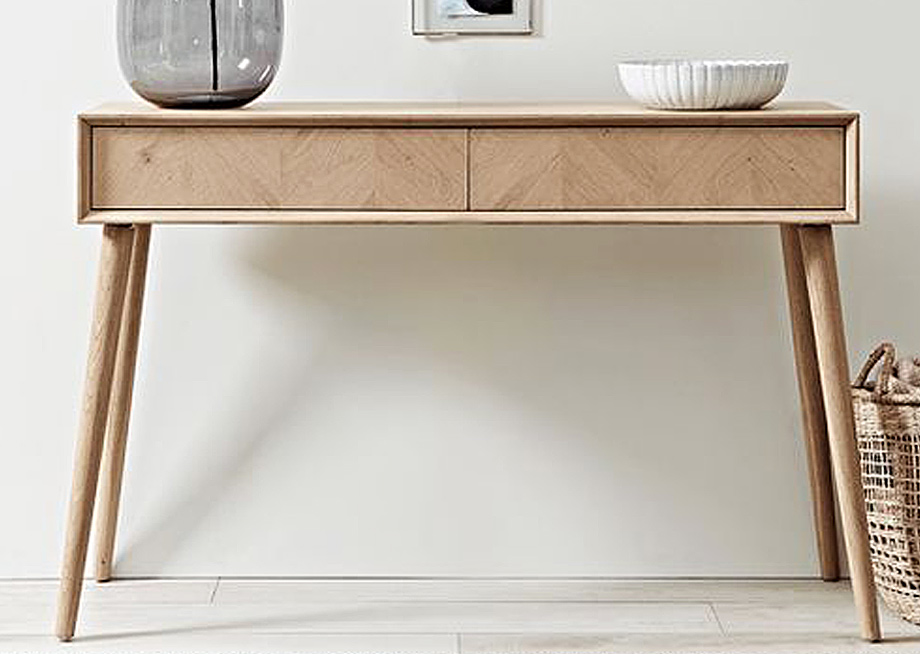
    We are building a version of this hall table ...


    We left off last time with basic preparation of stock from rough sawn boards ..


    A word of introduction before continuing: while I am best known for hand tool work, I am a blended woodworker and have a pretty full compliment of power tools, which I use. It is horses for courses - power does the grunt work and hands do the details and joinery. So there are machines here as well as hand tools, and I like to believe they coexist well in my builds, as they should.


    I began this session by turning the legs ...


    The Jarrah for the legs turned out a few shades lighter than expected, and I made an extra piece to experiment with different dye mixes. A final decision shall be made once the case is completed.


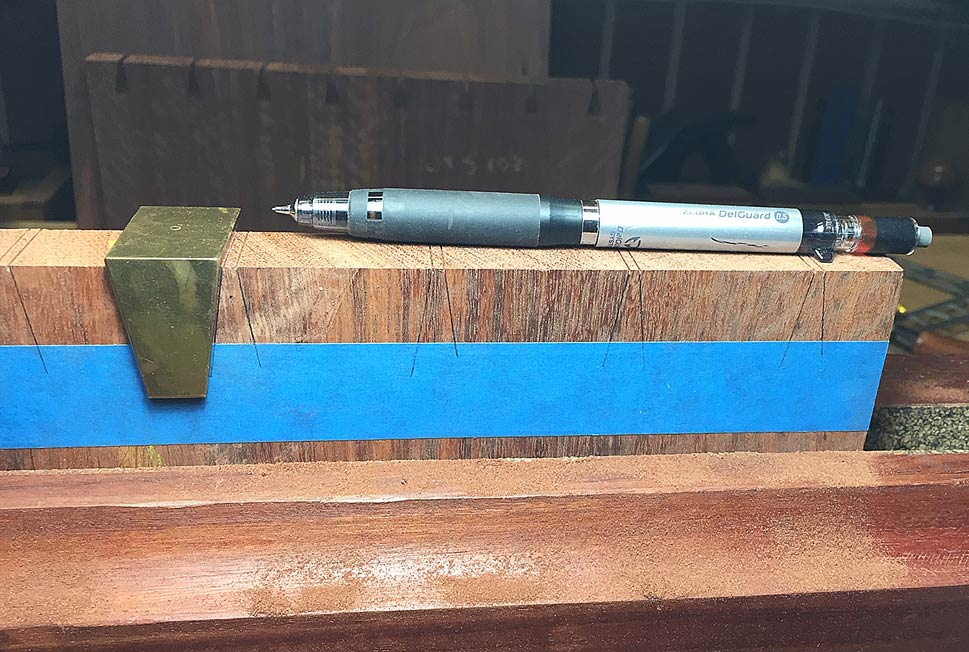
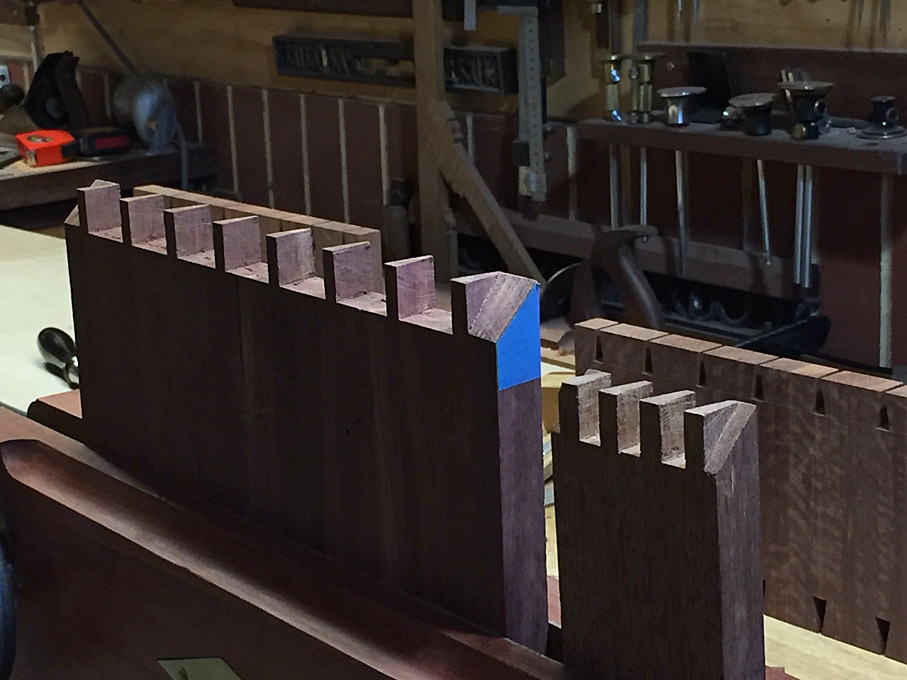
    The panels needed to sized, which involved measuring from the centre line of the book-matched panels. The quickest way to square this up was to mark a line (in blue tape), and plane to it ... much faster than using power saws, etc.


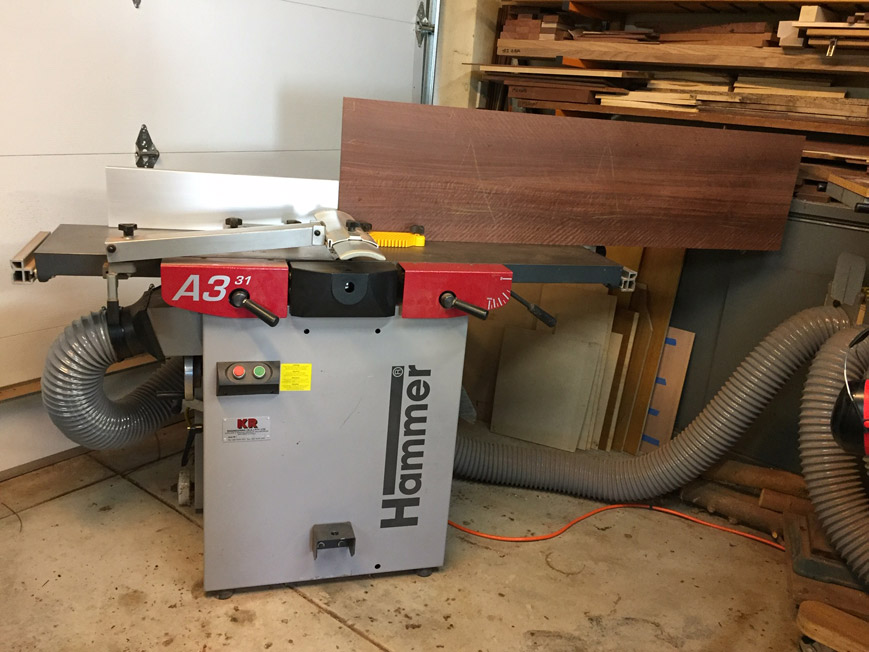
    Once done, you can square up on a jointer ..


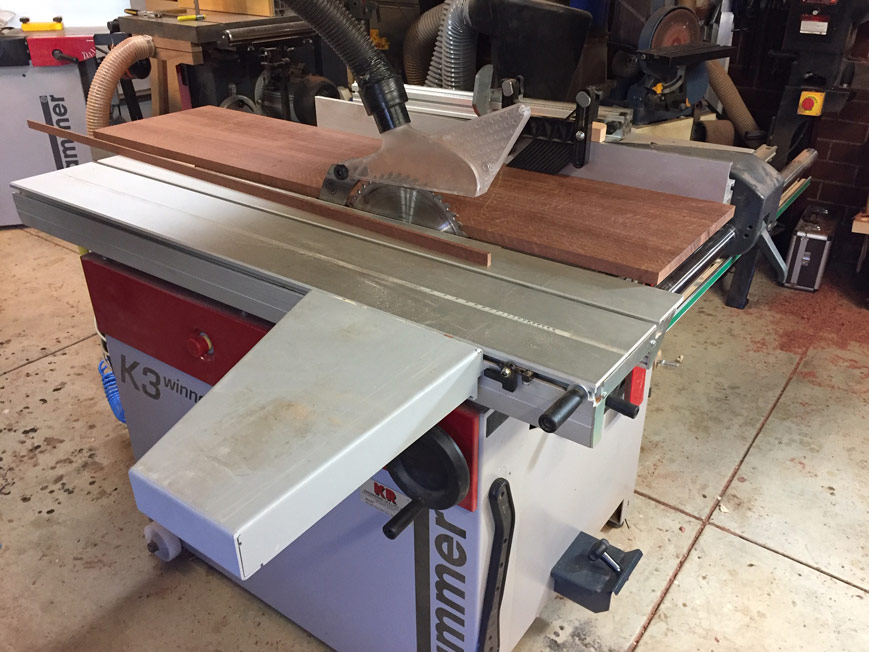
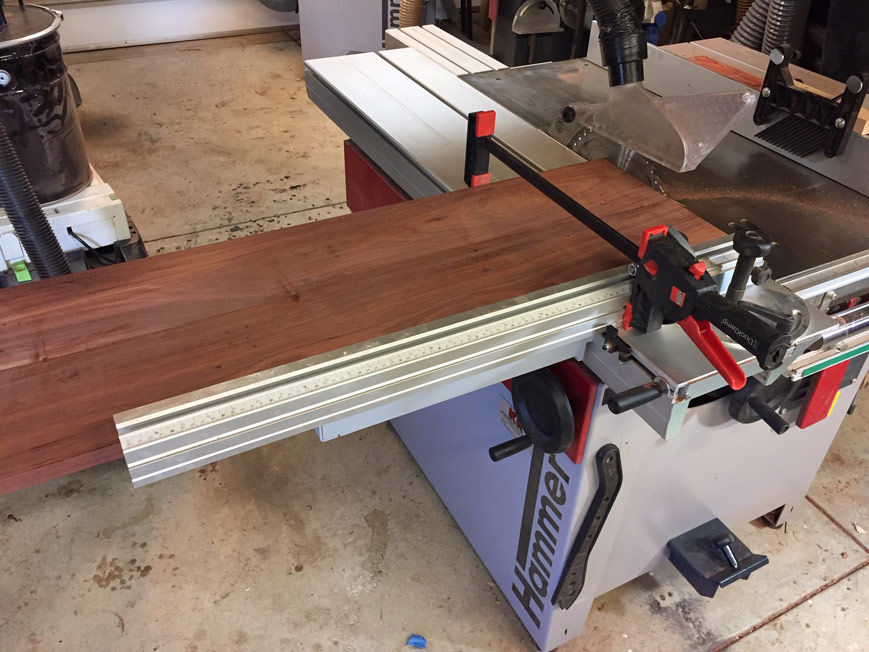
    ... rip to width ...


    ... and cross cut ...


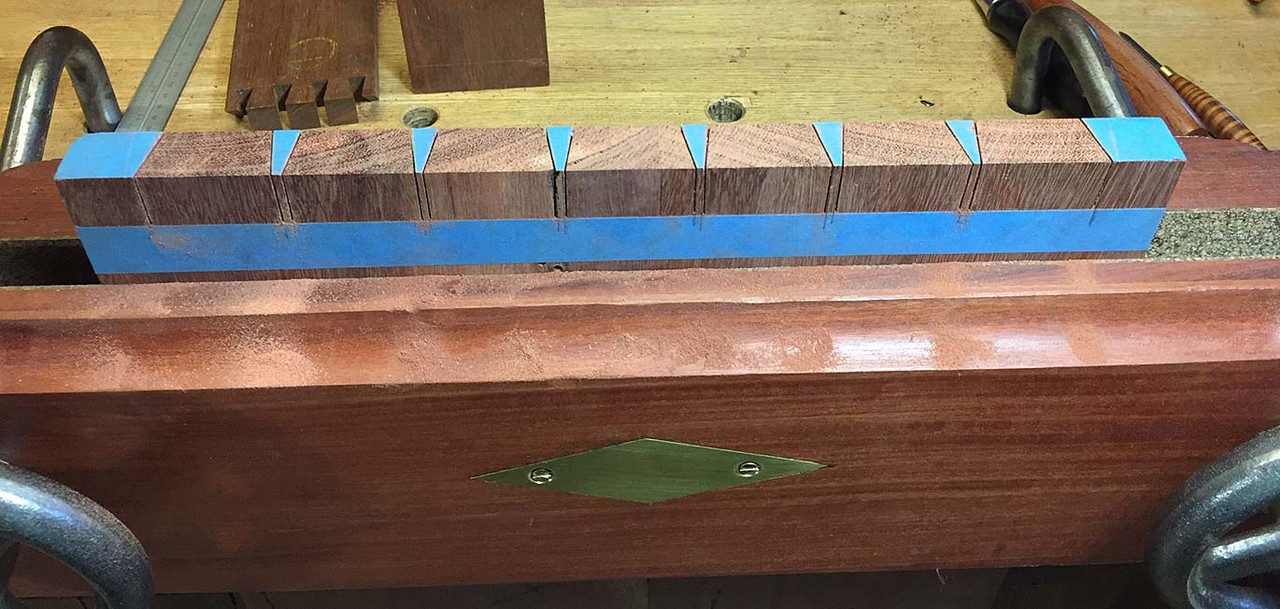
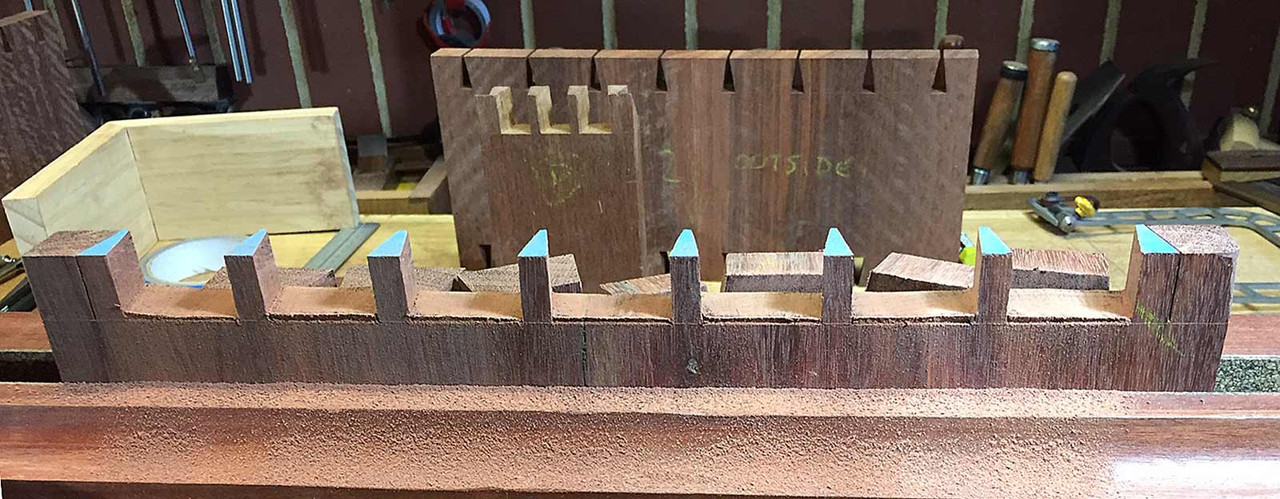
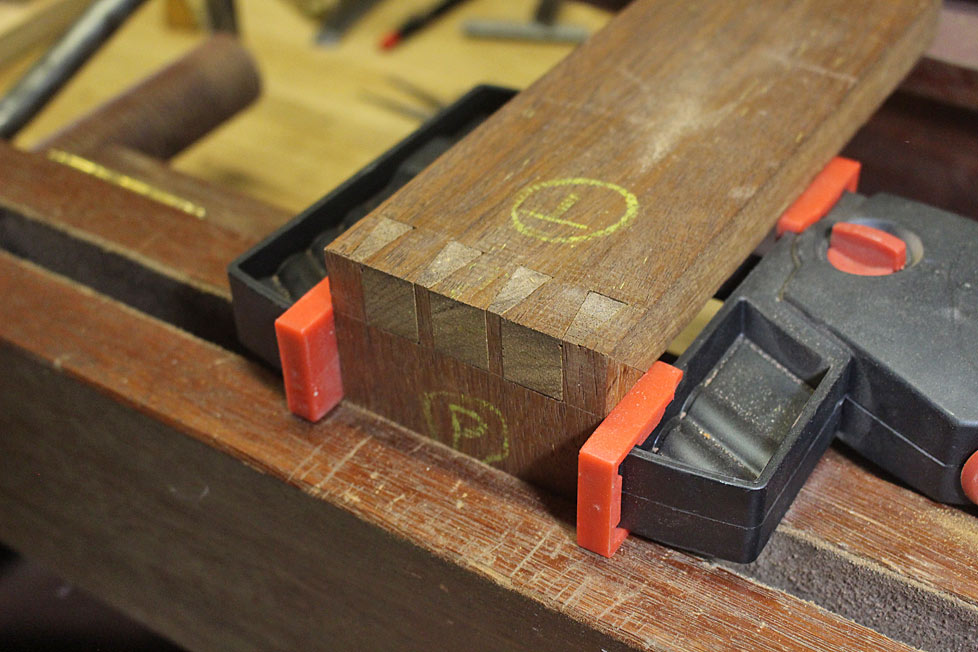
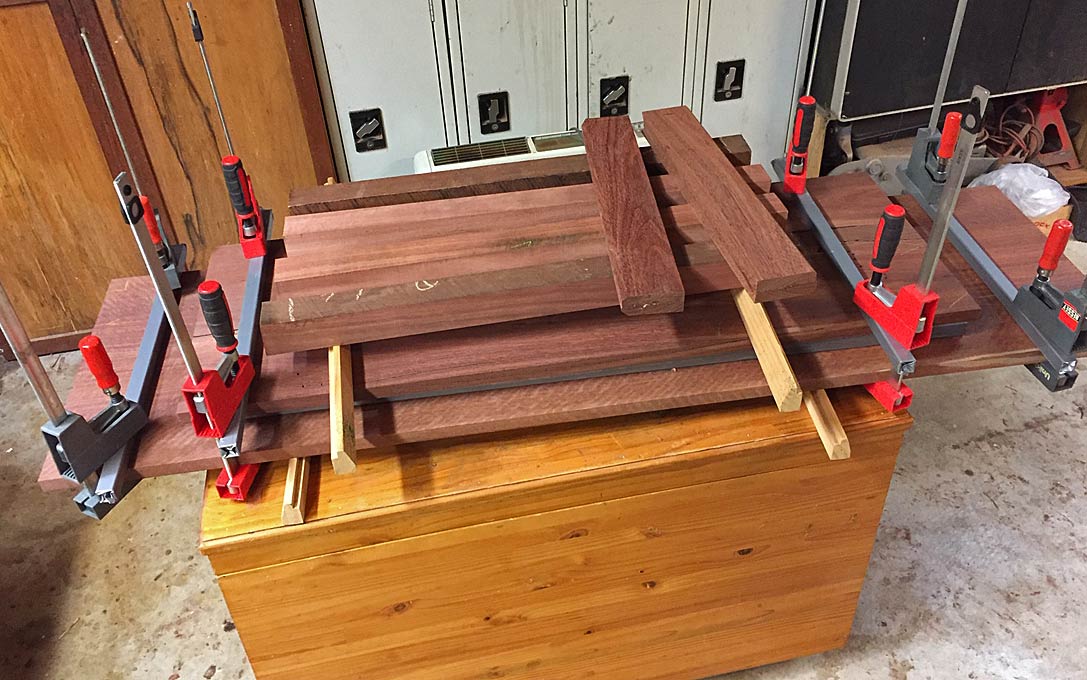
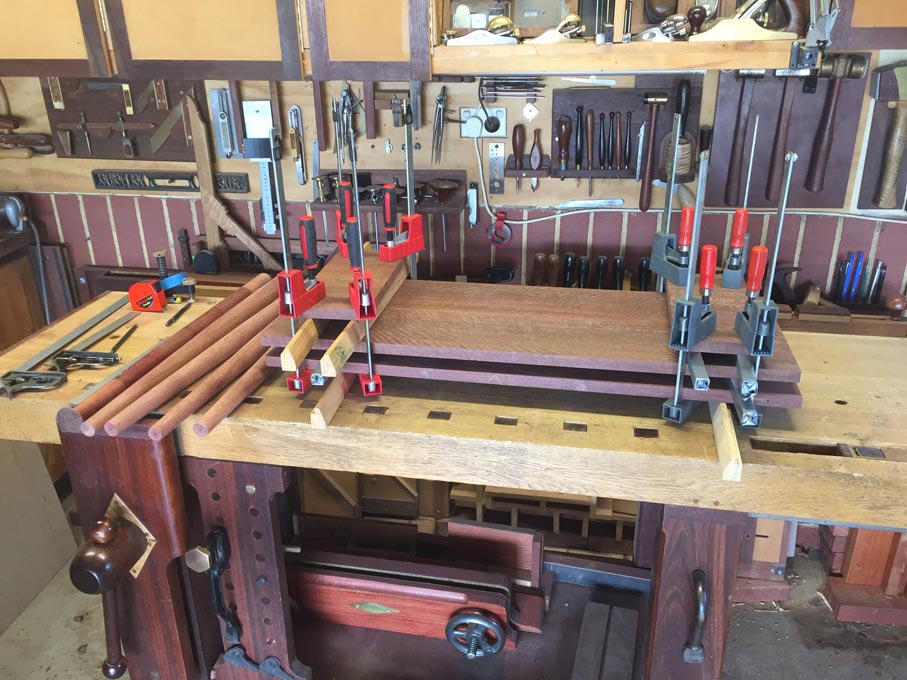
    Here are the panels for the case (sides yet to be dimensioned for height) ...


    Packed away for the night ...


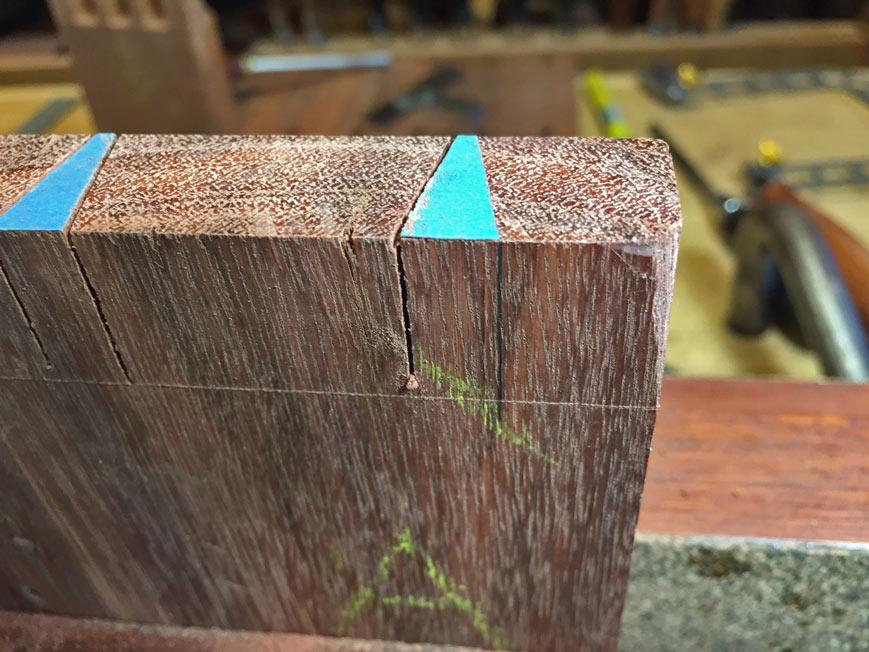
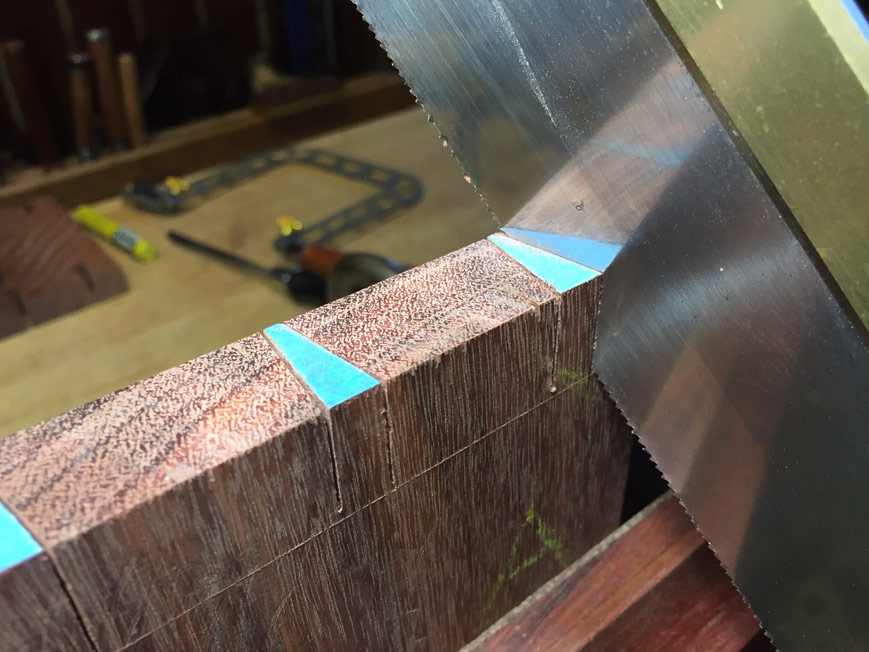
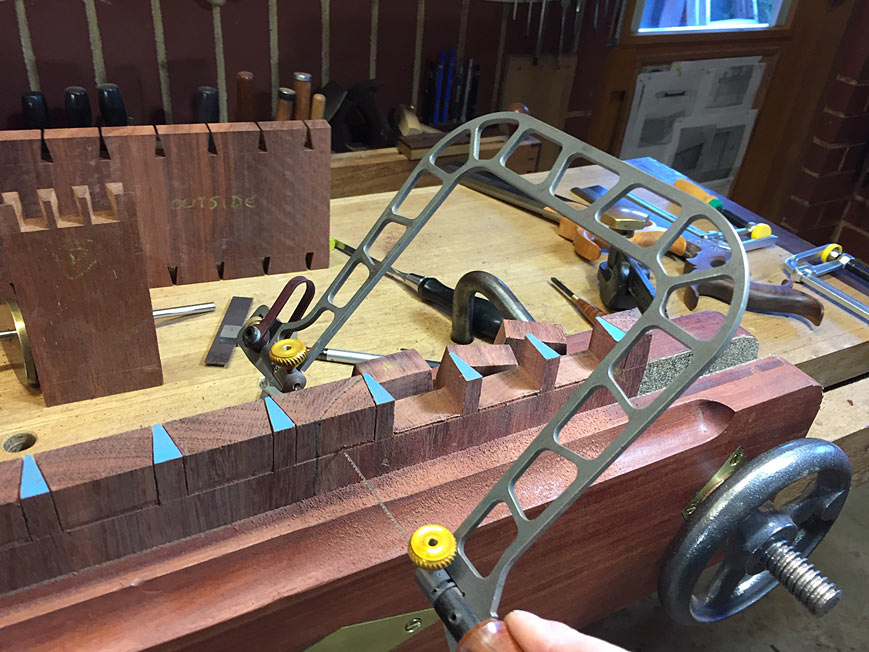
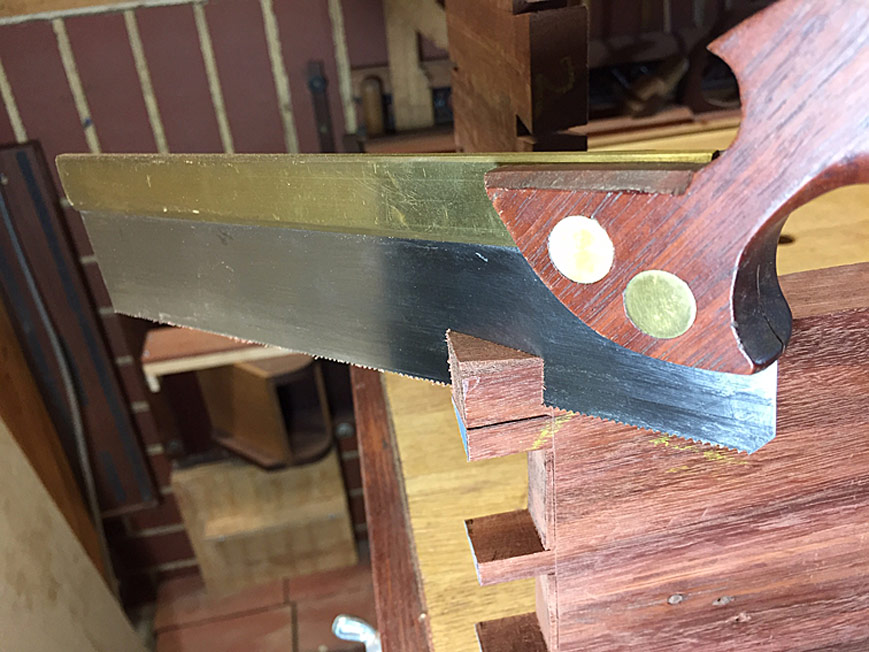
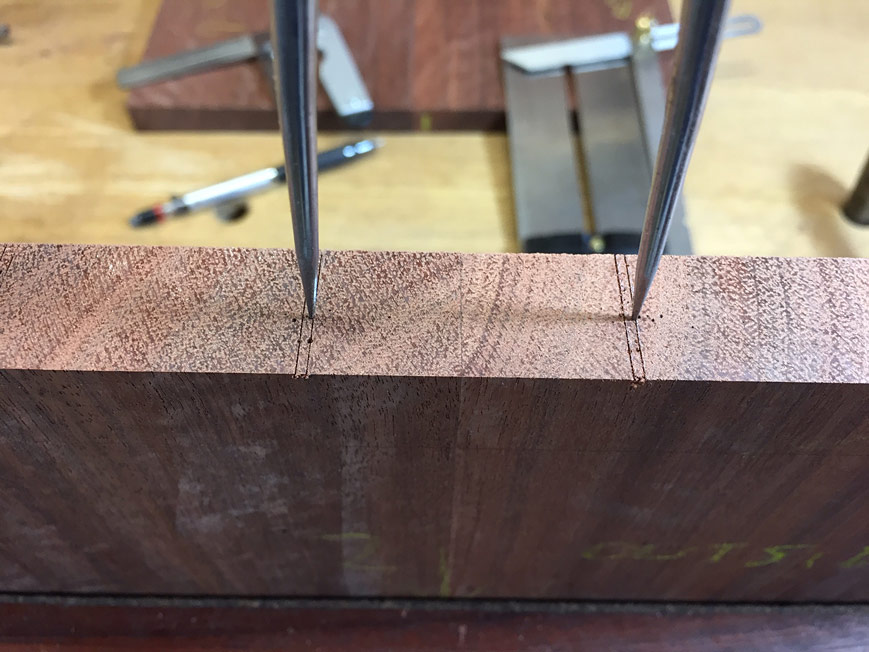
    When marking the dovetails, it pays to work precisely. Mark carefully ...


  2. #2
    Join Date
    Feb 2004
    Location
    Perth, Australia
    Posts
    9,492


    My favourite dovetail saw is usually the one I sharpened most recently. This is an original Independence Tools saw by Pete Taran (circa 1995) ..


    Completed side panels ...


    It begins to be a little more fun as I get to use one of the features I recently built into my new Moxon vise - the Microjig clamps (details of Moxon vise here: http://www.inthewoodshop.com/ShopMad...LastMoxon.html).


    These are used to hold the tail board to transfer to the pin board ...


    Here you see the transferred tails outline in blue tape (easier to see in the hard wood). On the left is a model of the mitred ends that will be part of this build ...


    Saw the pins ...


    Note that the end pins are not sawn on the outsides.


    Now turn the board around, and strike a vertical line at the outer pin ...


    Saw this on the diagonal only. Do both sides ...


    Place the board flat on the bench and create a chisel wall for each pin (earlier, this would have been done for each tail) ...


    The chisel wall will make it easier to create a coplanar baseline when removing the waste (by preventing the chisel moving back over the line). Do this on both sides of the board before proceeding.


    Now you can fretsaw away the waste.


    Try and get this to about 1mm above the baseline ...


    Here is a video of the process:


    https://www.youtube.com/watch?v=M6O4rY_0zQs


    To create the mitred ends, first mark ...


    ... and saw about 1mm from the line. This will later be flushed with a chisel for accuracy.


    And so this is where we are up to at the end of the weekend ...


    So will the sides fit ... or won't they .... mmmmm


    Regards from Perth


    Derek

  3. #3
    Join Date
    Mar 2003
    Location
    SE PA - Central Bucks County
    Posts
    65,859
    The figure on the panels is outstanding!
    --

    The most expensive tool is the one you buy "cheaply" and often...

  4. #4
    Join Date
    Feb 2010
    Location
    Collegeville PA (30 min west of Philly)
    Posts
    1,143
    Blog Entries
    1
    Really fun to read and walk through the pics (and to realize how farrrrrrrrrrrrr I have to go). Thank you! :-)
    - Bob R.
    Collegeville PA (30 minutes west of Philly)

  5. #5
    Join Date
    Aug 2013
    Location
    Princeton, NJ
    Posts
    7,295
    Blog Entries
    7
    Derek are you planning to chisel the baseline? I’ve been standing the board upright At the router table and using a bearing bit to clean between the pins, carefully using my fence as a pivot.

    Works nicely, and I don’t regret saving my chisels for other work.
    Bumbling forward into the unknown.

  6. #6
    Join Date
    Jun 2008
    Location
    So Cal
    Posts
    3,767
    I like the look of the piece. I don't like the evenly spaced dovetails. Looks to mechanical or machine made. I would like too see the number cut down to half random space. Or none at all.
    Good luck

  7. #7
    Join Date
    Aug 2013
    Location
    Princeton, NJ
    Posts
    7,295
    Blog Entries
    7
    It can't be machine made, the pins are too slim for that.
    Bumbling forward into the unknown.

  8. #8
    Join Date
    Feb 2004
    Location
    Perth, Australia
    Posts
    9,492
    Quote Originally Posted by Andrew Hughes View Post
    I like the look of the piece. I don't like the evenly spaced dovetails. Looks to mechanical or machine made. I would like too see the number cut down to half random space. Or none at all.
    Good luck
    Andrew, the evenly spaced dovetails on the case are deliberate. This style requires symmetry. As Brian mentioned, there is no way a machine could make these, and I do not know of any machine that could mimic where I am going with mitred ends.

    Regards from Perth

    Derek

  9. #9
    Join Date
    Feb 2004
    Location
    Perth, Australia
    Posts
    9,492
    Quote Originally Posted by Brian Holcombe View Post
    Derek are you planning to chisel the baseline? I’ve been standing the board upright At the router table and using a bearing bit to clean between the pins, carefully using my fence as a pivot.

    Works nicely, and I don’t regret saving my chisels for other work.
    Brian, I did think of the router for the baselines. I do this with half-blind dovetails. With through dovetails, there is so little left to chop away after fretsawing ... well, there is about 1mm or so. As Jarrah goes, this Jarrah is well seasoned and awfully hard stuff. I was having my thoughts of a router when clearing the waste!

    You will have to make us a video of your method. I’d be keen to see this.

    Regards from Perth

    Derek

  10. #10
    Join Date
    Feb 2004
    Location
    Perth, Australia
    Posts
    9,492
    A postscript to this, Brian. It has become too rare that discussions about techniques take place on forums. One of the reasons for my posting is to show mine. So thanks again for commenting in this regard. Comments/offerings from others are invited!!

    Regards from Perth

    Derek

  11. #11
    Quote Originally Posted by Derek Cohen View Post
    Andrew, the evenly spaced dovetails on the case are deliberate. This style requires symmetry.
    Derek
    I don't think I understand. What do you mean, that this style requires symmetry?

    Very nice project BTW, look forward to seeing the continued progress and end result.

    Thanks

  12. #12
    Join Date
    Feb 2004
    Location
    Perth, Australia
    Posts
    9,492
    Hi Edwin

    The simple and symmetrical lines of Shaker and Mid Century furniture designs are quite restful, because they are not imposing. Symmetry aids in creating a sense of balance and a "quietness".

    Regards from Perth

    Derek

  13. #13
    Join Date
    Apr 2013
    Location
    Stone Mountain, GA
    Posts
    751
    Looks great, Derek. Those boards are gorgeous. You do exceptional dovetails.

    I've done the mitered ends on dovetails a few times and I always found that getting that miter in exactly the right place was tricky. It seemed like I needed to leave a tiny bit extra on the miter, compared to what you would get if you struck a knife line for the miter off of the DT baseline. Otherwise there'd be a little gap at the miters. Couldn't quite figure out why. Seemed like it required a lot of trial and error and test fitting that I'd rather avoid.

    Are you just knifing a miter line off of the baseline and taking it down to that?

  14. #14
    Join Date
    Feb 2004
    Location
    Perth, Australia
    Posts
    9,492
    Hi Robert

    I agree that these are very tough dovetails to pull off. The mitres add a third dimension to work with.

    My thought is that, if you have a gap at the mitres after bringing the dovetails together, then most likely the dovetails are not coming together cleanly. Perhaps a bit of waste inside, just enough to prevent the corners closing.

    I've built a few cases this way now. The first was only a year ago. Here is an article I wrote on the full process: http://www.inthewoodshop.com/Furnitu...feeTable2.html


    Regards from Perth

    Derek

  15. #15
    Join Date
    Nov 2009
    Location
    Ellsworth, Maine
    Posts
    1,808
    Quote Originally Posted by Brian Holcombe View Post
    Derek are you planning to chisel the baseline? I’ve been standing the board upright At the router table and using a bearing bit to clean between the pins, carefully using my fence as a pivot.

    Works nicely, and I don’t regret saving my chisels for other work.

    I would love to see this technique in video. I often use a router to get the bulk of the waste out, especially on half-blind dovetails but still usually stay just shy of the baseline. This is done holding the router and clamping the board in a vise flush with the bench top so that the router has something stable to sit on.

Posting Permissions

  • You may not post new threads
  • You may not post replies
  • You may not post attachments
  • You may not edit your posts
  •