Page 2 of 4 FirstFirst 1234 LastLast
Results 16 to 30 of 46

Thread: Jointer testing and set-up: What tools / gauges do I need?

  1. #16
    Join Date
    Jul 2007
    Location
    NE OH
    Posts
    2,626
    You could use it on a planer if there is a good flat reference surface adjacent to the cutterhead, but I'm guessing most planers don't have that. I know my lunchbox planer doesn't.

    I don't think that other tool you link to would be any more versatile. It lacks the nice machined square back end of the oneway. The amazon photo of the oneway cuts off the part of it I'm referring to, you may want to look at it on the oneway site.

    Thing is, once you have a decent dial indicator (the one that comes with the oneway seems decent) there are all manner of bases with adjustable beams that will hold it and position it to make useful measurements.

  2. #17
    Join Date
    Feb 2011
    Location
    Central WI
    Posts
    5,666
    Brian lamb at lambtoolworks.com makes a nice indicator stand similar to oneway. A dip across the width of the table is a problem as is out of co planar if looking at a wedge type jointer. Problems near the head are worse than being out of flat at the ends of the tables. Cheaper wedge jointers with 6' tables can be out of flat up to .010 and still considered within spec. My DJ 20 has an .008 dip on the end of the infeed and a few thou at the lips. My old larger jointers much less but both can make flat boards. I'm not disagreeing with any of Doug's methods . When you set the straight edge on the outfeed and bring up the infeed, there isn't much unsupported length to be concerned with. Dave

  3. First off, I am 76yrs old, served an 8,000 hr apprenticeship as an industrial mechanic/millwright and worked in mechanic pre wrenching jobs for yrs, so I know my way around machines. I've also been a helo mechanic, car & MC mechanic too, retired auto tech teacher.
    Meanwhile I'm a lifelong woodworker. I use two tools to set the blades on my 8" jointer- a high quality carpenters level and a 12" Starret scale blade. I do own dial indicators w/magnetic bases and much much more but those two tools serve me well in the end. My jointer is an old one from the defunct Indiana mfg., and has a 1hp motor thats a leftover from my Grandfather's stuff-it's about 3X's the size of modern motors but in practice it gets to speed quickly and that huge armature once spinning is ideal for the machine. meanwhile, my Delta 14" bandsaw which is about 45 yrs old is on the 3rd or 4th motor and maybe the 3rd switch!

  4. #19
    Join Date
    Aug 2013
    Location
    Princeton, NJ
    Posts
    7,295
    Blog Entries
    7
    Doug is certainly correct in that checking crossways will show twist, that said in my opinion there is nothing wrong with using winding sticks, it will make a twist very obvious. If the table has a twist in it, I would certainly pass on it.

    Check your winding sticks against a reference, like a granite surface plate and verify them to be accurate. Winding sticks out of parallel will have you thinking everything in
    the shop is twisted.

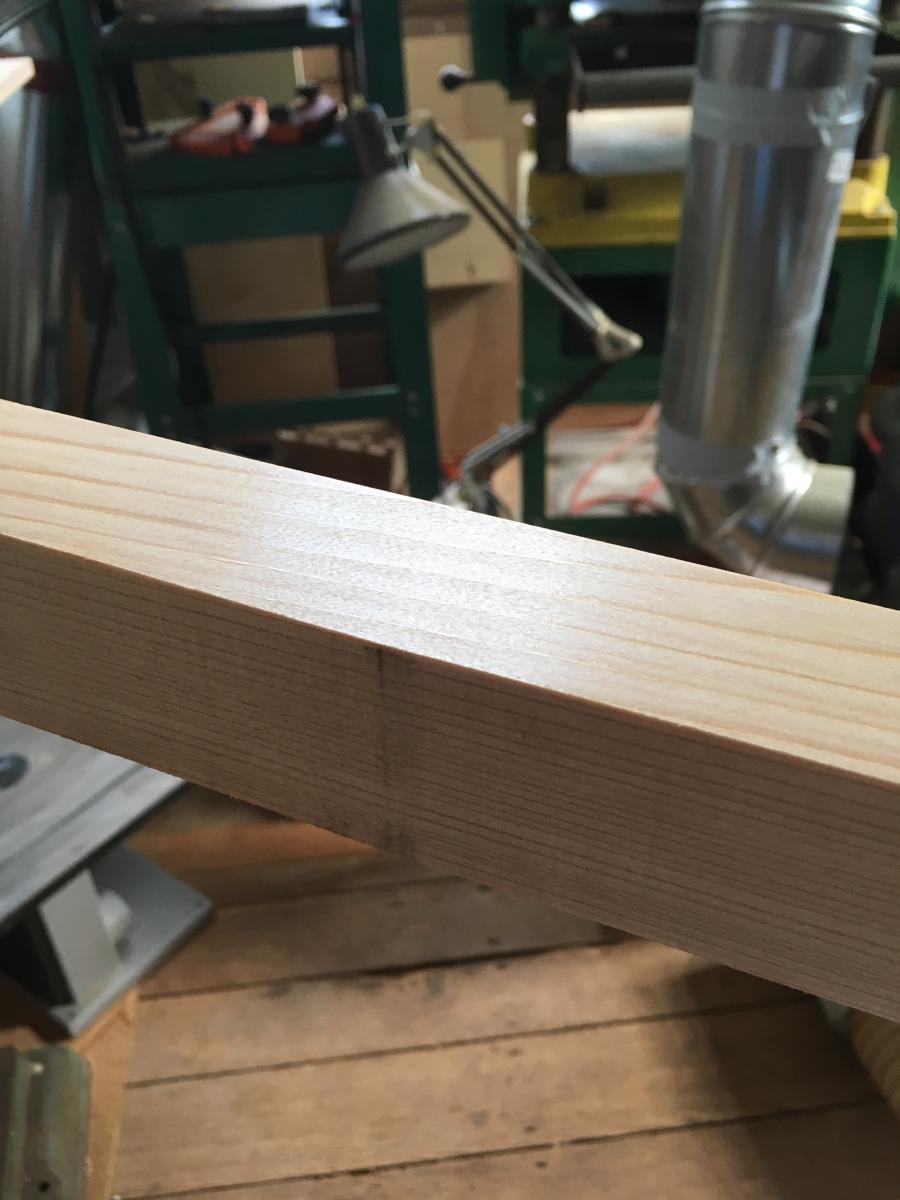
    Personally, I would want a straight edge at least as long as one table, use it to verify that the tables are flat (or otherwise) then use it to make them parallel to one another.

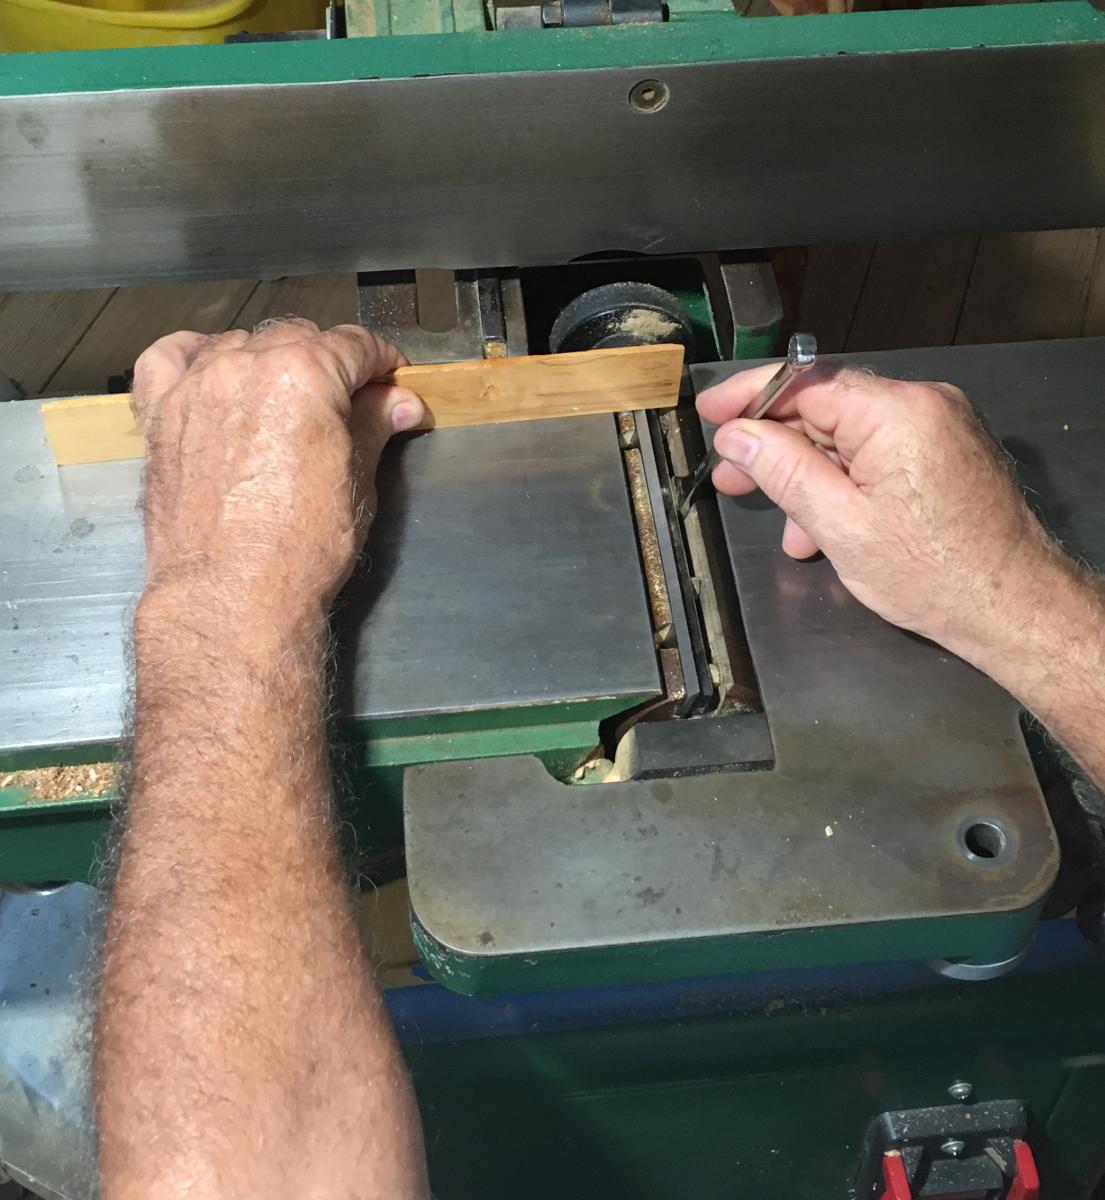
    I don’t use a one way gauge for outfeed table height, I just flatten a board’s edge, then set the height to the point at which rotating the head (by hand) will just barely pull the board. This is likely .001-.002” above the outfeed.

    Outfeed too high will have the board your jointing bump into the table edge as it goes over, outfeed too low will cause snipe at the end of the board.
    Last edited by Brian Holcombe; 11-25-2019 at 7:50 AM.
    Bumbling forward into the unknown.

  5. #20
    Join Date
    Aug 2013
    Location
    Princeton, NJ
    Posts
    7,295
    Blog Entries
    7
    A carpenter’s level is not a straight edge. Consider that a Starrett straight edge 72” long has a 3.15” x .276” section and I believe they are hardened steel. They are accurate to .0002”/ft to over 72” that is .0014”

    A Stabila level is rated accurate to .5mm/m so over 72” that is .036”. Ok for checking door frames but pretty useless for checking machinery.
    Bumbling forward into the unknown.

  6. #21
    Join Date
    Apr 2013
    Location
    Stone Mountain, GA
    Posts
    751
    For checking a prospective used jointer I would just be checking that each table is flat and not twisted and to see if there are gross errors in table alignment. So a good ~36" straightedge and some feeler gauges are the main tools. Lee Valley sells a nice steel 36" straightedge, supposed to be +/- 0.0015" over its length. You can check the face of the fence with this as well. The rest of the inspection would be trying to assess the state of the cutterhead and motor bearings, listening for strange noises or electrical issues, etc.


    For setting up a jointer you've taken home, you need those tools above plus a dial indicator and base, and a good square. And to really check the table alignment, you need a longer straightedge. Brian pointed out the problems with levels, and the machinist straightedges that are long enough are really, really expensive. The best solution for me is to make a pair of wooden straightedges, match planing them with a jointer plane then flipping over onto the other and checking for gaps. The straightedges need to have some depth to them to stay rigid enough to plane accurately, and you need to support them well while planing. If you do that then it isn't too hard to get them to 0.001" or less. I think the ideal shop-made straight edges would be a wooden I-beam, similar to a floor joist. Two 1x1 hard maple strips with a 1/4" BB or MDF web and a total depth of 6 or 8 inches.

    As for the dial indicator, I basically use the method Bob Vaughan shows in this video: https://www.youtube.com/watch?v=VRnrWOwun68

    He just uses a regular magnetic indicator base. That works but my indicator stand is not the best and I don't completely trust it not to move during the process, so I made a sort of wooden version of the Oneway gauge out of a block of SYP. It has three points of contact on the bottom and enough mass to stay in place while I move the knives/cutterhead. Indicator mounts to it with a wood screw. Works great. The Oneway gauge looks really nice as well.

    You want to get a broad convex tip for your dial indicator. I ordered a set of tips off of amazon, they are kind of a joke tbh but one of them works well enough for this. I would just order an actual starret tip from MSC or someplace like that.


    Bob Vaughan made a video for planer knives as well: https://www.youtube.com/watch?v=uSM7Jrg34a8

  7. #22
    Join Date
    Jun 2005
    Location
    Shorewood, WI
    Posts
    897
    I recommend "Care and Repair of Shop Machines" by John White. He not only shows how to adjust machines including the jointer, he also shows you how to make test bars to adjust flat and parallel to high precision. These bars are simple and cheap, and while they work to set jointers, they are not straight edges useful for other purposes. The idea is to get three test points that are in line accurate to .001" or better, and to use these judiciously to align your jointer tables. You need a set of three bars at each size: one set the length of your entire jointer span, and another the length of each bed. The trick is to get the points in line without an expensive reference, and he shows how to do that.

    This is not to say that machinist quality tools are not useful, but that if setting up the jointer is their only planned task, you may be able to get good results while avoiding paying for them.

  8. #23
    Join Date
    Aug 2013
    Location
    Princeton, NJ
    Posts
    7,295
    Blog Entries
    7
    A key point is that the OP intends to inspect a machine and then determine if he wants to purchase it. Four points is excellent for setup but it won’t tell you much when used for inspection.

    Two tables can be adjusted to agree on four points even if they’re not flat, but they may not joint a board well.
    Bumbling forward into the unknown.

  9. #24
    Great stuff, guys. thanks. And Alan I'll definitely check out that White book. From what you describe, that's some kind of "deluxe winding stick" method, using 3 sticks. I'm very curious about this.


    My big problem is what has been discussed at the end here: finding a reliable straight edge. I have a number of long carpenter levels, but none of them butt together without any daylight in-between.

    I was thinking about getting one of the Lee Valley units, as they are reasonably priced, though $122 is still a bit steep. (I assume it's the same one Robert mentioned)
    https://www.leevalley.com/en-ca/shop...-straightedges

    I'm also going to check my EZ track rails. They are thick aluminum. Maybe one of them will work

    I also am wondering if one could possibly use a laser level? I have a pretty expensive one, and it can be locked so it doesn't have to be level. I'm thinking maybe putting it on a tripod, then getting the output right at the level of one table, & shining it across. You get the idea. Well, maybe......
    Last edited by Allan Speers; 11-25-2019 at 8:41 PM.

  10. #25
    Quote Originally Posted by Allan Speers View Post
    I'll soon be buying a used 8" jointer, and I'm trying to determine what tools I'll need for a full check, & later setup. This would include testing flatness, twists, etc. The tables, the fence, and whatever else.

    I know the basic concepts, but I can't figure out which exact items are best, to get good accuracy without wasting money on uber-machinist type stuff. Can anyone simply post a list, of what they would recommend I buy?
    (And maybe even some ulrs for recommended instructional videos?)


    thanks a ton.
    You don't need much. You might lay a level across both tables and see if they are coplanar. Personally I've never seen one that is not but it wouldn't hurt to check. From there just make sure each of the knives is level with the rear table all the way across the width. If one is sticking up just a little it will be doing all the cutting. All you do to check the knives is lay a steel rule across the rear table edgewise and gently rotate the knife so it barely touches the ruler. If you get all the knives set like that it should cut nearly as smooth as a hand plane.

  11. #26
    Join Date
    Feb 2014
    Location
    Lake Gaston, Henrico, NC
    Posts
    9,030
    Copying, and pasting this from a thread I started called: Quick and Easy Setting Straight Jointer Knives on another woodworking forums.
    I think I forgot to mention that the first thing I do with a jointer is take the springs, and jack screws out. I change jointer knives fairly often. They are sharpened by hand on my Sigma water stones to as sharp as I can get them, which is way sharper than they come back from any sharpening service. Of course, they don't stay that sharp long, but if I have a few hundred small parts to run, as in making a bunch of window sash, it saves a lot of time in the long run, to finish off the jointer. This process takes just a few minutes. You can feel less than a thousandth of an inch.
    I do have a pretty fair assortment of indicators with various stands, and they do get used for planer knife setting, and planer adjustments, but I can do at least as good of a job with this simple method. You do have to be aware of wear on the wooden strip in the process, and only use clean, unscalloped sections for the final feel.

    You can see the machine marks on that test piece of wood, if you look closely, and have a large monitor. It was not fed unusually slow, but not slammed through either. Light is reflection from a North window.

    Last picture shows all the tools needed for precision knife setting. The right angle pick is to pull a knife up, if it starts too low, or you push it too low, for some odd reason.


    Tools needed: angle hook pick to pull knives up above final position if they drop too low when putting them in behind the gib
    wrench to fit gib screws
    strip of the hardest wood you have. I don't know what size this piece of Boxwood is, but it's a good size for the job. A wood not so hard would need to be a little thicker so it could push the knives down without such a large dent sliced into it.
    The trick is to install the knive so the gib will hold it where you put it, but not slide up, or down without help. Tighten until you feel a little resistance, and then back off a hair.
    Wrench starts on one of the center gib screws, and rotates the head back and forth. Tail end of the wood stays down on the outfeed table, so it can't possibly push the knife down too far. Rotate the head back and forth while gently pushing down each end of a knife. When you can rotate the head, and feel the knife brushing the wood, ever so lightly, on each end, tighten that screw that the wrench is on, and then after checking both ends again, tighten the other screws.
    Same for the other knives. Keep moving the position of the wood so the knife is not resting in any tiny groove. Takes maybe 20 seconds per knife, if you don't get in a hurry.
    No need to measure anything, or how far the knife can pull the wood.
    Test run a piece through the jointer. Some people I've taught this to end up with a little snipe. That's why jointers have adjustable outfeed tables. I use that adjustment a lot more than most people I expect. One reason some like to leave the knives proud of the outfeed table plane is so as the knives wear, you can still straighten a board. I just adjust the table at that point, but run it back up the next time I set the knives so it doesn't eventually get lowered too much. To adjust the outfeed table, learn which way it goes while you have knives out, so you don't have to chase it with fresh knives.
    I wouldn't mind having one of those Byrd heads, but the time necessary to change those cutters would be a little maddening for me. This way, if you need to run finished sides on the jointer, it doesn't take long to change a set, and saves a lot of time sanding.
    Picture of wood is piece of Cypress run against the grain. Freshen up the edges of your setting strip while the knives are fresh, so it will be ready to go next time.

    [*]
    Last edited by Dennis Peacock; 11-26-2019 at 10:37 AM.

  12. #27
    Join Date
    Feb 2014
    Location
    Lake Gaston, Henrico, NC
    Posts
    9,030
    Some will ask how many thousandths proud are the knives after I set them like that. I measured it a long time ago, with one of my dial indicators, but since it doesn't matter a bit to me, I forgot.

    These window sash have every part finished on two sides off the jointer, and not touched again. There were 38 of them total, and they are exact reproductions of the original ones that only parts were left of. They're in an 18th Century museum house. The inside of the Heart Pine sash were not painted, so the surface did matter. Everything else wooden in there is hand planed, but it wasn't worth the trouble for the sash.

  13. #28
    Join Date
    Jun 2008
    Location
    So Cal
    Posts
    3,768
    Excellent work Tom.
    Aj

  14. #29
    Join Date
    Jul 2007
    Location
    Inkerman, Ontario, Canada
    Posts
    1,403
    Nice work on the windows Tom, I need to get the courage to start making the replacement windows for our 115 year old house, i have been avoiding it for several years.

  15. #30
    Join Date
    Feb 2014
    Location
    Lake Gaston, Henrico, NC
    Posts
    9,030
    The full process should be in pretty good detail, with pictures, on my website.

    edited to add: The ones in that picture haven't been pegged yet. Just like the old ones, I don't use glue. That allows you to replace parts 200 years (or more hopefully) into the future, by driving the pegs out. Picture is 1798 sash that had two broken glazing bars.

    Last edited by Tom M King; 11-26-2019 at 8:54 AM.

Posting Permissions

  • You may not post new threads
  • You may not post replies
  • You may not post attachments
  • You may not edit your posts
  •