Results 1 to 9 of 9

Thread: Jewelry boxes

  1. #1
    Join Date
    May 2008
    Location
    MA
    Posts
    2,258

    Jewelry boxes

    Like many of my projects, this one came up on a whim. And has woven in with some other projects including some shop upgrades and a couple of projects with my daughter.

    It is unique to me, in that for the first time ever in my life I am following a set of plans. This came about due to one reason: volume. I needed to build 4x of everything. I was perusing the internet a while back looking at different 'small' projects. I ran across a variety of jewelry boxes that I liked, which many were of the same conceptual designs of a center column of drawers and a door on each side. Some of these builds are masterpieces, and I may get to that some day. But then I stumbled onto the 'Wood Whisperer' (via youtube recommended for me link I believe, for those that wonder just how all this big data tracking motivates us to buy stuff). He had a set of plans all ready to go. For $70. Yikes. There was some emotional block for me to build off set plans, let alone pay $70 for them.

    But its late October and Xmas is not that far away which means for me, anything that is going to be finished by xmas needed to be started last July... or earlier. So after a few days of 'thinking' about designs and drawing some up on cad, getting all the proportions right, tweaking everything around and generating component 2d drawings of them... I just paid up and downloaded his plans. Step #1 complete: Commitment to the project.

    I tend to hoard wood. Which means I have various pieces laying around, including some handed down to me from some elders that passed away, and a nice stack of cherry I picked up on CL for almost nothing. When this started I thought I would just use what I could dig out of my stash and it would have a sentimental aspect to it. My wife in particular likes those type of ideas (and my daughters would have something made by me, from wood from Grandpa Herk that although I have no idea where came from, could have easily come from a tree he cut down and milled off his property). My workbench is this (a tree he milled) and as such, makes it more satisfying to own/use.

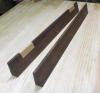
    So some nice old walnut that had been in the barn for a few decades, and a stack of cherry. And some hard maple I had. Should be able to put something together out of that. But when I dug them out (pita the way I have all my lumber stacked), it turned out some of what I thought was walnut was really cherry, just quite old and thus darkened. But I 'thought' I had enough walnut and could mix/match some of the other woods to serve the purpose.

    The plan calls for a plain grained carcass with some drawer fronts, and side panels in figured wood. Really this worked well for me. In fact, everything about the plan was well thought out. I am not one to sit through hours of videos (just dont like this new way of learning, prefer written and find written instruction much faster for me to use), but all the drawings are there and although in the past I have always heavily modified any plans/concepts I see, for this one I did not feel compelled to do so. The design approach and concepts resonated with me. No need to reinvent.

    All the while I am eyeing a piece of lacewood I had picked up cheap from many years ago. Quite a small section, about 6" wide and 2' long. And wondering if I could get thin laminations out of it enough to veneer the drawer fronts and side panels. I have never done veneer. And so it began.
    Last edited by Carl Beckett; 10-21-2019 at 8:59 AM.

  2. #2
    Join Date
    May 2008
    Location
    MA
    Posts
    2,258
    As a test, I simply set up my bandsaw to take a 'pretty thin' cut of the lacewood, and simply pushed it through. Cut like butter. This stuff is pretty soft (and later I learned brittle). My blade is an older RK with quite a thin cerf (thinner than the regular blade for some reason, that I never investigated). And recently I had sent it back to the factory for sharpening. So out of a 3/4" thick piece, I was able to slice 6 thicknesses (with a thin sliver of waste leftover). Pretty good. And by my calculations enough to do two boxes on the side panels and drawer fronts.

    But. I was a little short on walnut, after laying out the carcass and basic pieces. And I needed to do 4 of these boxes. So off to the store I go to get a piece of walnut and some other veneer to do the other two with. After finding one single piece of walnut, that was complete crap but that they wanted an absolute fortune for (still sore about that), I ran across a piece of quite nice figured maple at a reasonable price. So measured it a bit and decided tiger maple for the other two, and it goes well with cherry as a combo. So two cherry/tiger maple, and two walnut/lacewood combo. And I am off.

    I started out by simply chopping big pieces of wood into little pieces of wood. I needed to be sure I had enough material since I knew it was quite close. Anywhere I was short I simply substituted cherry or maple, since I had a lot of that.

    There is a basic carcass which is a base/top, then sides, then back and a top shelf panel. Then drawer fronts, sides, backs, and bottoms. 5 drawers plus a fake front for the top tray. Then side rail/stiles (two sets), with panels. And some smaller pieces (drawer runners, handles, feet, etc). So after an afternoon of chopping up wood my workshop is a mess with dust everywhere, my lungs are hating me, and the entire project went on hold while I upgraded the dust collection. There is a thread in the workshop section on this, but I added an overhead DC for the table saw, and built a remote relay switch. It worked great. But before stopping I managed to get everything sized (which might have been a mistake, more to come on that). And piles of little pieces of wood all over the place. My workbench was stacked with pseudo organized piles of roughly dimensioned material.

    20190915_124636_resized.jpg20190915_124642_resized.jpg20190929_132549_resized.jpg

    (note I had not intended to document this build, so only have a few random pics but did snap some from time to time)
    Last edited by Carl Beckett; 10-21-2019 at 9:33 AM.

  3. #3
    Join Date
    May 2008
    Location
    MA
    Posts
    2,258
    I decided to build the side frames first. Mostly because once I had material identified for the drawer fronts, I wanted to get the panels done to confirm enough of similar material for them. This is probably a habit that causes me more grief, and affects my projects, more than it should. I am always trying to get 100% wood utilization. I dont mind a 'less than perfect' piece of wood, and often even prefer it (Wabi Sabi). But someday I will try starting from a generous supply of perfectly dimensioned/flat material. Maybe (ok, probably not but it might be worth trying 'once' to learn first hand how much more efficient the work would be - I spend WAY too much time trying to make a piece useful.

    The side frames are nothing more than a rail/stile set, with the corners dovetailed together. A groove goes around the inside edge to hold a panel. The panels are either the tiger maple, or lacewood lamination. On one I used a maple backing for the lacewood and on the other I used cherry (in hindsight I would have done all cherry, it matches the lacewood color a little better but oh well, some might actually prefer the contrast of the maple/lacewood - just for me if it becomes too many colors I feel it is overdone). Anyway, the whole mentality of this project is 'onward!' - get it done and dont overthink it.

    So I setup the wood rat and knocked out some dovetails for the side frames. I have a digital readout on the wood rat and find it to be the fastest/easiest way to do a set of through dovetails. So now I have a bunch of frames and panels that look something like this:

    20190915_124630_resized.jpg20190915_124536_resized_1.jpg20190915_124527_resized_1.jpg20190921_144149_resized.jpg20190921_144158_resized.jpg
    Last edited by Carl Beckett; 10-21-2019 at 9:37 AM.

  4. #4
    Join Date
    May 2008
    Location
    MA
    Posts
    2,258
    Next I did the carcasses. They have two side panels that sit in a dovetail groove into a base. Then slots for all the drawer runners. Some rabbeting on the back, a back panel, and a top shelf/panel with a fake drawer front. Here is one step of several where I could have helped myself. I had chopped everything to rough length - to be sure I had enough material, before final thicknessing. So now I had a bunch of smaller/shorter pieces that still needed some planing and some thickness sanding. These machines do not like short pieces. But after some hassles, I was able to get them all to thickness. Then lots more chopping on the tablesaw to the final'exact sizes.

    And in the process of this realized I needed a ZCI for the router table, and added a moveable fence to choke down the gap around the bit, and made a couple stop blocks. I happened to have a couple pieces of T-track and believe or not, just glued it in place with 5 min epoxy. (get er done!). I have to say it seems to be stuck in place pretty nicely and I didnt want to spend the $ to upgrade the fence at this moment, and after making a couple pieces of MDF that slide with t-nut screws - it is quite functional. The ZCI is just a piece of plastic that attaches (standard bench dog design - which I am not that big a fan of, but which works fine). So a bunch of slotting with the incra positioner, some dovetail grooves, panel grooves, etc etc and I have some carcasses.

    20190929_132551_resized.jpg20191014_112235_resized.jpg

  5. #5
    Join Date
    May 2008
    Location
    MA
    Posts
    2,258
    Onward to drawers. Sighs. 20 of them. With blind dovetails to the fronts, which has a rabbet to overlap with the carcass sides. These again I made the tails on the wood rat using a dovetail bit. pretty brainless. But for the pins ... only thing I could come up with was chopping them (mostly) by hand.

    Turns out I had made a moxon vice recently and this got a workout. Having the material closer to my face allowed me to see better, and also help my posture/back. I simply transferred the marks with a mechanical pencil then hogged material out with the palm router, then finished with a chisel. In hindsight I might have tried putting them on edge and using a smaller bit to route the waste at an angle (I could have put a spacer board behind the on the table to let the router rest on). But these are pretty small features to there is only so much that can be done. So chop away, and to be honest the entire process went pretty smoothly and didnt take as long as I feared.
    20190915_124614.jpg20191013_084837_resized.jpg

    Then some grooves on the router table for runners and bottoms. And I have the makings of drawers (20 of them even...). A handful are not as tight as I would like, but pretty sure they will tighten up with glue and finish.

    20191014_171303_resized.jpg20191014_132858_resized.jpg20191014_132844_resized.jpg20191014_132916_resized.jpg
    Last edited by Carl Beckett; 10-21-2019 at 9:25 AM.

  6. #6
    Join Date
    May 2008
    Location
    MA
    Posts
    2,258
    The drawer fronts are curved. And have a rabbet that sets into the sides. So I cut the rabbet, then setup the bandsaw to cut 37.5" radius on the drawer fronts. This was nothing more than two layers of particle board I had, with a bolt on the center, to let it swing through the bandsaw on an arc.

    20191014_171829_resized.jpg20191019_104844_resized.jpg

    Once dialed in, this went well.

    Afterwards I needed to put those laminations on the fronts, simply used the waste piece as a clamping aid since it had the right curvature (close enough, they flex). And glued the lacewood to the front with titebond II.

    20191019_153908_resized.jpg

    About this time I found a Festool vacuum on CL so brought that home, and took all the drawers apart and sanded them into next week before starting to glue them together. Note I only have one set done at this time, but wanted to get one complete carcass/drawer set done to learn on, in case I might want a different sequence on the next set. Some runner fussing, gap trimming on the fronts, etc etc and I have what is starting to form the finished project. Oh, an I did send an order in for Brusso hinges. smh, no comment on those other than I just kept saying that my daughters are likely to keep this the rest of their lives so just suck it up and pay for the hinges.

    20191020_161830_resized.jpg20191020_161911_resized.jpg20191020_163001_resized.jpg20191020_162956_resized.jpg

    And one of the cherry w/ maple fronts. The great thing about these was that the fronts are solid so no laminating needed.
    20191019_104824_resized.jpg
    Last edited by Carl Beckett; 10-21-2019 at 8:58 AM.

  7. #7
    Join Date
    May 2008
    Location
    MA
    Posts
    2,258
    There is still plenty to do. The front stiles will get a radius to blend with the drawer fronts. The base/top matching radius. The drawer sides/dovetails all need cleaned up after gluing and smoothed out - I expect they will look better after that. Hinges. Some insane amount of sanding (I tried to do as much as I could to the inside of the drawers before glueup, those inside corners are always insanity). And finish. Times 4... And they are different woods so likely to behave differently.

    And in common 'scope creep' fashion, I am wondering if I could pull off some type of inlay on the tops. There are some inspiring ones posted by members here (outside my skill set), but even a relatively simple marquetry or inlay would really dress up the plain top. So if someone knows a source (even a custom shop) lmk and I will investigate it, I have specific themes in mind. Course, there is a lot of sanding to be done between now and then...

    More to come.
    Last edited by Carl Beckett; 10-21-2019 at 9:02 AM.

  8. #8
    Join Date
    Mar 2015
    Location
    SE Michigan
    Posts
    3,225
    Carl, thanks for the post, they look fantastic. The wood combinations are great. Truly heirloom pieces the ladies in your life will enjoy.

    Regarding the hinges: yes, worth every penny. You made the right decision.
    You may want to consider finishing the inside of the drawers prior to glue up. Much easier. No corners to deal with. Or rattle can shellac isn’t too bad either, but might need a slight amount of sanding.

    I’ve done a fair amount of stringing and banding inlay work. A little intimidating at first, but given what you have done so far, I have no doubt you could pull it off. And incidentally, I think that’s all I would do on the top of those boxes. As you said, less is more. And you already have a lot of nice wood grain/feature going on. At most, I’d do a 1/16th or 1/8th inch stringing outline maybe a 1/4 or 3/16 in from the edge. I’d look for a light color wood for the walnut top (to match the drawer fronts) and similar contrast for the other boxes. Doesn’t take more than a plunge router with an edge guide and a router bit sized to the stringing. Set depth on a test piece so the stringing is just a hair above the surface. Cut the stringing to length and glue it in. Stringing is available from a number of sources...just google it.


    Anyway, whatever you decide, look forward to seeing updates.

  9. #9
    Join Date
    May 2008
    Location
    MA
    Posts
    2,258
    Stringing is a good idea for consideration. Have seen some of that look outstanding.

    I did do a small wood strip inlay on a dresser a few years back. Just a simple strip of those multi pieced inlay. Came out great, and not 'too much'.

    Saw some simple inlays today while perusing that is another option. There are certain themes I have in mind.

    But before all of that, more sanding...!

    Also have to decide if I want to make some felt inserts for the drawers. Could even do some pillows for rings. Course knowing my girls these will likely get used for colorful rocks or funky bug carcasses... Maybe an owl pellet.

    😁

Posting Permissions

  • You may not post new threads
  • You may not post replies
  • You may not post attachments
  • You may not edit your posts
  •