I would cut the wood handle off with a saw and drill the remaining wood out.


 Member
I would cut the wood handle off with a saw and drill the remaining wood out.
 Contributor
Prashun, the OP has a problem with a handle on a socket chisel, there ain't no tang.Originally Posted by Prashun Patel

jtk
"A pessimist sees the difficulty in every opportunity; an optimist sees the opportunity in every difficulty."
- Sir Winston Churchill (1874-1965)
Moderator
Duh. Whoops. Should have read more carefully.
 Contributor
The OP also wanted to SAVE the handle, to use as a pattern to turn a new handle...
[OP]
Contributor
No, no it is all good. Don't sweat it man.
I did a quick search before I started a new thread, having multiple ideas here is good for future search button users. I am sure the subject has been discussed here before, I just couldn't find it easily.
Usually when I leave a voice mail for my blacksmith I expect him to check his voice mails every other Saturday and then call me a few days later. This one time he called me back in something like two hours instead of two weeks.
If you are getting into old heavy things like axe heads (major rabbit hole) or timber framing tools (expensive rabbit hole) you will want a good relationship with your local smith. You just aren't going to anneal, harden and temper a 3 pound chunk of steel at home with a blowtorch.
My local guy is fine with me burning handles out of stuff with a couple caveats. Number one, no forced air. With regular air flow, no bellows, carbon burns at about 600 degrees F, enough to mess up the temper on some things, but it shouldn't "hurt" good steel. #2, if 600dF does hurt whatever thing, better for me to find out the tool was crap without wasting his time. #3 Anything I heat to 600dF needs to be retempered before I use it.
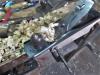
On a lot of this older stuff (Fairbanks goldrush started in 1902) got rode hard and put away wet. See for instance pic three, post one, this thread. That 2" chisel got just plain beat on with a heavy hammer. Often. I really just feel better having heavy vintage things thoroughly annealed to relieve internal stresses (plus they are easier to shape while soft) before re hardening and re tempering.
I look forward to putting Derek's instructions to use, and I do agree with Roger Nair (see post #11) - both have a lot more experience than me. As to Derek's advice, with the handle burnt out it sure does look like the inside wall of the socket is a straight wall. I should be able to make a simple (truncated) cone and go. I have two socketed chisels where the not glued wood got beaten on hard enough the handle isn't coming back out until it is destroyed.
I don't know how many Lie Nielsen chisels I have, more than six, but the one I walloped on when I was on a roll and thought it was the cheap BORG chisel took its walloping like a champion and hasn't let go of it's handle since. I didn't mean to do that, but I didn't hurt it. My Barr 1.5 inch laughs at me if I don't wallop on it hard enough and regularly enough to keep the handle firmly seated. Seriously. The anti mushroom ring jumps off, bounces over and over on the concrete floor of my shop and then hides under a heavy thing so I am ready to swing like a manly man when I get the fool thing back together.
I suspect that since I am routinely ridiculed in my own shop by my Barr, it is a good indicator my Witherby should become a slick lest my shortcomings hammering become more widely known.
Member
Saw the handle flush with the socket and use it for a pattern to make a new one.
Drill out the wood left in the socket.
Just my thought on it.
Contributor
Reamer, LARGE.JPG
Maybe drill a 3/8" hole, then run this to clean out the socket?
Sized 3/8" to 1-1/2" All the way from Meadville, by the L.L. Lord Co......No. 3 reamer...
 Posting Permissions

 Reply With Quote