Page 1 of 4 1234 LastLast
Results 1 to 15 of 56

Thread: Making my first Windsor Chairs

Hybrid View

Previous Post Previous Post   Next Post Next Post
  1. #1
    Join Date
    Apr 2007
    Location
    New Jersey
    Posts
    13,725

    Making my first Windsor Chairs

    I've been thoroughly enjoying this project, so I thought I'd share...

    I'm a big fan of Curtis Buchanan's work. His videos have a humble, 'golly-gee' quality that is endearing.

    His latest offering, the Democratic Chair is really on a different plane though. I have never seen such an accessible way to approach Windsor Chair making.

    He offers the plans as 'pay what you can' on his website.

    The chair is designed to be made with a minimal number of tools. Windsor chair making can be daunting because you need reamers and a way to cut tapers and shape edges. But he finds ways to keep that to a minimum. Even the steam bending and drying of green parts is approached with a view towards economy.

    Many of the parts are made from green wood; so it's a good entry into selecting logs, riving them, and making good chair parts. Again, this is done with a minimal number of tools; no need for a froe. He works all the parts down to the finishing with a drawknife. He pushes the drawknife past the point that most of us would typically stop using it. This has really improved my appreciation of grain direction and layers of the wood as well as the tool.

    Contouring a seat can be very non-intuitive (for anyone who's tried to follow plans can attest). But this chair has such simple, elegant, and easy-to-follow lines.

    The simple design really lends itself to being a springboard for a more personal design. While I did a lot of the rough work with the drawknife, I did much of the shaping on the lathe. The plans and videos rely less on exact measurements and lengths and more on dynamic adjustments and fits. I love that style of woodworking, and it really gives you license to adapt the design.

    All the while, the basic principles of Windsor chairs are preserved: tapered, socketed joints, stretchers that stretch the legs instead of holding them together; super drying tenons before mating them.

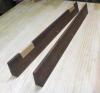
    I'm making this one from a pin oak we had to take down at work. The spindles and posts are from that tree. The seat is sycamore and the lower assembly is red oak.

    I happen to have a lot of the tools like reamers and a carbide carving wheel for an angle grinder. But some of my past efforts at Windsors have stalled because they have tricky crests, arms, or rockers. This chair is just distilled down to the bare elements.
    Attached Images Attached Images
    Last edited by Prashun Patel; 11-20-2019 at 9:27 AM.

  2. #2
    Join Date
    Dec 2005
    Location
    West Lafayette, IN
    Posts
    6,530
    All that good sounding stuff and no pics Prashun?

  3. #3
    Join Date
    Mar 2006
    Location
    Austin Texas
    Posts
    1,957
    Thanks for sharing Prashtun. I am very interested in following this to the end.
    David

  4. #4
    Join Date
    Mar 2015
    Location
    SE Michigan
    Posts
    3,225
    Wow, really nice work, Prashun. Look forward to the rest of the build.

  5. #5
    Join Date
    Apr 2007
    Location
    New Jersey
    Posts
    13,725

    Spindles and crest

    Buchanan drawknives the spindles at his shave horse. I wanted to get some practice using the skew at the lathe, so I turned mine. I haven't tamed my skew yet, so I will end up smoothing these with a block plane. It's just hard for me to minimize the vibration on these skinny parts. The block will make the spindle flat and straight much easier. I do like the finished surface that the skew leaves; it really doesn't need to be sanded much; but the block does as well here. Because these parts are split from straight grain, they are much easier to smooth with blades than sawn parts; you can come at it from either direction.

    I steam bent my crest rail. He just cold bends his with a piece of pipe for leverage. Once steamed, this green oak bent like rubber. There was a good deal of spring back, but again (despite leaving it in the form for a few days). But this is why this project is good; it doesn't matter. The aesthetics are forgiving enough, and the fitting to the posts and spindles is dynamic enough that it can still be made to work.

    It's a lot of trimming, fitting, walking around and checking for balance, and iterating.
    Attached Images Attached Images

  6. #6
    Join Date
    Mar 2003
    Location
    SE PA - Central Bucks County
    Posts
    65,854
    Skinny spindles at the lathe are helped with using a support mid-way...I assume you are doing that. It helps curtail the natural vibration. And bravo on the skew...a tool I was never able to get used to!
    --

    The most expensive tool is the one you buy "cheaply" and often...

  7. #7
    Join Date
    Apr 2007
    Location
    New Jersey
    Posts
    13,725
    John Jordan had a great post on turning skinny things. Using a steady rest helps, but I realize that by holding spindles in a chuck at the headstock (instead of between centers) and then altering the tension at the tailstock either up or down, the resonance is greatly reduced. Also, the order of ops helps (Shape the center, then tail end, then head end). I also mount the skinniest (top) of the spindle at the headstock. This is thinned last. I also use my hand as a steady. All these things give passable results.

  8. #8
    Join Date
    Mar 2003
    Location
    SE PA - Central Bucks County
    Posts
    65,854
    Oh yea...I was just suggesting that it's sometimes "fun" with skinny spindles on the spinny thing.
    --

    The most expensive tool is the one you buy "cheaply" and often...

  9. #9
    Join Date
    May 2014
    Location
    Washington State rainforest
    Posts
    122
    Someday, when I’m a better woodworker, I’m going to give this a go. Great post and good looking chair. Thanks for posting!
    Don't ask me how I know that!

  10. #10
    Join Date
    Apr 2007
    Location
    New Jersey
    Posts
    13,725
    Thanks, Tom. FWIW, I am doing this build with a coworker who is relatively new to woodworking and absolutely new to the drawknife and green woodworking. He’s been able to do everything.

    This is in fact a great project to learn on.

    I encourage you to watch those vids if u are at all considering doing it.

  11. #11
    Join Date
    Dec 2004
    Location
    Cincinnati, OH
    Posts
    924
    Your artistic eye is evident in all your projects. Are there structural reasons for selection of different woods for the components? (Maybe this is covered in the Buchanan video.) How was the sycamore to work with? Thanks for sharing!
    Rustic? Well, no. That was not my intention!

  12. #12
    Join Date
    Apr 2007
    Location
    New Jersey
    Posts
    13,725
    I started my second chair. This one will be in walnut.

    Boy, training with the skew on pin and red oak is like running with ankle weights. Turning this walnut is so much easier. I suspect (but cannot confirm) that the green oak, by virtue of being more pliable, was also more prone to vibration when turning thin. This KD walnut appears not to have this issue. This means a flatter surface before I have to sand.

    I'm going for fewer angles and more curves on this one. Buchanan's seat template is awesome for locating the seat and post holes. I plan to eliminate the concave dip on the sides of the seat and also to round the corners.

    I don't have any green walnut. Curving the crest rail might have been tough with a solid 1" piece of walnut. So, I cut it into laminations. it still wouldn't bend without some work, so I steamed the laminations for 45 minutes, bent them in the form for an hour or two until they cooled and some of the surface moisture evaporated. Then I glued it and left it in the form for 24 hours. I haven't quite figured out the post to crest joint yet.

    I also haven't yet figured out the spindles. I am considering just using oak for those, since I still have green, riven stock for that.
    Attached Images Attached Images
    Last edited by Prashun Patel; 10-20-2019 at 4:47 PM.

  13. #13
    Join Date
    Mar 2003
    Location
    SE PA - Central Bucks County
    Posts
    65,854
    Outstanding result!!! If I'm not mistaken, it was common to rub linseed oil over milk paint, but for today's world, the Waterlox is likely a very good choice.
    --

    The most expensive tool is the one you buy "cheaply" and often...

  14. #14
    Join Date
    May 2014
    Location
    Washington State rainforest
    Posts
    122
    Quote Originally Posted by Prashun Patel View Post
    Thanks, Tom. FWIW, I am doing this build with a coworker who is relatively new to woodworking and absolutely new to the drawknife and green woodworking. He’s been able to do everything.
    This is in fact a great project to learn on.
    I encourage you to watch those vids if u are at all considering doing it.
    I definitely will, thanks for the lead. Did you go the shaving horse route?

    It’s interesting that the Port Townsend School of Woodworking near me starts students in their Foundation course with a three-legged stool project - from raw log, to riving through construction. It makes sense how this fosters an appreciation for the wood itself, grain direction and basic hand tool techniques.
    Don't ask me how I know that!

  15. #15
    Join Date
    Apr 2007
    Location
    New Jersey
    Posts
    13,725

    Finished

    I wanted to finish this chair with red followed by black milk paint. However, I find the mixing and applying of milk paint tedious. I painted the first coat red, and then sprayed black India Ink for the second coat. Burnishing the milk paint is just no fun, IMHO. It's dusty, rubs through, and is just messy in every way to work with. I don't understand the appeal - besides the great stock colors that the Old Fashioned Milk Paint company makes it in.

    I diluted the India ink in ethanol and sprayed it until I got the shade of black I was after. I applied 2 coats of Waterlox Original Sealer Finish, then sanded it. Next time, I would use shellac as a seal coat. This can be sprayed. Wiping or brushing on finishes for a chair is not fun. With colorants, it's just hard to simultaneously knock the grain back between coats while not burning through. As a result, my painted and dyed finishes rarely feel as good as uncolored finishes. In the end, it worked out.

    I think prefinishing would have helped a great deal. Especially in this case, where very little glue is used. The pieces could be wedged, trimmed, and touched up easily, but you wouldn't have to touch the points where the spindles meet the seat or crest - the hardest part to keep smooth.
    Attached Images Attached Images

Posting Permissions

  • You may not post new threads
  • You may not post replies
  • You may not post attachments
  • You may not edit your posts
  •