A bad "hump" like that? I lay the iron on my bench, with the high spot facing up, and marked.....then a few whacks with a large ball pean hammer, checking as I go, until the worst is flattened.
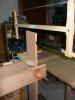
Beltsander, clamped in the bench vise, with the top handle in the vise. Have a cup of water handy. Stand to the side of the sander, lay the back of the iron on the spinning belt....count to 3, dunk the iron, check the back.....100 grit belt, and it helps if it is worn a bit. Repeat as needed, until the back is flat....then just polish it up.
Use your fingertips to hold the iron to the belt....when the fingers say they are too hot, dunk the iron.
Also, check the chipbreaker. Lay it on a flat surface ( BEFORE you do anything else to it) and see if it rocks. Either the curved section has a hump in the middle, or it is the inside of the hump.
same as the iron, lay it with the high spot up, a few taps, and check for any rocking....sometimes, the ends are lower than the middle, to where the corners only will contact the iron. Goal is to bring the high spot down, so the edge is a straight line across. Also, sight down the length of both the iron and the chipbreaker....sometimes they have sat wat too long, clamped down too tight...and soon have a bow along the length. Both can be hammered out...BTDT. Do NOT clamp an iron in a vise, and try to straighten it by hand.....cuts from when it snaps take a while to heal.
get both flat and straight, first.....then you can sharpen however you please ( Millers Falls called for a single bevel, @ 25 degrees) just remember...even a butter knife can be polished like a mirror, and still not cut cold butter....
Craftsman rehab, shavings.JPG
Craftsman #3 ( Sargent # 408)....single bevel, angle is 25 degrees. Had to fltten the iron and the chipbreaker, first. There are no gaps between the iron and chipbreaker.


 Reply With Quote