Page 2 of 2 FirstFirst 12
Results 16 to 28 of 28

Thread: Moxon vise/bench design phase

  1. #16
    Join Date
    May 2015
    Location
    Ingleside, IL
    Posts
    1,417
    Quote Originally Posted by Derek Cohen View Post
    ..............In this design, the front chop has a rebate. As the chop is set up in the design above, there is full support on both sides of the board when sawing. Now reverse the chop, and the rebate on the outside becomes a rebate on the inside, and this provides space for the router bit to clear the pin board............Derek
    Hey Derek - I like your idea of a rebate for routing and will probably steal it. Thx. Reversing the chop seems like it might be a pain in the arse to do, however, so what about some strong magnets - at the ends away from any saw work - that would hold a piece to fill the rebate when sawing and it could then be removed for routing. This would have the added advantage of it being a "disposable" piece that might get marked up with the knife and then can be easily replaced.
    Stand for something, or you'll fall for anything.

  2. #17
    Join Date
    May 2008
    Location
    MA
    Posts
    2,260
    Quote Originally Posted by Derek Cohen View Post
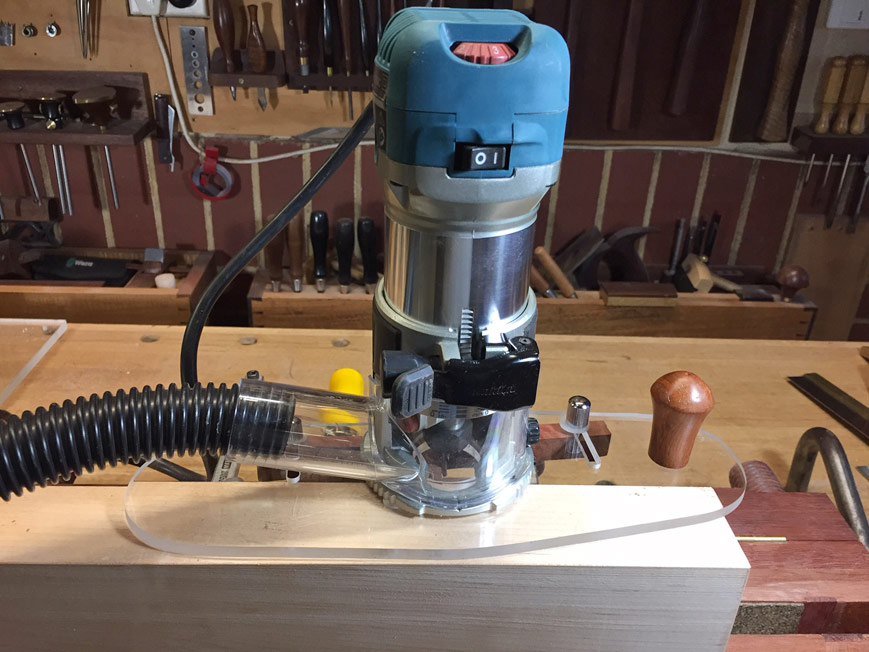
    Carl, I am interested in the possibility of using the Moxon to hold a board and rout out waste with a trim router (I am about to build a new Moxon vise) - I have an idea ...


    In this design, the front chop has a rebate. As the chop is set up in the design above, there is full support on both sides of the board when sawing. Now reverse the chop, and the rebate on the outside becomes a rebate on the inside, and this provides space for the router bit to clear the pin board.

    At the rear of the vise is a hinged spacer. This has three purposes; firstly, it lifts the tail board above the chop, which would be cut up by a knife when transferring marks if coplanar. Secondly, it is easier to align tail and pin boards if there is space around them (which is why I dislike the designs which have a continuous shelf at the rear of the vise. Thirdly, the spacer becomes a ledge to which one can attach clamps (if needed).

    Most of these ideas (the exception being the rebate in the chop) I have been testing for at least 10 years, in which time I have hand cut thousands of dovetails.

    What do you think?

    Regards from Perth

    Derek
    Sorry for such a delay Derek, I have been traveling for some time.

    I think you have cut a lot more dovetails than I have, but I dont like needing to flip the chop. Instead I think I would just use an extra spacer board and bump it up or down as needed. Getting the tail board above the chop... I will have to use this a bit to understand, but do have concerns of marring. Perhaps again a spacer board.

    The larger bench type surface on the top we will see, but I am expecting to use hold downs and dogs as needed (plus, it becomes a portable workbench). Am hoping to finish this off before long and will post a pic or two.

  3. #18
    Join Date
    Feb 2004
    Location
    Perth, Australia
    Posts
    9,494
    Carl, the delay was worthwhile. I thought about this some more, and eventually came up with a design for routing half-blind sockets. It needs a very simple set up, separate from, but usable with a Moxon. I posted this on the power forum, so search out the thread below.

    Regards from Perth

    Derek

  4. #19
    Join Date
    May 2008
    Location
    MA
    Posts
    2,260
    And a little more progress.

    Went ahead and cut dados for the legs, both into the top and into the back of the jaw. And made a little extension feature that allows a clamp to my workbench on the back.

    20190824_144839_resized.jpg

    Drilled some holes, and fastened the jaw to the top.

    20190824_144833_resized.jpg

    Made a little knob, just stuck it on with socket head cap screw for now.

    20190825_172006_resized.jpg

    And the functional bits are done. Turning the one side runs the chop in/out in unison with the other side. So it seems to work. The gears are not precision/smooth, but I am expecting it to loosen up just a bit as it gets used. Again no idea how this material will do with time, it tends to melt and get gummy when cut (low melt temp and relatively soft), but gear teeth 'in theory' are not sliding (they roll off each other, but do have high hertz contact stresss). So a big experiment and was relatively simple/quick to build. (remember, 'In theory there is no difference between theory and practice. But 'in practice', there is.....)

    20190825_172157_resized.jpg20190824_144833_resized.jpg20190825_172152_resized.jpg

    Given there will be chips and sawdust flying around, I am going to put a clear cover over the gears and call it good. Already the kids are asking if they can use it (and take it into the craft room to use). So I may never get to use it...

    I think the best part of this whole project was my youngest daughter (11) spent time in the shop while I was there, working on her own projects (some boxes with shelves on them....). She had a notebook and drawings and measurements and a plan in mind for them - which I didnt ask, she likes doing her own thing without my inputs. I just cut where she told me to and helped with the staple gun, she did the rest. (and then she asked if she could have the leftover gear rejects.... of course!)

    Will post a final final pic once final....

  5. #20
    Join Date
    May 2008
    Location
    MA
    Posts
    2,260
    20190902_103743_resized.jpg20190902_103740_resized.jpg20190902_103735_resized.jpg

    It is done. Slathered a layer of BLO on it, looks pretty good for misc wood pieces I had laying around. Gear action works and tightened evenly on both sides. Managed to break a gear while 'assembling' with a hammer... But just printed another one and carry on.

    Am going to make a shelf to slide it under the benchtop when not in use. If my kids let me use it that is, they have a long list of projects to do including school desks, am encouraging every project.

    It clamps nicely to the benchtop and registers on a rabbet on the lower front lip. So is pretty sturdy for whacking on. Have some stubby benchdogs I will use with it (if needed), and some holddowns but not sure how those will work with a relatively thinner benchtop.

    Printed parts work pretty well. In fact, I might print out some drawer organizers to hold my chisels... (long overdue to organize the chisel drawer).

  6. #21
    Join Date
    May 2008
    Location
    MA
    Posts
    2,260
    I remade the nut block, so it was more circular. This way I can rotate it and squeeze it down that last bit on one side to be sure both screws pull tight. (this was a clearance test, the older square one is still in place).

    20190919_115259.jpg

    Then this weekend tried it out. I have to say:

    1) The gears are loosening up and its running smooth enough. Being able to crank the jaws in/out quickly by turning one handle does make it more pleasurable to use (and kind fun at the same time).

    2) Getting work up closer to my eyes is a huge help! So this is going to get used more than I first thought even. I had a little light that I was using on my bandsaw, but it is going to get repurposed for this bench.

    3) In addition to cutting dovetails (plenty more of those to cut), I used the bench dogs already for cutting the hinge mortices on this little tic tac toe box my youngest made for a friend (her box came out great!). Pic of her putting that first finish on the raw wood, which she claimed was 'amazingly satisfying'. I agree.


    20190915_124614.jpg. 20190915_124527_resized.jpg20190915_124624_resized.jpg20190915_124536_resized.jpg20190915_124636.jpg20190922_120305.jpg

    Plenty more dovetails to cut, current project is about 20 dovetailed drawers plus some other parts.

  7. #22
    Join Date
    May 2008
    Location
    MA
    Posts
    2,260
    Spent all day chopping half blind dovetails (20 drawers, various figured woods). Turns out I spent ALL this time using the workbench feature of this moxon vice. These were relatively small drawers about 7" across, and having the height raised up to better posture helped my back tremendously. Also, getting things closer to my eyes helped my vision. Using hold downs and stops was useful.

    So far I put this unit on the end of my workbench and it hasnt come off since.

    The workbench feature, and getting it elevated, has turned out to be at least as useful as the vice portion of this project.

    20191013_084837_resized.jpg

  8. #23
    Join Date
    May 2015
    Location
    Ingleside, IL
    Posts
    1,417
    Very nice build, Carl. I agree with what you say about getting raised up for better vision and less back pain. What are the dimension of the top? (I re-read the posts but didn't see it) I'm finishing up several projects and a real moxon is next on the hit parade. I like the idea of the top being substantial enough for dog holes, so I'll incorporate that, and the chop will be an experimental piece that incorporates a spacer held by magnets that I can remove to use a router to clean up the dovetails. Can't tell from the pics but are you putting grupper on the faces? And I love the gear box - you should market it as a kit.
    Stand for something, or you'll fall for anything.

  9. #24
    Join Date
    Mar 2006
    Location
    Austin Texas
    Posts
    1,957
    You nailed it Carl - your back and eyes appreciate a Moxon.
    David

  10. #25
    Join Date
    Feb 2004
    Location
    Perth, Australia
    Posts
    9,494
    While I posted this on a thread earlier, some may visit here and be interested in the Moxon design I developed over several years.

    Link: http://www.inthewoodshop.com/ShopMad...LastMoxon.html


    The other area of interest was the ability to use a router to remove waste from sockets. This is the jig I came up with ...

    http://www.inthewoodshop.com/Furnitu...vingWaste.html


    Regards from Perth

    Derek
    Last edited by Derek Cohen; 10-14-2019 at 11:58 AM.

  11. #26
    Join Date
    May 2008
    Location
    MA
    Posts
    2,260
    A beautiful piece Derek, no doubt about it!!

    Quote Originally Posted by Derek Cohen View Post
    While I posted this on a thread earlier, some may visit here and be interested in the Moxon design I developed over several years.

    Link: http://www.inthewoodshop.com/ShopMad...LastMoxon.html


    The other area of interest was the ability to use a router to remove waste from sockets. This is the jig I came up with ...

    http://www.inthewoodshop.com/Furnitu...vingWaste.html


    Regards from Perth

    Derek

  12. #27
    Join Date
    May 2008
    Location
    MA
    Posts
    2,260
    Quote Originally Posted by Bill Carey View Post
    Very nice build, Carl. I agree with what you say about getting raised up for better vision and less back pain. What are the dimension of the top? (I re-read the posts but didn't see it) I'm finishing up several projects and a real moxon is next on the hit parade. I like the idea of the top being substantial enough for dog holes, so I'll incorporate that, and the chop will be an experimental piece that incorporates a spacer held by magnets that I can remove to use a router to clean up the dovetails. Can't tell from the pics but are you putting grupper on the faces? And I love the gear box - you should market it as a kit.

    The top is about... yay wide... by ... yay deep.... Sorry, but that is about the design approach. It came out at about 26" wide, x 20 deep. I wanted to leave room for the back feet to clamp on the back edge of my workbench (so it clamps both front and back, but dont really know if needed).

    I did waste out those pins using the battery powered router. I simply clamped the piece down with a holdfast then free handed it. The smaller trim router worked fine, but it wouldnt be all bad to have more support surrounding everything. I could also have clamped them down with the dogs (or a combo of both dogs and holdfast).

    The faces are unlined, but would benefit from it. Will add that to the do list for some day. And it could use a tool holder along the side to slide some chisels/saw into when not needed. Right now I find myself slipping them into the dog holes. Oh, and might move my small clip on light from the bandsaw to this table (or better yet, just get another).

    As for a gear kit, am happy to share CAD files with anyone that wants them. It definitely complicated the build, but I get satisfaction each time I run the vise with one hand. The original motivation was to inspire my kids, and they get a kick out of it so mission accomplished (but I am not likely to let them have this one any time soon, turned out more useful than expected).

  13. #28
    Join Date
    May 2015
    Location
    Ingleside, IL
    Posts
    1,417
    Quote Originally Posted by Carl Beckett View Post
    The top is about... yay wide... by ... yay deep....
    So we went to the same design school!!

    I like the size - I have a spot I can dedicate to it (90% of the time) so a big moxon footprint works for me. And Derek, I like your router base. Thanks for the link to the drawing.
    Stand for something, or you'll fall for anything.

Posting Permissions

  • You may not post new threads
  • You may not post replies
  • You may not post attachments
  • You may not edit your posts
  •