Page 2 of 6 FirstFirst 123456 LastLast
Results 16 to 30 of 76

Thread: A new Desk for me

  1. #16
    Join Date
    Jun 2010
    Location
    twomiles from the "peak of Ohio
    Posts
    12,164
    Ok, that "special" panel. From the outside..
    computer desk project, srange grain.JPG
    Doesn't look too bad? Rail covers the "bad spot"...
    computer desk project, knot buried.JPG
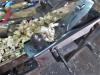
    Had two panels to raise. Made a mess on the floor, again..
    computer desk project, 3 hours of shavings.JPG
    Decided to try a dry run with the clamps, but no glue...
    computer desk project, 2nd side test run.JPG
    One rail had issues....finding where it's mortise was...hammer and a block of wood, cured that. need to go back and glue Side #2....
    Still have 4 panels to raise, and a pair of stiles to mortise. Then maybe get side #3 glued up? I moved the shop fan to where it would do a better job..
    shop fan 2.JPG
    Also tilted it back a bit.
    Now, anyone want to show up and help out?

    Stay tuned...

  2. #17
    Join Date
    Jun 2010
    Location
    twomiles from the "peak of Ohio
    Posts
    12,164
    Put in a little more work, last night...just under 2 hours worth....Got side 2 glued up, and in the clamps..
    computer desk project, 2nd side close up.JPG
    Yes, there are 2 sides sitting there.
    Which left the parts for side #3 to mill..
    computer desk project, 3rd side parts.JPG
    One of the stiles had a mis-matched set of mortise marks...hand plane to remove, used a square, and one of side #2's stiles (before the glue-up) to mark both of these stiles, so they will match the rest....decided to try to raise a few panels...
    computer desk project, 3rd side, 2 panels done.JPG
    One was kind of boring..actually..the one below it..had issues
    computer desk project, 3rd side, 1st panel.JPG
    Chose this face for the bevels....as the other face was...
    computer desk project, bad edge.JPG
    rather knotty. Even had to back off the Stanley 45's depth a bit...
    computer desk project, rebate work.JPG
    Finally got a dry fit...
    computer desk project, bad edge gone.JPG
    "Very interesting.."
    computer desk project, bevel tuned up.JPG
    been using this fancy plane, to fine tune the bevels...
    back was having issues, was getting to tired, and wornout...decided to stop for the day....just under 6 hours, total, of shop time...
    resting the back, this morning...may try later..
    Stay tuned..

  3. #18
    Join Date
    Jun 2010
    Location
    twomiles from the "peak of Ohio
    Posts
    12,164
    Ok, for those wondering...
    Stiles: 3/4" x 2" x 31" They have a 1/4" x 1/4" groove. Mortises to house the tenons go another 1/4" deeper.

    Rails: 3/4" x 1-1/2" x 16". These also have that groove. The 16" length includes a 1/2" long tenon on each end....size to match the 1/4" groove. And are 1" (more or less ) as the grooves take out a bit.

    Sides: 3/4" by 18-5/8" wide, by 31" tall.

    Raised panels are 3/4" x 15-5/16" and are 5-1/2" wide.....rebates are 1/4" deep, by 5/16" wide.

    Have a stack of 1x6 and 1x8 Pine scraps.....will be ripping those down, to build webframes....will try to use 1x scraps of Ash for the frame's front edge...

    2 of the side panels will get a rebate, to allow for a 1/4" plywood back where the drawer unit is. 4/4 x 4 of Ash for a "footrest" across the back of the kneehole...connects the bottom of the drawer unit to the bottom of the leg unit.

    Need to get side #3 into the clamps....then work on webframes....10 more mortises to chop, 2 more panels to raise....and a sore back.

    stay tuned...

  4. #19
    Join Date
    Jun 2010
    Location
    twomiles from the "peak of Ohio
    Posts
    12,164
    last 2 stiles are done...
    computer desk project, last mortises done.JPG
    10 mortises, in 40 minutes...5 minutes to cut the 2 feet profiles..
    computer desk project, last 2 feet done.JPG
    needed to raise the last two panels...one was...
    computer desk project, not good #3.JPG
    Flipped this over, to see IF I could bevel it ...
    computer desk project, good #3.JPG
    I think I can work with this. was finally able to get all the parts together, cleaned up, glued up, and clamped up...
    computer desk project, 3 sides done.JPG
    All three sides are done, none....need to start on some webframes, for the 4 main drawers to slide on...
    computer desk project, webframe parts.JPG
    Pine scraps...need 5 more of the longer stiles....may try to assemble what I have, then go and buy a few 1 x 6s at the borg....later?
    computer desk project, smoothed rail.JPG
    I did have a few items that needed cleaned up....this was rough sawn...almost "presentable" now

    Stay tuned...

  5. #20
    Join Date
    Jun 2010
    Location
    twomiles from the "peak of Ohio
    Posts
    12,164
    run to the Blue Borg completed....maybe after lunch, I can start building webframes?

    Have already set up the Stanley 45 to make rebates for the case's back..

    Will see how the day goes.....maybe a 1300 hrs start? time limits for the shop is around 4 hours....if I get to 6 hours, I pay the price with a sore back....

    Stay tuned

  6. #21
    Join Date
    Jun 2010
    Location
    twomiles from the "peak of Ohio
    Posts
    12,164
    Late start...1500 hrs....early quitting time 1800 hrs...waiting on glue to cure...
    computer desk project, more lumber.JPG
    three 1 x 2 x 6', and that 1 x 4 x 4'.....and as clear and straight as I could find...
    computer desk project, side 1 rebate.JPG
    Clamped up, to mill a couple rebates...along the back edge of side #1 and side #2...had the Stanley 45 reset...and might have had it a tad deep..
    computer desk project, rebate shavings 1.JPG
    takes a bit, to get to 1/4" deep...
    computer desk project, depth checked.JPG
    Once both rebates were done...I stash both sides out of the way..for now..
    computer desk project, stashed.JPG
    Found a scrap of Ash in with the Pine scraps...
    computer desk project, drawer front blank.JPG
    Might be a decent enough drawer front? had a LOT of parts to mill....webframes. They will sit about here...
    computer desk project, frame location.JPG
    Then, across the front of each frame...
    computer desk project, face frame part.JPG
    There will be a strip of Ash, dovetailed into the front of the side's stiles...will see about milling a kicker..later...
    Stay tuned, part 2 is coming right up...

  7. #22
    Join Date
    Jun 2010
    Location
    twomiles from the "peak of Ohio
    Posts
    12,164
    Had a few more Pine parts to crosscut for length....some will be stiles, some will be rails...
    Stiles needed a groove milled, rather than chop a bunch of mortises..
    computer desk project, stiles have grooves.JPG
    10, to be exact. then needed to mill a few tenons to fit into the 1/2" deep grooves..
    computer desk project, rails have tenons.JPG
    20 tenons. Each stile needed 2 holes, to attach the frames to the side of the case...countersunk, to allow a bit driver access..
    computer desk project, countersink.JPG
    Electric drill was set up for the pilot holes...
    computer desk project, pilot holes.JPG
    Glue and a couple 5/8" long nails at each joint, checking for square..
    computer desk project, checked for square.JPG
    A few needed a clamp, to pull things tight...
    computer desk project, webframe assembly.JPG
    Set this aside, and build the other 4 frames..
    computer desk project, 5 webframes done.JPG
    While I decide on kickers...mainly, how thick....IF I do add them, need to do so, before I assemble the case...not a whole lot of room in there.
    need to mill the face frame parts, out of Ash. and see about 3 more drawer fronts..
    Stay tuned
    Attached Images Attached Images

  8. #23
    Join Date
    Jun 2010
    Location
    twomiles from the "peak of Ohio
    Posts
    12,164
    The 4 "extra" stiles...I may just use those as kickers. Need to get the case assembled, and the Ash dividers milled, and installed....And..see about some plywood to attch to the back of the case.

    Stay tuned...

  9. #24
    Join Date
    Jun 2010
    Location
    twomiles from the "peak of Ohio
    Posts
    12,164
    kickers have been installed..
    computer desk project, 5 frames installed.JPG
    Bottom webframe didn't need one...rotate, add glue and screws...
    Computer desk project, rotate and repeat.JPG
    Add a few clamps, as well..
    computer desk project, case asembled.JPG
    While I scrounge for some plywood for the back...and pull the case into square...
    computer desk project, back installed.JPG
    Then add drawer dividers around in from...glue only, no screws..
    computer desk project, face frame install.JPG
    Added a few extra clamps after this picture...swept the floor.
    computer desk project, cleaned the shop.JPG
    And called it a day, just under 4 hours, today...
    Stay tuned

  10. #25
    Join Date
    Jun 2010
    Location
    twomiles from the "peak of Ohio
    Posts
    12,164
    Snuck back to the shop, this evening...can't stand a clean shop floor, right

    Most of the parts for the 2 webframes for the knee well have been milled to thickness, length and width...have a few details to work out on them, before I get too far along...drawers here will be skinny...about 2" tall. There will be no kickers, top frame will do that job. Ash where it will be seen, Pine where it won't...need to make a back for it...might be a solid wood one?
    stay tuned..

  11. #26
    Join Date
    Jun 2010
    Location
    twomiles from the "peak of Ohio
    Posts
    12,164
    Been picking dried glue off me fingers...picked up a splinter in one of them...Glasses needed cleaned..a few times..
    Knee well frames, parts 1.JPG
    Where I started at...parts for 2 frames that hold 2 drawers over where my legs go under the desk ( Knee Well?)
    Brought an ugly board to the shop....needed a back for betwen the two frames, and blanks for 2 drawers..
    Knee well frames, ugly board1.JPG
    4/4 x 4 x 5' Ash...some places where worst than others...
    Knee well frames, ugly board 3.JPG
    Cut the 5' down to 2 at 28" or so...set the fence, twice...one for 2-1/4" and then at 2"
    Knee well frames, 2 inch wide rips.JPG
    Got rid of most of the ugly stuff,,,needed to thin these down to 3/4"...took two passes...
    Knee well frames, ripped for thickness.JPG
    While the saw was set up...had a few others in line..
    Knee well frames, fat rails.JPG
    Rails were a tad too wide, and..
    Knee well frames, too thick.JPG
    Too thick...That piece beside the rail?
    Knee well frames, front divider 1.JPG
    drawer guides...First, the stiles get a groove thing going..
    Stay tuned...this may take a couple posts...

  12. #27
    Join Date
    Jun 2010
    Location
    twomiles from the "peak of Ohio
    Posts
    12,164
    Stiles got a groove milled, as I didn't want a joint showing...
    Knee well frames, groovy stiles.JPG
    Then the rails got a tenon to fit in the groove....checked the first rail, to make sure it was the right length after the tenons....nope, had to shorten the rails a bit, THEN they matched. The center divider/ runner also got tenons,,
    Knee well frames, center assembly.JPG

    And the center guide was glued and screwed in place...why the step back?
    Knee well frames, dado and parts.JPG
    To allow this block to sit in place. had to notch the block, and cut a dado for the block to sit in..
    Knee well frames, bottom frame assembled 1.JPG
    Glue, clamps, nails....check for square....adjust for square...block needed trimmed for length....
    had to cut the back "wall" for length...can't use the tablesaw (was a bit busy) so..
    Knee well frames, trim the back wall.JPG
    langdon #75 worked just as well, and just as fast.
    Knee well frames, back wall installed.JPG
    Glue and clamps to install....waiting on all the glue to cure, then the top frame goes on this frame.
    Sooooo, once this frame is done, should I glue up a top, or build all the drawers, next?
    Stay tuned ( have to go and get clamps of the case, later)

  13. #28
    Join Date
    Jun 2010
    Location
    twomiles from the "peak of Ohio
    Posts
    12,164
    removed all the clamps from the drawer unit....then gave it a good sanding. Cleaned off the burn marks on the feet, and leveled them...case does not rock. Leg unit was also sanded smooth, and a too long foot adjusted...stashed both units out of the way...
    Knee well frames. cases done.JPG
    Got the top frame of the Knee well unit built....and then clamped to the lower frame....just glue..
    Knee well frames, all assembled 1.JPG
    Small c clamp where I missed a couple nails...Blue Harbor Freight clamps are coming in handy...
    Knee well frames, block details.JPG
    Just glue...block seems to fit the dado, nicely...
    Since I won't have the Pine 1 x 6s to build the drawer sides nor the plywood for the bottoms...will see about gluing up a top for the desk, instead...not sure IF there will be a bread board edge done...depends on the lumber supply....as I also have a hutch to build....
    Stay tuned...

  14. #29
    Join Date
    Jun 2010
    Location
    twomiles from the "peak of Ohio
    Posts
    12,164
    Lets see...Monday....shop is usually closed....I still went down and removed the clamps, and set up corner blocks to attach the top with. Will add those when the desk gets assembled....

    Left knee cap is in the wrong spot....instead of centered, it is off to the left side....knee is very sore, and not working right..have no idea what happened, or when..

    Measured and added four times....top still needs to be 46-1/2" long....even with 1" overhang on each end....may add a little extra? Might cut the blanks for the top at 48" and see what happens...width? Thinking just an overhang along the front edge about 1"? With none out the back? Will see how the glue-up goes....5-1/2" times 4 pc.....

    Stay tuned...

  15. #30
    Join Date
    Jun 2010
    Location
    twomiles from the "peak of Ohio
    Posts
    12,164
    Seems I will be very busy the next few days....Doctor visits (3 !) so...tried to get this thing assembled...
    computer desk assembly, moving day.JPGcomputer desk assembly. inside details.JPG
    Can't work on it here..so
    computer desk assembly, up where I can work.JPG
    Not the easiest thing to do, by meself....just to finish installing a few brackets...
    computer desk assembly, last Stanley.JPG
    Brackets are by Stanley..
    computer desk assembly, Stanley brackets.JPG
    So I could avoid driving screws into the raised panels...
    computer desk assembly, assembly started.JPG
    Some of the corner brackets I use to attach the top...
    computer desk assembly, corner blocks.JPG
    One end fits into the grooves, the other gets a screw..both ends get glued..
    computer desk assembly, details.JPG
    Under that one end, is the pilot hole for the screw to attach things together...
    Had to wait until those screws were installed, before these corner blocks were added...

    Stay tuned...will update what I find out from the Doctors....

Posting Permissions

  • You may not post new threads
  • You may not post replies
  • You may not post attachments
  • You may not edit your posts
  •