Results 1 to 15 of 41

Thread: Cherry Cockpit Table

Hybrid View

Previous Post Previous Post   Next Post Next Post
  1. #1
    Join Date
    Jul 2012
    Location
    Punta Gorda, FL
    Posts
    3,028

    Cherry Cockpit Table

    Yes, it's a little crazy but I have this figured cherry and the boat needs a new cockpit table and...

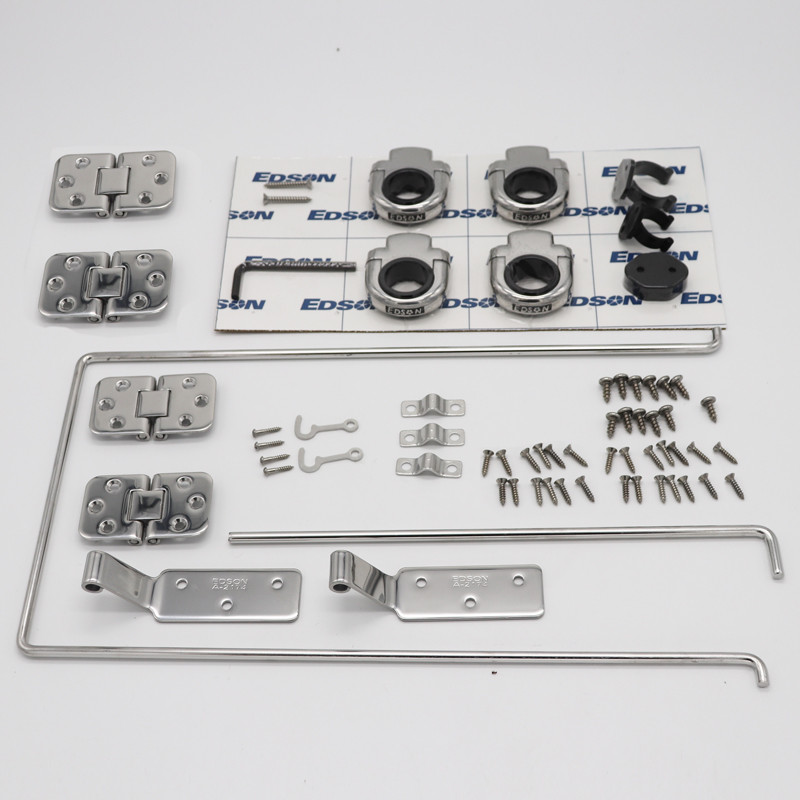
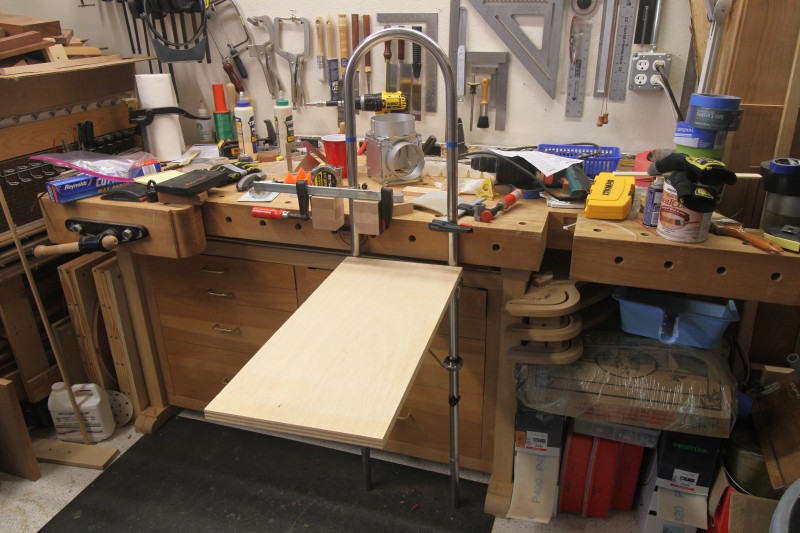
    Took the old pedestal and set it up with the table hardware and a piece of plywood to get things going.


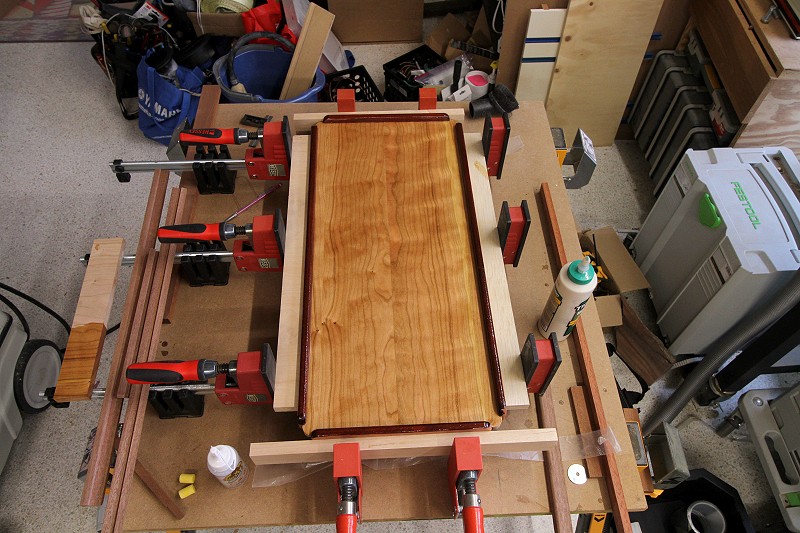
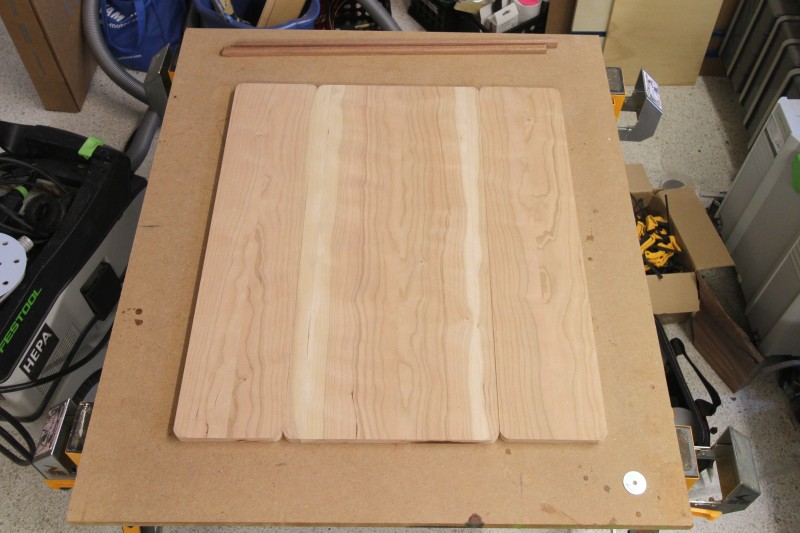
    I milled the cherry to 5/8", ripped the wide boards down the tree's center and glued the whole thing up.


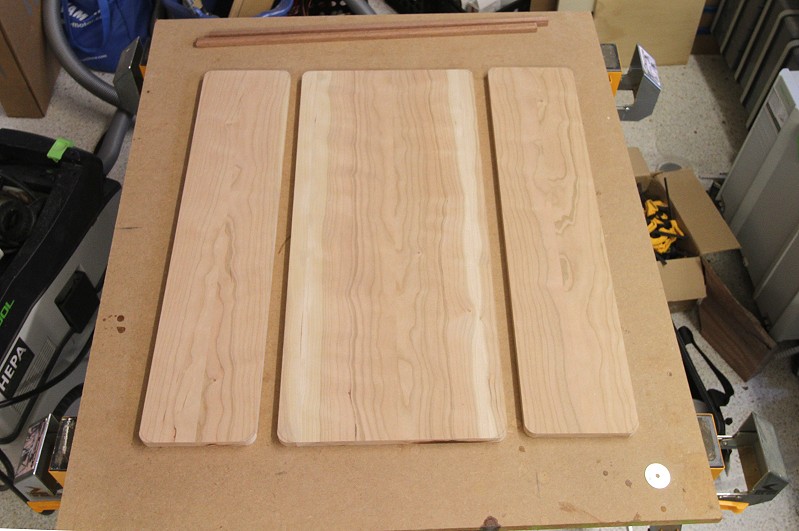
    And ripped it to size


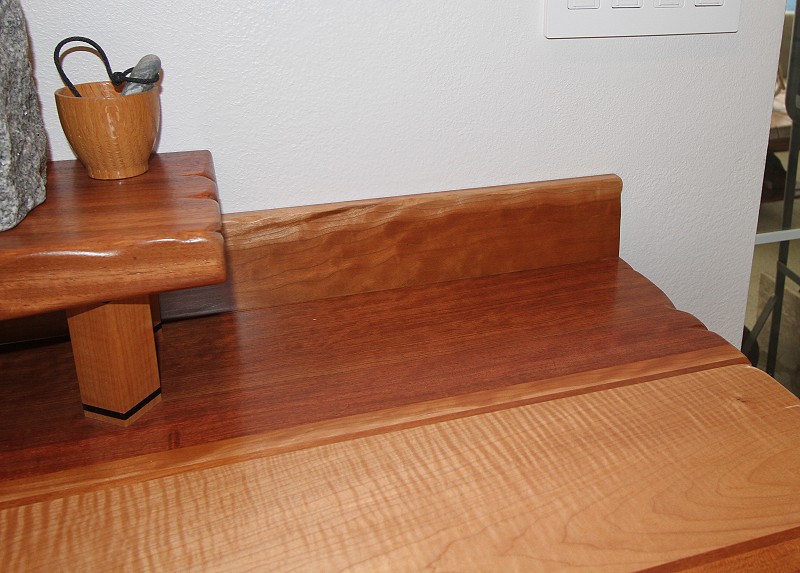
    In the folded position


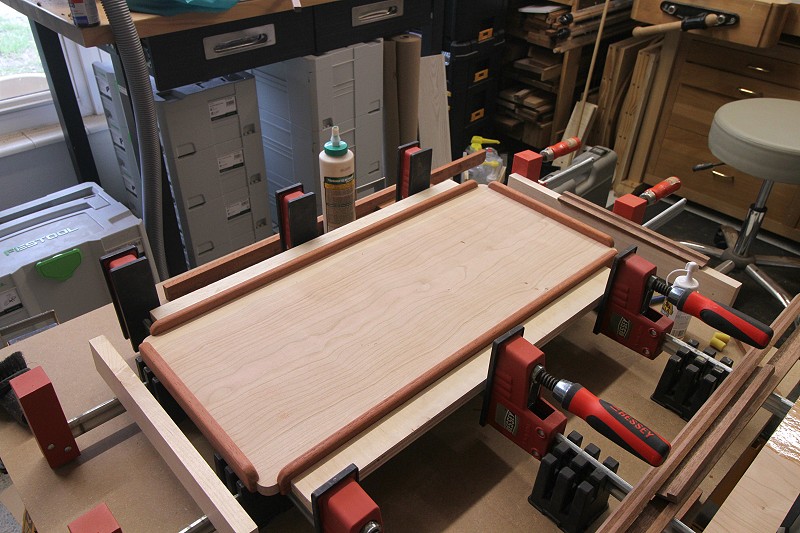
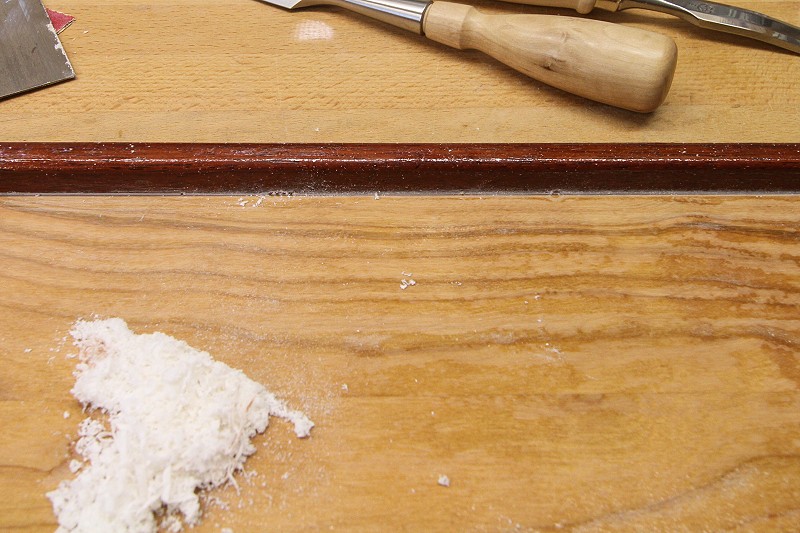
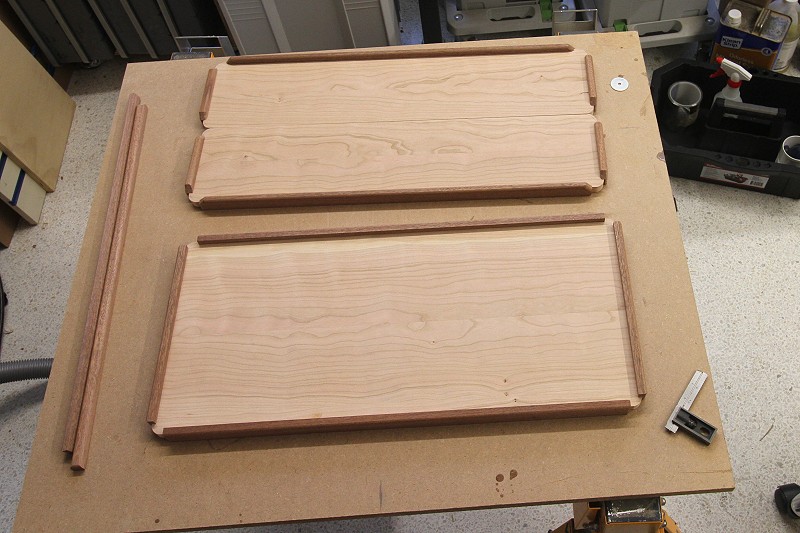
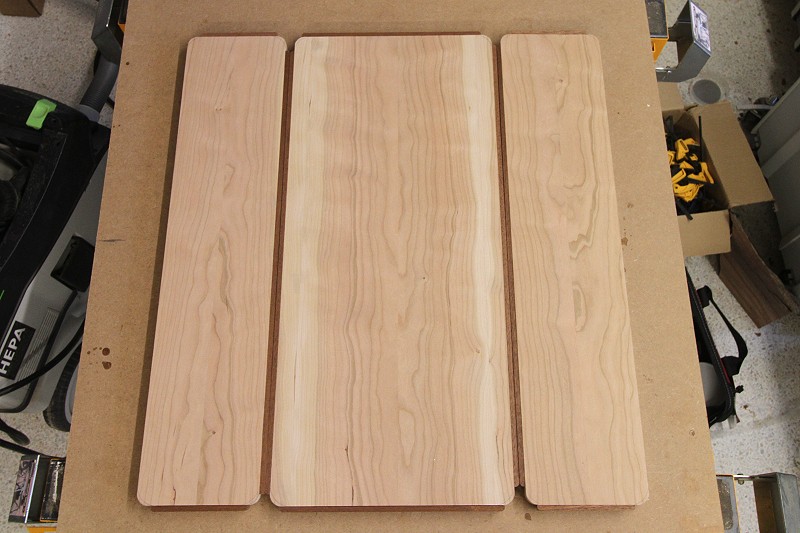
    For the trim I'm using African mahogany. This particular piece was really heavy. So I milled that to size, trimmed some corners and did a roundover on the pieces. Then rabbetted to accept the cherry boards. This would be the open position


    And folded


    “Travel is fatal to prejudice, bigotry, and narrow-mindedness..." - Mark Twain

  2. #2
    Join Date
    Dec 2016
    Location
    South West Ontario
    Posts
    1,503
    Much nicer than that boring teak! Interested in the hardware and finish used.
    ​You can do a lot with very little! You can do a little more with a lot!

  3. #3
    Join Date
    Jul 2012
    Location
    Punta Gorda, FL
    Posts
    3,028
    Quote Originally Posted by William Fretwell View Post
    Interested in the hardware and finish used.
    The hardware is from Edson.


    For the finish I'm using Interlux Perfection Plus. It's a 2 part epoxy. A Practical Sailor test showed it still holding up after two years.
    “Travel is fatal to prejudice, bigotry, and narrow-mindedness..." - Mark Twain

  4. #4
    Join Date
    Jul 2012
    Location
    Punta Gorda, FL
    Posts
    3,028
    The African mahogany rails were pretty blah when I tested them with epoxy. Padauk won the contest for what would replace it. I have a piece of padauk that has retained the red really well so we'll see how that works. Also rounded the corners and lengthened the rails closer to the table corners.

    This is the underside where the bracket will be mounted.


    The two flip tops


    Then epoxied the rails on using West System 105 with the fast hardener. The remainder was diluted with Behkol to use as a sealer. The wood soaked it up like a sponge.
    “Travel is fatal to prejudice, bigotry, and narrow-mindedness..." - Mark Twain

  5. #5
    Join Date
    Dec 2016
    Location
    South West Ontario
    Posts
    1,503
    Gorgeous! Love the lighter cherry colour. Those tables take a lot of sun! After you drill the screw holes do you fill them with Tung oil to help seal them from the rain?
    I will file that hardware supplier in my bookmarks, I do some work on boats but NOT on your scale. The table project is very doable however.
    ​You can do a lot with very little! You can do a little more with a lot!

  6. #6
    Join Date
    Jul 2012
    Location
    Punta Gorda, FL
    Posts
    3,028
    All holes will be drilled larger than needed then filled with full strength epoxy. I have to look into mixing in some collodial silica to see if it adds strength. Where the table hinges go, I am making a routing template that will be a fraction larger than needed so I can lay in some epoxy. Cherry and water don't mix well so it's epoxy in, around and over everything.
    Last edited by Julie Moriarty; 06-23-2019 at 10:08 AM.
    “Travel is fatal to prejudice, bigotry, and narrow-mindedness..." - Mark Twain

  7. #7
    Join Date
    Jul 2012
    Location
    Punta Gorda, FL
    Posts
    3,028
    Some changes with the next coats - use slow hardener; stir very slowly for a couple of minutes to avoid air bubbles; run the brush slowly across the surface.

    Air bubbles - No matter how careful I've been with mixing and applying the penetrating epoxy, the air bubbles persist. Usually you can apply some heat to pop them but I tried that with a heat gun and watched as the epoxy quickly bubbled and turned white. Thankfully, a quick run over it with a wet brush made the mess disappear. More experimentation is necessary.

    Speaking of experimenting, I've been experimenting with the best method to flatten the surface in preparation for the next coat. I've settled on a card scraper followed by a little sandpaper.


    When I was working on this piece I noticed some dried air bubbles in the corner, sealed in epoxy. The card scraper was able to eventually knock it down to nothing.


    I just finished laying the next coat of penetrating epoxy. And the bubbles returned.


    What I think is happening is the porous wood is soaking in the epoxy which in turn is forming the air bubbles. So the epoxy is probably too thick. It's been the consistency of skim milk but maybe it needs to be even thinner. Whatever the case, the epoxy coatings will continue until I know the wood is completely sealed.
    “Travel is fatal to prejudice, bigotry, and narrow-mindedness..." - Mark Twain

  8. #8
    A couple of thoughts for future epoxy coating and encapsulation work:


    • Set up - well in advance - a top for your epoxy mixing pot with an attachment for your shop vac. The vac will pull air bubbles out pretty quickly.
    • Thin the surface coating epoxy with ~5-10% acetone by volume; it will level and de-gas ever so much faster and better. Do not use this much thinner for adhesive/laminating/bonding uses.
    • Yes, your wood will de-gas as air is displaced by the epoxy.
      • Warm the wood surface before coating. Increases flow of the epoxy.
      • GENTLY warm the epoxy mix just before coating. Reduces viscosity of the epoxy.
      • Thinner helps the air move through the epoxy as it too reduces viscosity.
      • Misting (not spraying) with acetone helps break the bubbles at the surface. I use an emptied-out cheap hairspray mister that works pretty well. Use sparingly.

    • These steps make for a really good 'primer' and pore filling base coating. Subsequent coats won't see the wood out-gassing and simpler de-gassing steps usually work well.
    • Use less thinner (or even no thinner if you're working in warm conditions) after the base coat. No more than 5% and less is better.
    • If you're doing 'yachtie-snottie' work and have to get that 'Chris Craft factory finish' look, sand after each coast (starting with the second) to a uniform 320P grit smooth finish before moving on to the next coat. Don't sand until at east 18 hours after gel time or the dust is pretty iriirating. After 36 hours, it's painfully hard to sand. If it ain't perfect, it ain't ready for the next coat.
    • Overcoat the epoxy with a two-part polyurethane with a good UV protection. Interlux Perfection Plus is good stuff and is the only one to choose if you want to roll and tip. It and all the others are best applied by spraying, but with good technique, the Perfection Plus is almost the equal by roll and tip.
    • If you want to roll (and tip) Perfection Plus, I strongly recommend Russell Brown's book; http://ptwatercraft.com/ptwatercraft...ell_Brown.html


    And for those who wonder why boat yard work is soooo expensive, these thoughts provide a bit of a clue! It's a LOT of work to get yacht quality results.
    Fair winds and following seas,
    Jim Waldron

  9. #9
    Join Date
    Jul 2012
    Location
    Punta Gorda, FL
    Posts
    3,028
    Thank you, Jim! This experiment with using cherry and padauk for the cockpit table just might work.
    “Travel is fatal to prejudice, bigotry, and narrow-mindedness..." - Mark Twain

  10. Quote Originally Posted by Julie Moriarty View Post
    Thank you, Jim! This experiment with using cherry and padauk for the cockpit table just might work.
    I've never used Cherry on deck. I'll be interested in how the color behaves after a year in Florida sun. Even with good uv protection from the sealing and surfacing coating(s), it should be expected to darken quite a bit, I would imagine. I look forward to learning more. Keep us up to date, please.
    Fair winds and following seas,
    Jim Waldron

  11. #11
    Join Date
    Jul 2012
    Location
    Punta Gorda, FL
    Posts
    3,028
    I used the same cherry on a backsplash for a cabinet bar. It never sees direct sunlight but still has darkened a lot. The dark wood on the bar top is bubinga.
    “Travel is fatal to prejudice, bigotry, and narrow-mindedness..." - Mark Twain

  12. #12
    Join Date
    Feb 2019
    Location
    Grafton NY
    Posts
    276
    Quote Originally Posted by Julie Moriarty View Post
    What I think is happening is the porous wood is soaking in the epoxy which in turn is forming the air bubbles. So the epoxy is probably too thick. It's been the consistency of skim milk but maybe it needs to be even thinner. Whatever the case, the epoxy coatings will continue until I know the wood is completely sealed.
    you need to do 2-3 seal coats of epoxy. Basically pour a small amount of epoxy and spread it with a shower squeegee. Probably 1 ounce per sq foot.
    Some Blue Tools
    Some Yellow Tools
    A Grizzly Collection
    ShapeokoXL
    Blue and White 50 Watt

  13. #13
    Join Date
    Jul 2012
    Location
    Punta Gorda, FL
    Posts
    3,028
    Quote Originally Posted by Clark Hussey View Post
    you need to do 2-3 seal coats of epoxy. Basically pour a small amount of epoxy and spread it with a shower squeegee. Probably 1 ounce per sq foot.
    Clark, I found this video after the initial bubble problem. The successive coats I've applied have used the techniques shown in the video with one exception - I used a foam brush instead of the roller. Going to the brush requires using a large mixing bucket. I've found (the hard way) small buckets promote heat buildup causing the epoxy to thicken quickly which in turn makes it difficult to spread.

    “Travel is fatal to prejudice, bigotry, and narrow-mindedness..." - Mark Twain

  14. #14
    Join Date
    Feb 2019
    Location
    Grafton NY
    Posts
    276
    Quote Originally Posted by Julie Moriarty View Post
    Clark, I found this video after the initial bubble problem. The successive coats I've applied have used the techniques shown in the video with one exception - I used a foam brush instead of the roller. Going to the brush requires using a large mixing bucket. I've found (the hard way) small buckets promote heat buildup causing the epoxy to thicken quickly which in turn makes it difficult to spread.

    Julie, good video. I used to do epoxy floors. One day while doing a touch-up, I left a small container of epoxy on the tailgate. The epoxy melted right through the container. Lesson learned.
    Some Blue Tools
    Some Yellow Tools
    A Grizzly Collection
    ShapeokoXL
    Blue and White 50 Watt

  15. #15
    Join Date
    Jan 2017
    Location
    Marina del Rey, Ca
    Posts
    1,937
    Quote Originally Posted by Clark Hussey View Post
    ... The epoxy melted right through the container...
    I had one burst into flame.
    "Anything seems possible when you don't know what you're doing."

Posting Permissions

  • You may not post new threads
  • You may not post replies
  • You may not post attachments
  • You may not edit your posts
  •