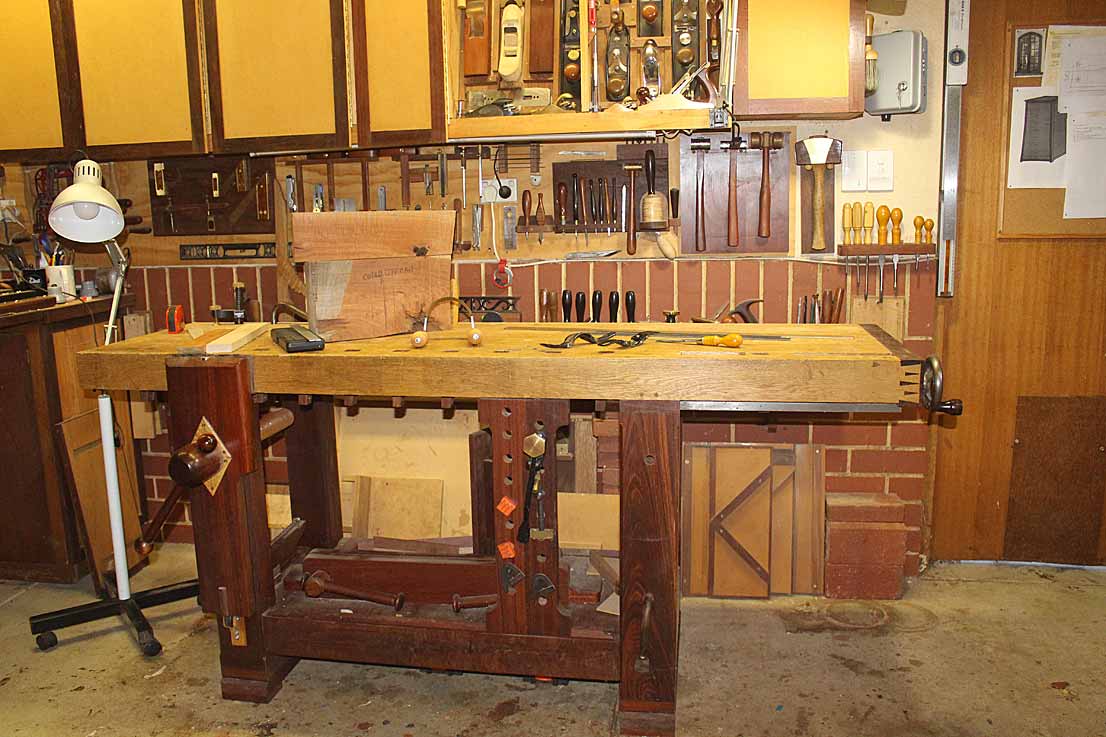
Page 1 of 2 12 LastLast
Results 1 to 15 of 23

Thread: Workbench design and planning

  1. #1

    Workbench design and planning

    So I think it’s time I finally build a proper workbench - something I’ve wanted to do for a few years now. I’ve been researching different styles of benches for just as long and I keep coming back to the Frank Klausz style bench. As much as I think I would love the large shoulder vise, I’ve been worried it will be too big for my small shop - protruding too far out from the bench. But still, I keep coming back to that bench. I think it’s time to stop wondering what if and just get building. I’m feeling a bit overwhelmed (just my personality) on where to start. I have some good resources, the Landis book, the 1985 FWW article with the Klausz bench plans, and some online info about this bench. I plan on maybe decreasing overall width by about 2 inches, and making a few personalized touches. But where to begin? My plan is to write a list of changes and personal touches I have in mind and then draw up my own detailed plans (referencing the plans I already have) to follow. Also thinking of writing a detailed order of operations so I don’t miss any important step (orienting boards in the same direction for ease of hand planing for example). This will be the most complicated thing I’ve made. And I don’t plan on having it done anytime soon. In fact, I’m sure I can’t afford to buy all the lumber in one shot. Anyone have any tips, suggestions, things to remember? Is there anything you’d do different if you were building your bench again? Also, build the base first, then the top? Or vice versa. The only advantage I see of building the top first is that you can locate the base members directly from the top and take your measurements there, rather than planning for each to mate in the right locations. Any advise, comments, suggestions would be appreciated! I have some time off of work soon and I’d really love to get some good plans drawn up and maybe even pick up some lumber!

  2. #2
    it it were me, I'd make my base first. that way i could use them to lay-up and glue my top.
    Be the kind of woman that when your feet hit the ground each morning, the devil says, "oh crap she's up!"


    Tolerance is giving every other human being every right that you claim for yourself.

    "What is man without the beasts? If all the beasts are gone, men would die from great loneliness of spirit. For whatever happens to the beasts will happen to man. All things are connected. " Chief Seattle Duwamish Tribe

  3. #3
    Join Date
    Nov 2013
    Location
    Leland, NC
    Posts
    476
    If you already have some sort of bench to work on then I would make the top first. It is surprising how small differences add up and next thing you know, something does not fit and then the compromising begins.

    Not sure how building the legs would give you something to work on top of unless you throw a makeshift top on the base.

    It is a challenge, that is for sure. Built mine about 20 years ago, 6X6 legs, 3.5 inch maple top. Square dog holes. Even made both the vises from scratch including threading the screws and tapping the nuts. I am a big guy and it was all I could do to tap those 2 inch threads in hard maple. Wound up making a special handle so I could get more leverage to turn the tap.

    Mine is 78" X 39" 6 inches of that 39 is a tool well. I have three what I call "deck plates" that cover the tool well most of the time. I work on all sides of my bench. When I have done larger furniture I prefer not to have to turn things constantly to get in a good spot to work. The rest of the time that extra space is handy for keeping things organized and still within reach. If I had it to do over again I would not change anything.

    I love wooden vises. Wooden screws work great. A huge secret to working with vises is to line one of the jaw faces with leather, that way you do not need anywhere near as much pressure to hold something firmly. My face vise opens up a full 24". I rarely open it that much but that takes a few turns on the handle!

    My "hardware store" is under the bench. A bank of cabinets with a total of 15 drawers, three of them dedicated to hardware.

  4. #4
    Join Date
    Oct 2006
    Location
    Manistique, Michigan
    Posts
    1,367
    I would make the base first. That’s how I made mine. Make a good sketch of your bench so you know the top will match the base. I used rough cut maple. I jointed and planed strips parallel and glued them together. Then with the top sitting on the base, I flattened the top with a router and jig while it was sitting on the base.

  5. #5
    Join Date
    Aug 2017
    Location
    Hobart, Australia
    Posts
    8
    Dan, have you looked at David Barron’s version. It’s a simplified build of the same style.


  6. Paul Sellars

    Made several You tube videos (free) of him making a "traditional" bench from high quality plywood. It is aimed at people who need their first bench.

    I understand he has produced some furniture that is in the White House, and is good instructor albeit sometimes a bit slow and wordy.

  7. #7
    I have made a couple of similar benches that have a wooden tail vise with a steel screw and a Record quick release front vice. The front vise works for me, takes less space and is easier to adjust than a wooden shoulder vise. Doing it again I would use a steel tail vise like this http://www.leevalley.com/us/wood/pag...36&cat=1,41659 or this http://www.leevalley.com/us/wood/pag...46&cat=1,41659 and I would ditch the tool well which just fills up with debris. On my second bench I wound up rabbeting the top of the tool well to accept a 1/2" plywood lid which keeps the shavings out. In it I keep a bench slave, a holdfast and a bench hook among other things. I have an old Record holdfast which I like- this appears to be a copy https://www.highlandwoodworking.com/bench-holdfast.aspx

    I made the tops of rift hard maple by ripping 2 1/2" strips out of flatsawn planks and edge gluing them, which has stayed reatively flat and stable. The bases are KD with stub tenoned and bolted rails tying the trestles together. Weight and rigidity are your friends when hand planing and similar tasks. The wooden bench is a few steps away from a 4'x8' assembly table (currently my cnc router, but in the past was a light 4" thick torsion box covered with p-lam on boxes that could be turned for a table height of 24" or 32").

    DSCN0607[1].jpgDSCN0608[1].jpgDSCN0609[1].jpg

  8. #8
    Join Date
    Mar 2003
    Location
    SE PA - Central Bucks County
    Posts
    65,850
    While it's easy to admire a big, fancy, stout, thick-topped amazing traditional bench in any number of alternative designs, the number one bottom line thing for a bench is that it is 1) flat and 2) sturdy enough and sized appropriately to support the kind of work one intends to use it for. The materail one uses is only relevant to those things. My "ideal" has changed over the years based on my own experience and my work habits.

    The base is almost more important than the top because it's got to fully support the intended use so pay attention to the design if you're building or buying. I personally prefer an adjustable height work surface for my bench so I opted for a commercially available adjustable height bench. (Adjust-A-Bench by Geoff Noden) There have been good examples of shop made adjustable height solutions here in the forums over the years, too. But a fixed height is fine, too, so make that stout, whether you do it first or put together your work surface first and support it temporarily while you develop your base. My personal opinion is to start with the base because it's the foundation of the whole thing.

    Relative to the work surface, early on, I coveted a thick, solid wood bench top and when I put together my current solution a number of years ago, I went with a maple top with a face vice and a reasonable grid of dog holes. I don't do a lot of work with hand tools, but I do bring out my hand planes occasionally for refining things. What I have has served reasonably well...it's large enough at 30" x 60", solid and doesn't move much. On the downside, it's been a challenge to keep flat and reconditioning it periodically is something I frankly do not enjoy. The dog hole system has been functional, but since it's not a precise grid and also uses .75" holes, it's less attractive at this point compared to my portable Festool MFT top with the very precise 9mm grid of 20mm holes. This is important because most of my bench top use, aside from some fine fitting and "piling up of components" is for assembly work. So one of my planned projects for "real soon now" is to make a new, more "modern" bench top that retains my ability to utilize the vice while adding the work-holding and alignment benefits of the MFT style work surface. It will be a "hybrid" design, in other words and most likely be built as a torsion box so I can enjoy having it stay flatter over time than the maple top I have now.

    There is nothing wrong with using materials like plywood, MDF and laminates for a workshop bench surface. They may not look as kewel as a laminated maple, beechwood or other hardwood top, but they will function as well or maybe even better over time. Functionality is a good thing...

    -----

    Kevin, I see you, like me, also use your CNC for "alternative work support", too.
    --

    The most expensive tool is the one you buy "cheaply" and often...

  9. #9
    I used the Schwartz book to build my bench. Went 24" wide, which works great for some things, but a few inches wider would have made it a better assembly bench. I built an assembly table with adjustable height which I use as well.

  10. #10
    Join Date
    Feb 2004
    Location
    Perth, Australia
    Posts
    9,492
    It depends on what you plan to use the bench to do. A predominantly power tool user will not need the hugely beefed up bench of a hand tool user. After roughing out on machines, I hand plane all my work. I chop and pare with chisels. The bench is designed around work-holding vises for this purpose (leg vise for edge planing, wagon tail vise for face planing, moxon vise for dovetailing). The bench dogs and hold downs playing an important role. The bench top is thick and heavy (3 1/2” oak) on a extremely solid Jarrah base. It must not rack. I doubt a bench could be made adjustable and still have the rigidity.


    Ask yourself why you want Frank Klausz’ face vise. What work do you want the bench to do? What have you used to date, and what do you find useful. A bench is a tool - make it work for you, not just look interesting.

    Regards from Perth

    Derek

  11. #11
    Dan,

    I too elected to go with the Klauzs design bench. Referred heavily to Landis' book plus a couple article with a few more drawings. (I can't remember where I got them but would be happy to email them to you. PM me if desired)

    My "do better/do overs":

    1. Tail vise sag is a common issue but can be rectified with shimming the brackets, which I seem to be too lazy/distracted to do. Doesn't affect the performance.

    2. Bench dog hole spacing. I would space them closer in the tail vise.

    3. Quick release vises!! Especially on the tail vise. Will eventually upgrade.

    4. Tool tray - I would put a trap door clean out in the middle. And like any bench its a shavings/cutoff and really good for losing your pencil/small squares etc.

    5. When doing the splines to attach the aprons, be sure not to mix up tops and bottoms of aprons LOL.

    6. Bench dogs: I went with DIY dogs, had to do over I would buy the LN steel dogs (which my current holes are too big for).

    Other than these things, I absolutely love this bench. The hard maple top, although about 2 3/4" thick on mine, is still plenty stiff enough. The shoulder vise eliminated the need for a moxon. Board jack (can't remember the name) you can do anything.

    Let me know if I can help you any other way.

    IMG_1705.jpg
    IMG_1800.jpg
    IMG_1801.jpg
    IMG_1803.jpg
    Bench Slave.jpg

  12. #12
    Join Date
    May 2014
    Location
    Alberta
    Posts
    2,162
    Dan about 5 years ago I got the' bench building bug'. I bought a book about it and read all my W.W. mags trying to figure out what to build. I decided that I did not know which height would work best so I built a simple bench from framing lumber. I made my base just like the bench Lon Schleining built.I made my bench top from three layers of plywood glued up. Started with a layer of one inch,then 3/4'' and last 1/2'' baltic birch. My top is very stiff and stays flat. I only have a quick release Record vise and a few holes for a pair of Gramercy holdfasts. I am not sure if I will ever replace my "temporary bench ",it is not as sexy as the glued up Maple benches but it flat works. I would like a tail vise someday. Good luck with your build.

  13. #13
    Derek,
    The biggest issue I’ve been back and forth on is the Klausz style shoulder vise. I hate the idea of an additional 10”+ protrusion jutting out from the front of the bench. I’m sure it’ll get in the way in my small shop. But I love the idea of having 7-8” of unobstructed clamping. As well as the additional surface area to the left of the vise. I’ve never used that style vise, but I have used standard cast iron front vises, and I think the screws and bars get in the way. This bench would certainly be for hand tool use. I’m a “hybrid” woodworker. Milling, dimensioning and some joinery is done with power tools, but every project sees hand work.

  14. #14
    If I may chime in, I would say the shoulder vise is THE single reason for building a Scandinavian bench. The versatility of a shoulder vise will be appreciated the first time you use it.

    For me the shoulder vise does the job of a both a leg vise and moxon.

    4 feet of space in front of the vise is good. 3’ minimum.

  15. #15
    Quote Originally Posted by Robert Engel View Post
    If I may chime in, I would say the shoulder vise is THE single reason for building a Scandinavian bench. The versatility of a shoulder vise will be appreciated the first time you use it.

    For me the shoulder vise does the job of a both a leg vise and moxon.

    4 feet of space in front of the vise is good. 3’ minimum.
    I would miss the shoulder vise on mine. I use it all the time, even though I am more power tool than most of the Neander types. One of the main things I use it for it edge jointing, since I have a too-small, crummy jointer. I don't often dovetail, but when I do, I wouldn't be without a shoulder vise; it makes it so much easier. Leg vises and moxon vises would just p!ss me off, if I had to use them.

    If you are worried about space, you could do the Tage Frid design. It is basically the same bench, but a little smaller. I built that one rather than Klaus's for space reasons as well. It has worked just fine for me. Plans are in FWW #4, the third Tage Frid cabinet making book, and maybe other places.

    As for recommendations, I agree with most of the things posted. More dog holes and closer together. I made mine 13/16, so I can just make dogs out of 3/4 stock boards. I have a habit of hitting the dogs with planes, so steel doesn't work for me.

    I would do the base first, it makes it convenient to set the top on as you work on it. I did that on the two Tage Frid benches I built. As everyone says, get your hardware first, in case you need to modify the design to accommodate available hardware. Be careful on choosing the height of the bench, my first one was a little too high for my liking. The second one (pictured below) was about an inch shorter, and I like that much better.

    Maple and beech were traditionally used because they were cheap and available in the right size and quanity, and the light color helps make it easier to see on the bench. Any decent hardwood should work though. I used 8/4 maple and cut it into strips 2" wide and then turned them 90 and laminated them in a quarter sawn grain pattern. I then planed the top in my planer to make everything nices flat and even. You could do the traditional hand planing, but that seems like an awful lot of work do to what a machine does very well.

    How you work will determine what bench you will like. As I said before, I use a lot of power tools as well as hand tools. Personally I like this bench because it makes securing work quick and easy for both hand tool and power tool wood working. I frequently hold things I am routing with the dogs and tail vise. I think a lot of why I like the bench is that it works well with the scale of many things I build, small and mid size pieces from about inches to 5 feet. It occasionally might be handier if it was larger, but this size bench certainly hasn't held me back at all.

    Frid Bench.jpg

Posting Permissions

  • You may not post new threads
  • You may not post replies
  • You may not post attachments
  • You may not edit your posts
  •