Results 1 to 8 of 8

Thread: Shaping 1/4" TDL's

  1. #1
    Join Date
    Dec 2018
    Location
    Pennsburg, PA
    Posts
    39

    Shaping 1/4" TDL's

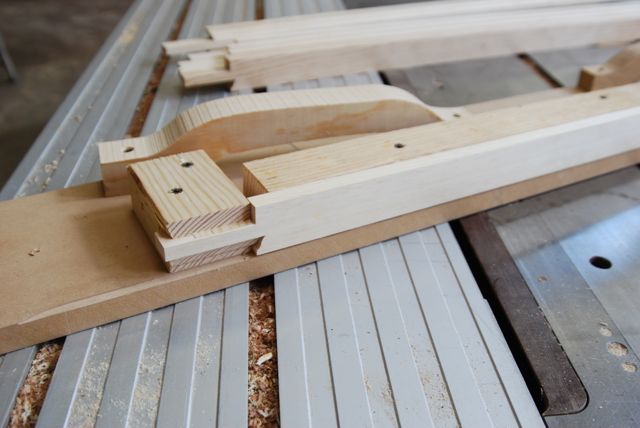
    In the past I worked at a shop that specializes in historic windows and doors. I decided to go out on my own and start my own shop. I'm about 4 months into it and the only thing I've really been having a hard time with is getting consistent results shaping thin TDL's (1/4 between glass). Right now I rip my rough stock wide enough to shape each side and rip it in half to shape the other sides (getting two bars out of one piece). This is where I run into problems. I made a jig with a cope cut along the edge to accept my work piece and a backer piece to prevent it from coming out the back of the jig. I power feed the jig and work piece through the shaper and always get dicey results. This includes considerable sniping, and variation in width along the length of the piece. I can't use an outboard fence, because my work piece wont stay in the jig, unless there is a way to fix it to the jig...
    Does anyone have any suggestions? I'm relatively new to this so I'm try to get my mind wrapped around all that goes into it. So far all of my jobs have involved 3/4 bars, this is my first whack at 1/4.
    If you need pics I can upload them.
    Thanks ahead of time
    Jack

  2. #2
    Join Date
    May 2013
    Location
    Northern Virginia
    Posts
    1,370
    Blog Entries
    3
    Im picturing your current setup as a jig like this:http://customfurniture.us/index.php/...ic-window-sash

    Last edited by Jared Sankovich; 05-09-2019 at 2:00 PM.

  3. #3
    Join Date
    Dec 2018
    Location
    Pennsburg, PA
    Posts
    39
    Jared,
    That helped. Having a flat sheet on the bottom helps to keep the piece in place while shaping. Feeding by hand was something I didn't want to attempt because I'm taking off a decent amount of material, but it allows for better control than the powerfeeder. I'm still getting variance in width but I'm chalking it up to my rips being inconsistent. I'll make an attempt to better my rips for next time.
    Thanks
    Jack

  4. #4
    Join Date
    May 2013
    Location
    Northern Virginia
    Posts
    1,370
    Blog Entries
    3
    How about a outboard fence to match the rabbet and part of the profile. Keep it tight to the main fence so its basically captured between fences, With the feeder angled out. I run thin moulding all the time that way.

  5. #5
    Join Date
    May 2013
    Location
    Northern Virginia
    Posts
    1,370
    Blog Entries
    3

  6. #6
    Join Date
    Dec 2008
    Location
    Ouray Colorado
    Posts
    1,400
    1/4” bar width can get dicey especially if it’s deep for IGU. Single pane putty glaze is not too bad because not a lot of material removed. Here is a little food for thought. First side is always easy. For the second side a carrier piece that is counter profiled and the same thickness so the feeder wheel gets purchase on both pieces works pretty well. This picture is not a TDL but you can get the idea.
    88617AC7-628E-4ABF-895C-DBF0F2DFF4C6.jpg

    Another method is turning the feeder against the fence and making a add on fence with a ledge. This fence is also taking a millimeter off the entire edge. I found it works better to keep 3 wheels on the infeed and some Aigner rollers helping on the outfeed. A feather board would work also.

    4F688A8E-E613-4245-B97F-91DDD2E54B31.jpg
    935A4134-5A68-4235-8E23-5F544BD128CC.jpg
    B0E19041-BE5D-45C1-8292-F011EB3DBD04.jpg

    Yet another method and i like this for low volume and one off work is to make the bars 2 piece. Makes the cross laps easy if you don’t have a Stegherr type machine for this.
    6494B0F2-B42D-4A03-88AD-9AD03851CDA1.jpg

  7. #7
    Join Date
    Nov 2012
    Location
    North Dana, Masachusetts
    Posts
    489
    I make muntins as narrow as 9/16", with 3/16" between the rabbets. I break up the jobs of running the sticking and rabbets.

    I plane muntins to finish size, plus .002" to 003" at the planer. next, everything gets tenoned to finished length, and mortised as needed.

    The sticking is run on a shaper. For a fence, I use 1/4" thick aluminum stock screwed to the wooden fence. The cutter runs under the aluminum, so the pieces don't snipe. I just made a sash with 4" long muntins. Long muntins get run with a feather board and a stock feeder. Short muntins can also be fed, using a mini feeder. For small jobs, I use a push block and hand feed the short muntins.

    I run the rabbets on a dado blade on a table saw. I use a wooden table and fence, and raise the blade through it to make zero clearance above and beside the stock. Again, the stock is fed with a featherboard and a mini feeder. Checking the wood left between the rabbets with a dial caliper, I keep the .002" to.003" over for a mush factor. The fence on the table saw is locked front and back, and the wooden table is screwed down to prevent movement and flexing. The dado blade is always sharp. I hope that the saw tooth striations on the muntins give a good surface for putty to grip to. Certainly when the wood is primed before glazing, it's a little rougher than the smooth wood from a shaper.

    Breaking up shaping sticking and running rabbets into two operations does take more time, but the wood runs fast, and the results are consistently good.

  8. #8
    Join Date
    Sep 2016
    Location
    Modesto, CA, USA
    Posts
    9,978
    Why not run the wood through the planer after ripping to rough width?

Tags for this Thread

Posting Permissions

  • You may not post new threads
  • You may not post replies
  • You may not post attachments
  • You may not edit your posts
  •