Results 1 to 15 of 15

Thread: First Glue Up Attempt

  1. #1

    First Glue Up Attempt

    Hello all, looking to show off what I have done so far and ask for some advice/feedback on my glue up.

    I am building two dog kennels that will serve as bedside tables in our master bedroom. The body is 4/4 planed down to 7/8" poplar and the top is 6/4 black walnut planed down just under 1 1/4". All the wood was rough when I bought it. Milling everything out has been very enjoyable and full of learning moments.

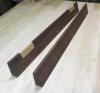
    I have all my walnut ready for glue, I think, but since each top is about $100 bucks in wood I figured I would pause and ask you all for tips/tricks. So far I have the wood all planed out and edge jointed on my router table (no dedicated jointer). I have ripped the piece to widths between 2 1/4" and 5". The picture shows them all mocked up. My edges fit tight, I am pleased with them.

    Here are my questions:

    1.) Some boards have some bowing in them. I am planning to use three cauls, one in the middle and one on either end. Is this the right approach?
    2.) I plan to use TBIII glue, no mechanical fasteners (like pocket screws). Is that OK?
    3.) How long do you normally allow the glue to cure before working the project?
    4.) When is the best time to clean up the glue squeeze out? And, how?
    5.) Once this beast is all glued up, how is the best way to square up my corners?

    Thanks, in advance, for the help!

    57429416383__8A9279A5-ED10-460E-94F6-73C1F620F08D.jpg57429415765__ACA19550-9DB7-475B-95AD-92EB42F2FEE7.jpgIMG_2374.jpgIMG_2402.jpgIMG_2403.jpgIMG_2404.jpg

  2. #2
    Join Date
    Mar 2006
    Location
    Austin Texas
    Posts
    1,957
    1. Yes. I use more than three cauls on longer pieces or when there is excessive mis alignment. I apply the clamps in an alternating pattern of clamps on the lower side (as shown in your photos) and over the top.
    2. I don't remember ever using TB III (or it was a long time ago), but I have not heard any reason why it should not work. I use the original TB for 99% of everything unless it is for outdoors/wet applications. Again, TB III should be just fine.
    3. Hot-dryish weather, I have been known to pull the clamps in 30-45 min but handle the piece gently and set aside for final curing without any further handling. Usually, clamp today, continue work on that piece tomorrow. I don't believe that long is required for curing, just how it works in my shop. Decent weather - maybe 2,3,4? hours? Others should have more scientific knowledge on that.
    4. I wait until the squeeze out is "rubbery", than try to carefully peel the squeeze out off with a thin, flat blade (flexible paint scraper type tool) in as intact a squeeze out run as I can. Work the blade so as to run under the glue but not lift up wood. Weather dependent, but this is usually 30 min or so after clamping. Stuff that I cannot get to until I remove the clamps well after everything is hardened, I scrape off.
    5. I use a hand saw on wider pieces like your table top. Others may use a circular saw or one of the newer track saws.
    David

  3. #3
    Join Date
    Jan 2006
    Location
    Mt. Pleasant, MI
    Posts
    2,924
    1.) Some boards have some bowing in them. I am planning to use three cauls, one in the middle and one on either end. Is this the right approach?

    It is an approach. As long as the misalignment isn't too much it is fine. You don't want that board putting undo stress on the others so flat to start is the best option. How much is too much is a moving target. This is what the jointer does.

    2.) I plan to use TBIII glue, no mechanical fasteners (like pocket screws). Is that OK?

    Yes. I don't use TBIII but it is as good as any of the other yellow glues and edge to edge grain is plenty strong. See above, I sometimes use biscuits but simply for the alignment aspect and not for any real or perceived added strength.

    3.) How long do you normally allow the glue to cure before working the project?

    There was some testing done a while back I read somewhere. Under normal conditions most yellow PVA glue has 80-90% strength in 30 minutes. I leave it in the clamps at least that long. Light work in an hour or two with heavy milling, etc after several hours.

    4.) When is the best time to clean up the glue squeeze out? And, how?

    Tomato/banana. They all work to some extent better or worse depending. I try to not final dimension until after glue ups when I can so the planer takes care of it in those situations. Otherwise I let is get gummy and pop it off with a ratted out old chisel.

    5.) Once this beast is all glued up, how is the best way to square up my corners?

    Crosscut sled on the tablesaw. Other options are track saw or shop built saw guide or router with a guide after a rough chop with a circular saw. Careful layout will yield good results with any of those.

    Make sure to post a picture of said dog prison once done.

    Joe
    JC Custom WoodWorks

    For best results, try not to do anything stupid.

    "So this is how liberty dies...with thunderous applause." - Padmé Amidala "Star Wars III: The Revenge of the Sith"

  4. #4
    Join Date
    Mar 2015
    Location
    SE Michigan
    Posts
    3,225
    A few things that might be obvious, but be sure to put clear packing tape or similar on the faces of the cauls so they don’t get glued to the top. Also, if you think it might take some effort to straighten the “bow” before the glue sets up, you can glue just two boards first, and then glue up the additional boards one at a time. You may also want to put some wax paper or something between the black pipe and the wood...the black pipe can sometimes stain the wood.

    TBIII will give you a little more open time, but if you want even more, you could use Titebond liquid hyde glue.

  5. #5
    Join Date
    Nov 2009
    Location
    Peoria, IL
    Posts
    4,506
    I'd suggest a little more effort in color matching. When you have sapwood on one board at the seam, bring up another board with sapwood. Not a dark heartwood piece. Don't let the walnut sit on the pipe when you glue up. You will get dark staining with the reaction of the glue to the steel.

  6. #6
    Thanks all! Great info.

  7. #7
    Join Date
    Apr 2007
    Location
    Columbus, Ohio, USA
    Posts
    3,441
    This will be large, heavy, and awkward to deal with after it is glued up. Make the boards as straight / flat as you can before glue-up so that you can do minimal work after.

    Sometimes I glue in stages, especially if a single glue-up will allow me to use my machines and a full glue-up will not. For example, I have a 13" thickness planer. If I have four boards that make a total width of 20 inches, I might glue two boards together to make 10 inches each and clean them up on the planer before doing the final glue-up.

    Tightbond III is what I usually use and it has a longer open time. I leave the boards clamped at least one hour and I do not do significant work for 24 hours. Why?

    http://www.titebond.com/resources/use/glues/faqs

    For most of our wood glues, we recommend clamping an unstressed joint for thirty minutes to an hour. Stressed joints need to be clamped for 24 hours. We recommend not stressing the new joint for at least 24 hours. For Titebond Polyurethane Glue, we recommend clamping for at least forty-five minutes. The glue is completely cured within 6 hours.

  8. #8
    Join Date
    Jul 2013
    Posts
    547
    Blog Entries
    1
    Alternate tour clamps between the top and bottom e.g. two pipes on one face, the other two on the other. Alternating.

  9. #9
    If it was me, I wouldn’t glue all those up at the same time. There’s going to be a lot of movement once you out the glue on and it will probably be tough to keep it aligned well. I would do a few boards at a time.

  10. #10
    Got it all glued up. Did it in three sections that each will make a run through the planer. Than I’ll glue the three section together, maybe tomorrow.

    Worried I didn’t use enough glue? I have squeeze most everywhere, but not EVERYWHERE. We shall see.

  11. #11
    Join Date
    Jun 2018
    Location
    Hilo, Hawaii
    Posts
    208
    Blog Entries
    1
    Re and re read carefully what all the other people said about technique. That said, I think Richard Coers got it right. Very carefully select your grain pattern, take a couple days coming back to it if you can. It is something g easy to rush, but you will want to destroy things you build because you can do it better now. A hastily thought out grain pattern matching on wood as nice as that will make you very upset in the coming months.

  12. #12
    Update!

    This is what I would consider to be my "first" wood project. Super proud of it, but, please critic if you see something I can learn from.

    My glue up went amazing, with the help of you all. Very happy with it. The first coat of poly is drying right now. Going to build a sister to this with the door opening opposite. They will be bed side tables. The intent, which worked great, was to have the door swing 180* and stay open so the dogs can come and go at night or during the day when we are home and than we can easily shut the door when we leave. The dogs are never left out when we aren't home.

    I do need advice on the latch... I cannot seem to find any good ideas. I want a simple, small, discrete latch. Something that goes on the inside that we can reach in and use would work also, does not have to mount outside. If it mounts outside, i want it to mount of the right side wall so the front is kept perfectly clean. Thoughts???

    There is only one tiny mistake on this build that only my wife and I will notice. When routing the edge of the top my router tipped backwards and dove the bit about 3/16" deeper than my run. So, i lowered the router about 1/8" and re ran the pass. Cleaned up well, but i will still notice that ~1/16" bump! lol. I am running a Triton 3 1/4HP router, it lives in my router table and I remove for work like this. Its HEAVY and awkward. Do you all have a smaller, mid sized router that you use for this type of work and leave your beast in the router table? I am considering buying the Triton 2 1/4HP unit for work like this ... Thoughts???

    Anyway... here are the pics!

    If you look carefully at the corner you can see the dip in the edge corner where the router tipped. Oh the cuss words that flew. It was impressive.
    57816940631__C6C0ABAB-29C8-43D6-B169-9E4B4F3E0723.jpg

    First coat of poly.

    IMG_2439.jpg

    Here it is with the front door closed.

    57816934937__FBC47FF1-F689-4CCC-84A8-C30D60FB9AFA.jpg

    And open. Thoughts on the type of latch i could use?

    57816936136__54572B7A-66F3-4169-BEB1-8EC3AA138266.jpg

    Thanks everyone. I really enjoyed this build.

    Oh! And here is a pic of the lucky pup that gets a new place to call lay down. She is a boxer/lab. Turns four in two weeks. Her name is Whiskey. She is an amazing dog. Loves like I have never seen a dog love. We spent 2 years training her to be a registered therapy dog and now she loves going to the Children's Home here in town and hanging with the kids and playing frisbee with them.

    IMG_1623.jpg

    IMG_1630.jpg

  13. #13
    What about a window sash for a latch? Could mount on the side of the kennel easily.

  14. #14
    Join Date
    Feb 2019
    Location
    Denver
    Posts
    142
    Jack - What a brilliant project - The "Nightstand Dog Kennel". I'm sure Fine Woodworking will want to publish this .

    Your work is great for a first build. Just keep on building and you'll figure out how everything works. The first table tops I built looked like a skateboard park after using a belt sander on soft wood!

    The 3-1/4 HP router is too much for hand-held edge work as you discovered. You will want to dedicate this to your router table. With a smaller router and firm hand pressure on the base you will avoid the tipping.

    I haven't used the Triton routers. I've used lots of Porter Cable routers in all sizes and love them. I've never had a service issue. I have one Festool 2-1/4 HP (the OF 1400) and LOVE it too. I use this in conjunction with the guide rail and the 32 mm system. Festool is an investment for sure. You'll hear many woodworkers say they love Festool and it's worth it. You'll also hear many say it isn't. You can always buy one and return it within 30 days. I also hear good things about Dewalt, Bosch, etc. Since you don't yet have an arsenal of routers, you might be wise to get a plunge router for the next one as it will add versatility. Watch several YouTube videos before you buy your next router and see what features you think you will use.

  15. #15
    Thanks Mark! I appreciate the info!

Posting Permissions

  • You may not post new threads
  • You may not post replies
  • You may not post attachments
  • You may not edit your posts
  •