Results 1 to 13 of 13

Thread: Balance beam

  1. #1

    Balance beam

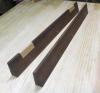
    I made a balance beam for my son to play on. I bought the straightest (ugh!) doug fir 4x4 I could find at the big box store. While this was a down and dirty project not intended to be very refined, I had a horrible time with the curves on the feet. It was too thick to really use my turning saw with any kind of accuracy on the back side (and I don’t have too much experience with my turning saw). I mostly whacked away at it with a 1 inch chisel to get it reasonably close, then switched to a draw knife. My draw knife is pretty big - too big for something like this, so I tried to finish up with a spoke shave (too small!) as much as I could. It would have been nice to have a smallish draw knife or a heavy rasp. Oh well. Given its purpose (to entertain a 7 year old and slowly succumb to the weather) I think it’s good enough. I don’t know how well the glue will hold up to the weather, although it will be mostly under a covered area, so I drove a large lag screw through each foot. Three coats of spar urethane to seal it up. This project was a challenge for my tiny bench.
    beam1.jpg
    beam2.jpg
    beam3.jpg
    beam4.jpg

  2. #2
    Join Date
    Sep 2007
    Location
    Longview WA
    Posts
    27,427
    Blog Entries
    1
    Neat

    jtk
    "A pessimist sees the difficulty in every opportunity; an optimist sees the opportunity in every difficulty."
    - Sir Winston Churchill (1874-1965)

  3. #3
    Join Date
    Sep 2008
    Location
    N. Idaho
    Posts
    1,621
    That's the best kind of project! Looks great and enjoy watching your son have fun.
    "You can observe a lot just by watching."
    --Yogi Berra

  4. #4
    Join Date
    Mar 2004
    Location
    Cockeysville, Md
    Posts
    1,805
    Neat idea Chris. It looks great!

    So tell us...... who tried it out first?
    The significant problems we encounter cannot be solved at the same level of thinking we were at when we created them.

    The penalty for inaccuracy is more work

  5. #5
    Join Date
    Dec 2015
    Location
    Cincinnati, Ohio - north
    Posts
    110
    Or who crashed first?

  6. #6
    Chris, What a neat project to make for your son. I only wish I had seen this a few summers back when we had our similar aged niece staying with us. I suspect this project would have been a big hit with her.


    As to cutting the curves, My suggestion would not be to use a turning saw, spoke shave/drawknife or a rasp to do that. I would pencil in my curve, then saw multiple crosscuts to that line. Then use a wider chisel (bevel down) to remove the waste.

    I think if you try that, you’ll find that it works to quickly remove lots of material and it will still leave a reasonable finished surface.

  7. #7
    Join Date
    Feb 2007
    Location
    Libertyville, IL (Chicago - North)
    Posts
    360
    Chris, You have overcome your short bench issue by making yourself a nice, long Japanese planing bench and pretending it is a balance beam for your son. Clever!

  8. #8
    Join Date
    Feb 2008
    Location
    E TN, near Knoxville
    Posts
    12,298
    Excellent! Kids of all ages like those, great for their devlopent. I've cobbled them together with construction lumber and the grandkids used them a lot. But that one is way too nice!

  9. #9
    Join Date
    Feb 2003
    Location
    McKean, PA
    Posts
    15,635
    Blog Entries
    1
    I made a similar balance beam when my kids were young and they played with it for many years.
    Lee Schierer
    USNA '71
    Go Navy!

    My advice, comments and suggestions are free, but it costs money to run the site. If you found something of value here please give a little something back by becoming a contributor! Please Contribute

  10. #10
    Well, we gave it a good workout today. I think my son got the better of me.

  11. #11
    Join Date
    Jan 2004
    Location
    Lewiston, Idaho
    Posts
    28,530
    It's great project that will get a lot use. Well done Sir!
    Ken

    So much to learn, so little time.....

  12. #12
    Join Date
    Mar 2015
    Location
    SE Michigan
    Posts
    3,225
    I think you’re being a bit hard on yourself...the curves look great. Nicely done. I agree with Kevin that multiple saw cuts and a chisel would have removed the bulk pretty well. I’ve also been know to finish up something like that with a large spindle sander attached to a drill.

  13. #13
    Quote Originally Posted by Phil Mueller View Post
    I think you’re being a bit hard on yourself...the curves look great. Nicely done. I agree with Kevin that multiple saw cuts and a chisel would have removed the bulk pretty well. I’ve also been know to finish up something like that with a large spindle sander attached to a drill.
    Because I had four curves, I did get plenty of opportunity to experiment. Just going straight at it with a 1" chisel was the fasted method for removal (this was doug fir; in a harder wood I don't think that would have been the case!). But there was one curve that had a big, unavoidable, knot in it. For that one making a bunch of saw cuts did help significantly, and otherwise would have been impossible. In fact, the knot just plain sucked, but there was no way around it. I did contemplate resorting to electricity with the band saw, but I stayed the course!!

Posting Permissions

  • You may not post new threads
  • You may not post replies
  • You may not post attachments
  • You may not edit your posts
  •