
A lot of 3D projects have come my way over the years. I probably post less than 0.5% of the things that I do...but I thought this project might be of interest to some. A couple months ago a customer contacted me because he was doing a custom-resto on a motorcycle and wanted to do some parts on the bike in wood. He already has a custom hand-tooled leather seat and grips done (really stunning) and adding some wood to the bike was part of his vision.
Since the bike has a 6v electrical system, he wanted to take the 12v LED lights from one plastic fairing (the violet one) and the battery pack mount from the back of another (the red one) - and mix them together in a thicker version of the original, 1.5 mm thick injection molded fairing. I started by scanning both plastic fairings and set off to modify them and extract geometry needed for the newer, thicker wood fairing. I wound up using Rhino to visualize everything, including how it was going to mount in relation to the forks, bars etc. Because the headlights needed to be shooting forward and not up/down/left/right, the plane that the lights mounted on was established as the 'master plane' of sorts, so that it was perpendicular to the Z. This way I could precisely machine a pocket for the light's O-ring gaskets and light assemblies to fit in there - without worrying about blinding any of us on the road at night.
Since I had to maintain that plane 'normal' to the Z, I needed material that was at least 3" thick. I wound up getting a 3.25" maple glue-up from my supplier and set out to do all the toolpathing in Aspire, using the 2-sided setup, mainly because it allows you to visualize both front and back toolpaths at once. The front side was pretty straightforward, but the back required about 15 different toolpaths to do the general 3D machining, to flatten/pocket critical areas, drill spots for the stainless insert hardware and undercut the battery slot so the tabs on the battery pack could slide right in the slot made by the keyhole bit.
My methods differ from most...for hold down I used some toe clamps that I 3D printed solid in conjunction with 3/16" slots I put in the sides with a hand router. They sat up about .02" and that turned out to be the perfect amount of spring to clamp everything down and keep things from moving as stresses in the material were relieved. (What was I going to do, run 5-6" long Spax/lag bolts through the table?) I've never been a fan of using dowels on 2-sided projects, so I just rolled with what I've always done. The material was prepared precisely at 14 x 14 x 3.25". The front edge of the sacrificial board was 'kissed' with an end mill to create a qualified surface true to the CNC. Then a fine mechanical pencil was used to trace around the outside of the material. When it came time to flip, I just aligned it to my qualified front edge and to the inside of my fine pencil marks. The flip was *perfect* - as witnessed by the 2nd side profile cut not digging in where the front side profile was.
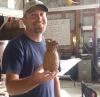
I sent pics to the customer - he is absolutely stoked. The only thing left is to do some matching bar-ends in maple and he's on his way to completing his resto-custom dream.
So weird...Yeah, we can do that!

 Reply With Quote