Results 1 to 7 of 7

Thread: Hammer K3 - off switch modification

  1. #1
    Join Date
    Feb 2004
    Location
    Perth, Australia
    Posts
    9,494

    Hammer K3 - off switch modification

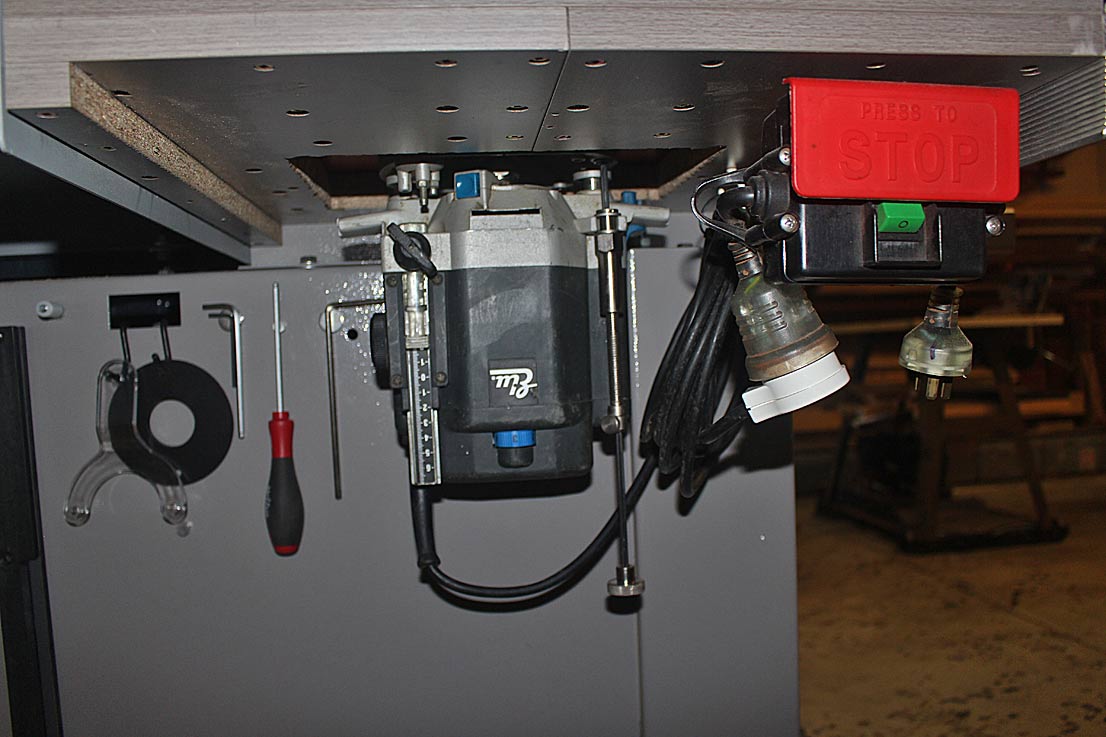
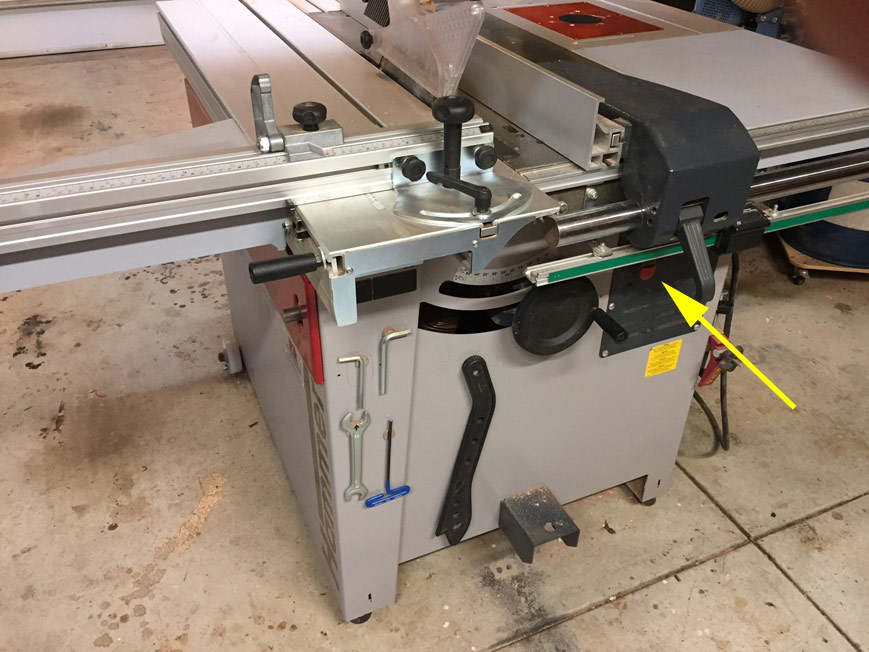
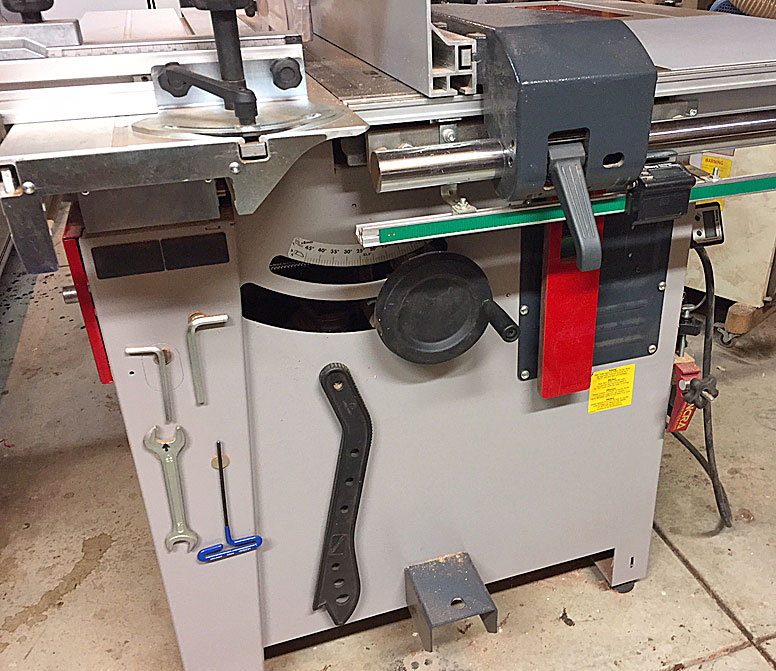
    I have found the off switch for the Hammer K3 frustrating and potentially dangerous. It is tucked away under the rail and difficult to get to when working with the rip fence ...


    The on-switch is also small ...


    ... but I am not bothered much by this since switching on is a deliberate act, while switching off may need to be done quickly.

    There is an off switch on the side by the panel, but this is only accessible when using the slider ...


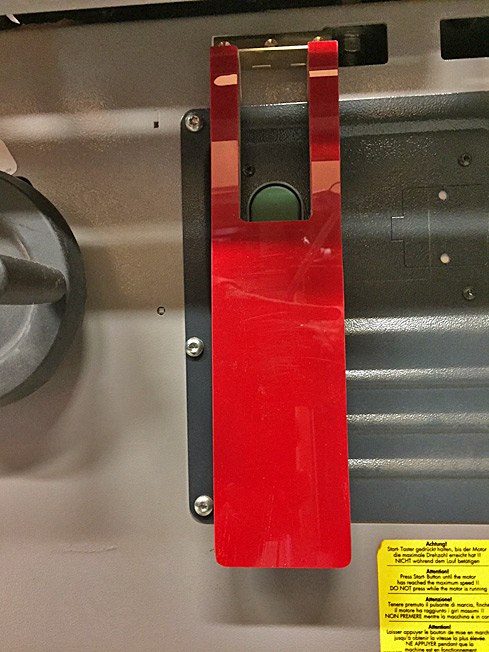
    So today I built a paddle switch. This was to be a prototype, but it is good enough to stay on permanently ...


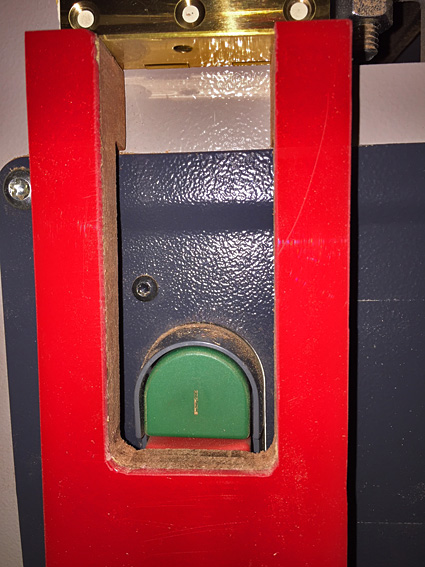
    The body is made of Jarrah (it needed to be stiff and have some weight), and covered in red perspex. The end is a simple hinge.

    It has been attached with double-sided tape, and it feels pretty strong.

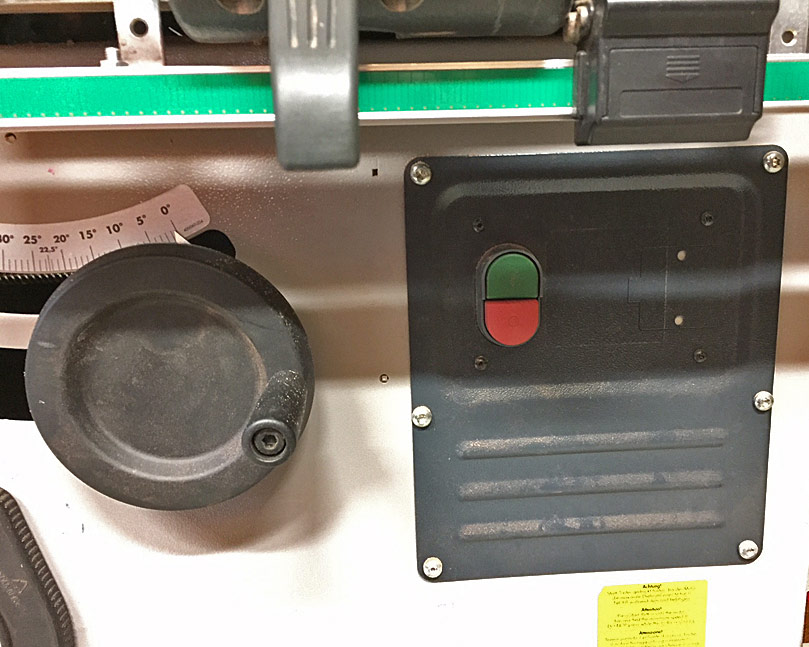
    The positioning allows the on-button to be accessed as easily as before ...


    ... while the off switch is now within reach of a palm or knee ...


    From the side, it can be seen that the off-switch is slightly higher than the on-switch. There is sufficient clearance to tap the paddle and depress the button.


    I love the way it works!


    Regards from Perth

    Derek

  2. #2
    Join Date
    Mar 2016
    Location
    Florida
    Posts
    1,950
    Simple, elegant and effective. I like it.

    On on another note have any pictures or a prior post of how you built your router into your side table? Not sure I could do it in my layout but am interested to know more.

  3. #3
    Join Date
    Aug 2013
    Location
    Princeton, NJ
    Posts
    7,298
    Blog Entries
    7
    Derek, just my opinion but if you build the top out as the pivot it would be pretty sweet looking and remove a point of failure (screws into end grain).

    Also, probably not much more difficult to make this in aluminum since you have Chris Vesper nearby.
    Bumbling forward into the unknown.

  4. #4
    Join Date
    Feb 2004
    Location
    Perth, Australia
    Posts
    9,494
    Brian, aluminium is a great idea ... well, it would look nicer I shall look for a source (Chris is on the other side of the continent). The screws into end grain Jarrah are not going anywhere. That timber is tough.

    Regards from Perth

    Derek

  5. #5
    Join Date
    Feb 2004
    Location
    Perth, Australia
    Posts
    9,494
    Quote Originally Posted by Greg Parrish View Post
    Simple, elegant and effective. I like it.

    On on another note have any pictures or a prior post of how you built your router into your side table? Not sure I could do it in my layout but am interested to know more.
    Greg, here are some photos. I hope they make sense ...


    Melamine-covered chipboard ...


    This section connects to the outfeed table ...


    These bolts were used as supports on the chassis side ...


    This is the side with the table levelled, but not attached ...


    These are bolt holes for a rail (for the extension table) that will be used (later I attached the rails over the bolts to be added) ...


    I drilled a length of 3mm aluminium for a support ...


    Attached to the chassis ...


    The rail (for the extension table) is placed over it ...


    Screw the aluminium to the router table - this supports it on the far side (it is supported on the opposite side with bolts into the outfeed). And replace the extension table ...


    The router table from the top ....


    I have connected an Elu 177e with a Router Raiser and Muscle Chuck.


    I built the fence from aluminium square section and faced with adjustable Maple sections ...


    Dust is connected to the rear ...


    Hope this helps.

    Regards from Perth

    Derek

  6. #6
    Join Date
    Mar 2016
    Location
    Florida
    Posts
    1,950
    Very nice. Bookmarking this just in case I ever want to merge mine. Thanks.

  7. #7
    That is very clever and looks like a big improvement. ...Interestingly, the early K3 machines had a much better off switch on the front--a big oversized mushroom shaped knob that is nice and easy to find. Mine, complete with the old blue livery and 1990s-style graphics, was made in 2000. Don't know when they changed that, but too bad they did. ...I do wish they put a second start switch on the left side. Of course, you're right that the off switch is the crucial one there, but sometimes with a big piece of plywood on the table, it's necessary to duck underneath and crawl over to hit the switch on the front panel.100_1132.jpg
    Last edited by David Stone (CT); 04-07-2019 at 8:15 PM.

Posting Permissions

  • You may not post new threads
  • You may not post replies
  • You may not post attachments
  • You may not edit your posts
  •