Page 1 of 4 1234 LastLast
Results 1 to 15 of 48

Thread: Wedding gift for a friend

  1. #1
    Join Date
    May 2016
    Location
    Northeast PA
    Posts
    527

    Wedding gift for a friend

    Friends of my wife and I are going to be married in May. After seeing the envelope box that I made for our wedding 5 years ago, they asked if I could make something similar for them as a commission. I decided I’d do it as a gift instead, they just don’t know that part yet.

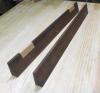
    They left wood selection up to me, so I set out in search of some KD figured walnut. The box is just a basic dovetailed box in curly walnut. The base is quartered walnut, and the frame for the lid was also cut from the straightest-grained stock that I had left. The straight grain was necessary since all the profiling was done with molding planes and scrapers. Pics in just a minute...
    Attached Images Attached Images
    ---Trudging the Road of Happy Destiny---

  2. #2
    Join Date
    May 2016
    Location
    Northeast PA
    Posts
    527
    8392F677-4809-4B9B-A3EE-731B96EA4491.jpg 2713F2A3-8305-44CB-A79E-AAEB493ED594.jpg
    I have found that folding a piece of blue tape over the board before I mark up for tails & pins has increased my accuracy in both marking and sawing dramatically. So much easier to see the line. Sneer if you want, it works for me lol


    CEBC7D31-896E-42DD-B7D9-6BB73B5CEF9F.jpg C0AE3AD3-1E06-4340-B22C-F469B1432680.jpg 8C627050-A55E-4A5F-BBAD-CADE4626D544.jpg
    A few process pics of sticking the moulding for the base.
    Last edited by brian zawatsky; 04-02-2019 at 10:49 PM.
    ---Trudging the Road of Happy Destiny---

  3. #3
    Join Date
    May 2016
    Location
    Northeast PA
    Posts
    527
    6EC13D0D-14CB-4C05-A140-7FE1973B64D4.jpg
    Box & sticks for base

    F3E56140-B432-430C-9572-0DFED3802DF3.jpg
    Cut some arcs into the base sticks to give it the look of a bracket-footed base. *POWER TOOL WARNING: I cut the rabbet for a piece of 1/2” plywood that will act as the bottom of the box with the table saw, and used the table saw to cut the miters. Also used a 23ga pin gun to tack the miters together. Don’t tell anyone.

    3F10F99D-AAF6-42DF-9BFA-65DFE5555F73.jpg
    708E9D0A-4730-4582-B23D-4A224CED631E.jpg
    Next task was to cut a wide cove for the frame that will hold a figured panel for the lid.
    Last edited by brian zawatsky; 04-02-2019 at 10:52 PM.
    ---Trudging the Road of Happy Destiny---

  4. #4
    Join Date
    May 2016
    Location
    Northeast PA
    Posts
    527
    I should mention that I cut a scraper to match each profile to clean up any grooves or scratches left by the moulding planes. Both profiles had elliptical elements to them that required the use of 2 different size round planes that were then blended together. To complicate things a bit, the base’s profile transitions from an outside radius at the top to an elliptical inside radius approaching the foot. I’m just not proficient enough with hollows & rounds to blend that all together without leaving a stripe or digging in here or there. Hence the need for some custom ground scrapers to match. Worked a charm. Good thing I have a pile of old saws laying around.

    Once the sticking was cut for the lid pieces & a groove was plowed on the inside edges, I selected a piece for the panel and cut a tongue on the edges.

    754F47D5-7487-48DA-9A42-155B7B33350C.jpg

    Heres the box as it sits. The frame miters aren’t glued yet, and there is still some detail work to clean up before finish goes on. If life cooperates I’ll Have this thing totally wrapped up by the end of the week.

    6F74E0CB-888E-43F8-A13B-ABD65E027411.jpg
    A0D6166C-D03E-4314-83D4-E609403559DE.jpg
    8761A228-5E6D-484B-A477-98CF2E6E0641.jpg
    286F88DB-F526-4573-A79C-4D4C3D4A2378.jpg
    Last edited by brian zawatsky; 04-02-2019 at 10:55 PM.
    ---Trudging the Road of Happy Destiny---

  5. #5
    Join Date
    Mar 2015
    Location
    SE Michigan
    Posts
    3,225
    Beautiful work, Brian. That walnut is spectacular.

  6. #6
    Join Date
    May 2016
    Location
    Northeast PA
    Posts
    527
    Thanks Phil. The walnut really is beautiful, I am excited to get some finish on it. It came from Groff & Groff Lumber in Lancaster county PA, one of my favorite places to visit when I'm in the area.
    ---Trudging the Road of Happy Destiny---

  7. #7
    Join Date
    Nov 2007
    Location
    Goleta / Santa Barbara
    Posts
    968
    Brian, absolutely gorgeous. They will love it. Patrick

  8. #8
    Join Date
    May 2015
    Location
    Ingleside, IL
    Posts
    1,417
    Wow. Wonderful box Brian. Great gift and great work.

  9. #9
    Join Date
    Sep 2007
    Location
    Longview WA
    Posts
    27,441
    Blog Entries
    1
    Great work, it will be a gift they will treasure for a long time.

    jtk
    "A pessimist sees the difficulty in every opportunity; an optimist sees the opportunity in every difficulty."
    - Sir Winston Churchill (1874-1965)

  10. #10
    Beautiful wood and workmanship. Look forward to seeing it with finish on it.

    Derek Cohen has been demonstrating the use of blue tape with dovetails for some time. I haven't tried it yet. But I'm glad to hear of another satisfied user of that technique.
    "All that is necessary for the triumph of evil is that good men do nothing."

    “If you want to know what a man's like, take a good look at how he treats his inferiors, not his equals.”

  11. #11
    Join Date
    Jul 2016
    Location
    Denver, Colorado
    Posts
    79
    That is beautiful!

    I agree with the use of the blue tape - the contrast really makes it easier to see the lines. I am just conflicted about all the waste from it, but that is something I will have to come to terms with.

  12. #12
    That is awesome.

  13. #13
    Join Date
    May 2015
    Location
    Ingleside, IL
    Posts
    1,417
    Quote Originally Posted by Frederick Skelly View Post
    Beautiful wood and workmanship. Look forward to seeing it with finish on it.

    Derek Cohen has been demonstrating the use of blue tape with dovetails for some time. I haven't tried it yet. But I'm glad to hear of another satisfied user of that technique.
    I've been using his idea for a bit now, and it works well. I like what Brian shows here - adding tape to the sides as well as the end grain. Put the tape on, use the marking gauge, and tear off the upper portion of the tape. Should make the cut stop line MUCH easier for these old eyes to see.

  14. #14
    Join Date
    Feb 2007
    Location
    Libertyville, IL (Chicago - North)
    Posts
    360
    That is going to be spectacular when finished.

    Open Question: In the photo where Brian is selecting the panel for the top, that board has a diagonal streak of figure in it. What causes that? Specifically, is that where a branch joined the trunk? Was that tree leaning over? Is that the sort of thing that a sawyer can imagine is going to appear? How unusual is that? Thanks.

  15. #15
    Join Date
    May 2016
    Location
    Northeast PA
    Posts
    527
    Quote Originally Posted by Frederick Skelly View Post
    Beautiful wood and workmanship. Look forward to seeing it with finish on it.

    Derek Cohen has been demonstrating the use of blue tape with dovetails for some time. I haven't tried it yet. But I'm glad to hear of another satisfied user of that technique.
    Thanks Fred. I stole the technique from Derek and adapted it somewhat to fit my workflow.
    ---Trudging the Road of Happy Destiny---

Posting Permissions

  • You may not post new threads
  • You may not post replies
  • You may not post attachments
  • You may not edit your posts
  •