Page 1 of 3 123 LastLast
Results 1 to 15 of 36

Thread: Walnut medicine cabinet

  1. #1
    Join Date
    May 2016
    Location
    Northeast PA
    Posts
    527

    Walnut medicine cabinet

    I have a small bathroom remodel project looming in the future. I decided to get a jump on a couple cabinets so that when I'm ready to start the remodel all the necessary components are at hand. The cabinetry is going to be simple in a clean, modern-ish style which is not what I normally build. This is an in-progress build, and I'll try to keep it moving along so it doesn't get boring. Anyway...

    Derek's mitered dovetails on his coffee table build looked so cool i wanted to try some, and I figured they would work well on the medicine cabinet carcase. A while back I adopted his blue tape trick for marking out pins & tails, and it made a world of difference in my accuracy. As usual, I milled my stock with machinery and did everything else so far with hand tools. I'm just not a big enough glutton for punishment to forgo the electrons spent on the jointer and planer.

    The pics:

    IMG_2518.jpg


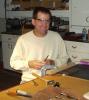
    Here's the simple jig I built to shoot the miters with a paring chisel.
    IMG_2536.jpg

    IMG_2537.jpg

    Dry fit joint
    IMG_2543.jpg

    This is how you know that your paring chisel is SHARP!
    IMG_2545.jpg
    Last edited by brian zawatsky; 01-19-2019 at 11:50 PM. Reason: forgot a pic...
    ---Trudging the Road of Happy Destiny---

  2. #2
    Join Date
    May 2016
    Location
    Northeast PA
    Posts
    527
    Once all the dovetails were cut the case was dry fit and checked for square

    IMG_2544.jpg

    IMG_2538.jpg

    Then knocked apart and rabbets were cut to accept the back panel. Back will be veneer on plywood, so no need for a captured panel in grooves since wood movement wont be an issue. I had to chop the beginning and end of the rabbet on the pin board with chisels, since it needed to be a stopped rabbet. On the tail board i was able to just plane right thru.

    Cutting rabbets with the original skew rabbet plane
    IMG_2551.jpg

    Then smoothed out the insides of the case parts
    IMG_2552.jpg
    ---Trudging the Road of Happy Destiny---

  3. #3
    Great post! Thanks for the build in process pics. Looking forward to seeing this cabinet develop and progress.

  4. #4
    Join Date
    May 2016
    Location
    Northeast PA
    Posts
    527
    The veneer for the back panel is reconstituted "quartered walnut", which I chose for 2 reasons. The straight grain and even color fits well with the modern look, and it was WAY cheaper than real quartered walnut wood on wood veneer.

    Cut the panel to size using a 7pt rip saw
    IMG_2557.jpg

    Then jointed the sawn edges to final size. I intentionally cut the panel 1/16" big to allow for a little oops room with the saw.
    IMG_2558.jpg

    Then smoothed out the veneered panel with a cabinet scraper
    IMG_2556.jpg

    I like to use a little plumber's flux brush to spread glue on the long grain surfaces of the joint when assembling dovetails. Keeps it from getting too messy. The handwork gods smiled on me, and the dovetails fit so nice & tight no clamps were needed to assemble the case. The back panel was nailed on with 6 penny finish nails. I can't remember when the last time I used finish nails in a piece of cabinetry. I'm ok with it lol
    ---Trudging the Road of Happy Destiny---

  5. #5
    Join Date
    May 2016
    Location
    Northeast PA
    Posts
    527
    I have a very bright fluorescent fixture over my bench which is great for seeing what the heck I'm doing, but lousy for taking pictures. Hence I brought the assembled case upstairs and snapped a couple pics.

    IMG_2570.jpg

    IMG_2571.jpg

    IMG_2572.jpg

    I work in a commercial cabinet shop (lots of melamine and formica, don't get excited lol) and we have a spray booth so I'm going to spray it with a 2 part urethane finish that cures very hard & moisture resistant. I may do that tomorrow, provided I don't have to spend the whole day on snow removal.

    The plan is to finish off the front with 2 inset mirrored glass doors. Havent decided on the hardware yet, but I'm leaning toward these:

    https://www.hafele.com/us/en/product...ze=78&PDP=true

    The inside will get three adjustable shelves in 3/8" thick tempered glass with pencil polished edges, and I'm toying with the idea of mortising 2 small LED puck lights into the top of the case. TBD.

    I'll update as progress is made.
    ---Trudging the Road of Happy Destiny---

  6. #6
    Join Date
    May 2016
    Location
    Northeast PA
    Posts
    527
    Quote Originally Posted by Jon Wolfe View Post
    Great post! Thanks for the build in process pics. Looking forward to seeing this cabinet develop and progress.
    Thanks Jon!
    ---Trudging the Road of Happy Destiny---

  7. #7
    Join Date
    Feb 2004
    Location
    Perth, Australia
    Posts
    9,491
    That is Excellent work, Brian!

    I shall steal your mitre jig. Much better than mine.

    Regards from Perth

    Derek

  8. #8
    Join Date
    Mar 2006
    Location
    SoCal
    Posts
    22,510
    Blog Entries
    1
    Clean simple form that really shows off the material. I am happily tagging along. Thanks for posting the progress.
    "A hen is only an egg's way of making another egg".


    – Samuel Butler

  9. #9
    Thanks for sharing. Great work!

  10. #10
    impeccable. If the floor were carpeted I would have suspected you stole these pix of such nice design and work from the other Brian

  11. #11
    Join Date
    Jun 2008
    Location
    So Cal
    Posts
    3,765
    Nice work Brian, your work looks very satisfying. The miters are a nice touch.
    Aj

  12. #12
    Join Date
    Mar 2015
    Location
    Virginia
    Posts
    1,211
    Quote Originally Posted by Prashun Patel View Post
    impeccable. If the floor were carpeted I would have suspected you stole these pix of such nice design and work from the other Brian
    Clearly not stolen. I can see dirt under the fingernails, and there was no trace of the robe/smoking jacket that is necessary to execute truly quality work.

    On a serious note though, it is a great pleasure to pare walnut with a sharp chisel. I like the mitered dovetail. That is a very nice touch.

  13. #13
    Join Date
    Jun 2012
    Location
    Lubbock, Tx
    Posts
    1,490
    Really looking good. Will be following.

  14. #14
    Join Date
    May 2016
    Location
    Northeast PA
    Posts
    527
    Quote Originally Posted by Derek Cohen View Post
    That is Excellent work, Brian!

    I shall steal your mitre jig. Much better than mine.

    Regards from Perth

    Derek
    Thanks Derek. I stole your blue tape idea, and piggybacked on your mitered dovetail tutorial, so I guess it’s only fair lol

    Seriously though, thanks for taking the time to post so much instructional stuff. I appreciate it very much, as I know a lot of other guys here do too.
    ---Trudging the Road of Happy Destiny---

  15. #15
    Join Date
    May 2016
    Location
    Northeast PA
    Posts
    527
    Thanks for the compliments, guys. I don’t think my work is in the same league as the other Brian’s though. But I’ll take the praise nonetheless

    I wanted to spray some finish today, but spent the whole day digging out from this slop of heavy wet snow & ice we were blessed with in northeast PA. Oh well.
    Last edited by brian zawatsky; 01-20-2019 at 3:28 PM. Reason: Autocorrect misspelling.
    ---Trudging the Road of Happy Destiny---

Posting Permissions

  • You may not post new threads
  • You may not post replies
  • You may not post attachments
  • You may not edit your posts
  •