The strips have +-+- marks. White only as far as I can tell.


 [OP]
Member
[OP]
Member
The strips have +-+- marks. White only as far as I can tell.
NOW you tell me...
Contributor
That's a new one to me but it sounds like white. Voltage drop is a problem and maybe they are doubling up on the conductors to help with that. I'd stick with my advice that all stranded wire is tinned and all connections are either soldered or screw terminals (except for connectors intended to be removed like those 4-pin male & female), but I don't know anything specific about what you have.Originally Posted by Ole Anderson

[OP]
Member
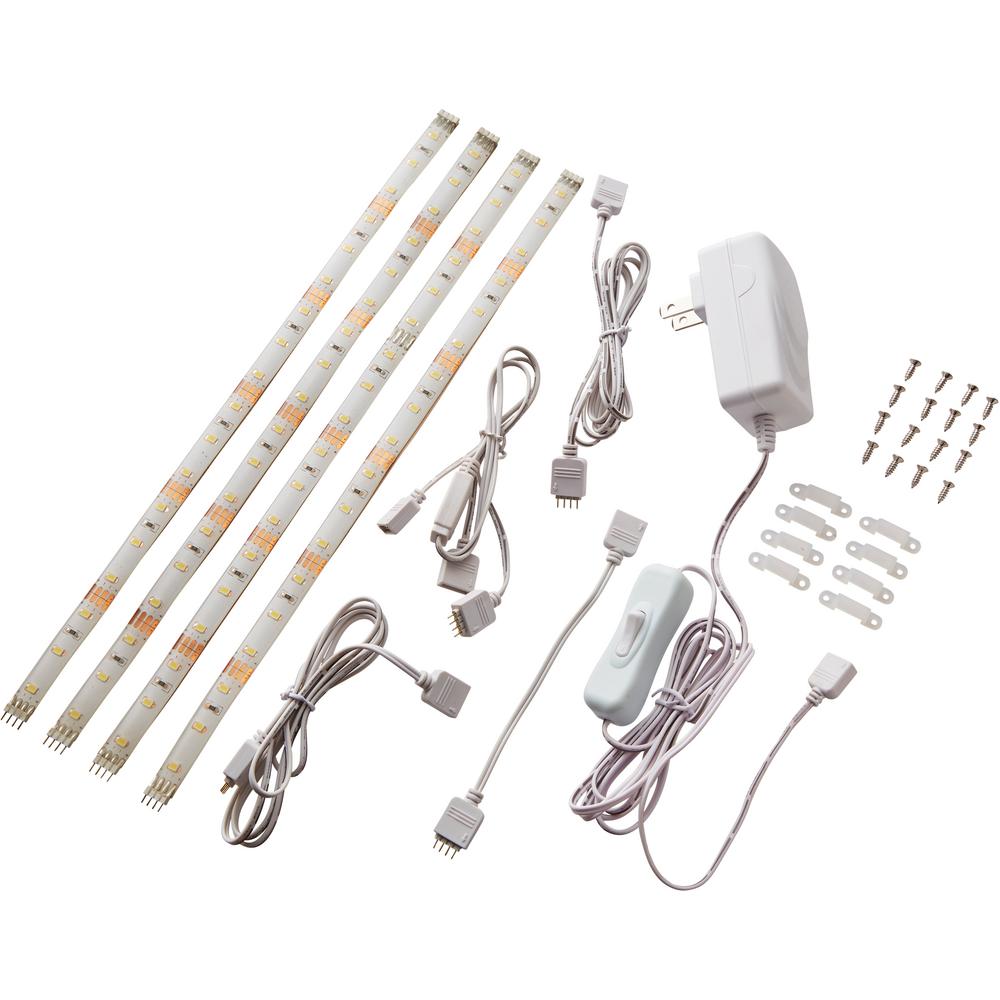
Here is what I ended up with (ironic that the grainy pic was due to poor lighting) I simply didn't have the time or inclination to locate heat shrink tubing and go that direction. I'll be fine with the crimps as amperage is extremely low:
LED strips.jpg
Last edited by Ole Anderson; 01-10-2019 at 7:53 AM.
NOW you tell me...
 Contributor
For low voltage, low current applications such as this I usually just tightly twist the copper ends together and use a bit of tape to keep them protected and from shorting to each other. Really no need for anything else. I hate those splices anyway, so ugly. I even just use trsnspatent tape to minimize the eyesore of the tape.
Contributor
LEDs are light emitting diodes. Diodes pass current of one polarity and block the opposite, hence they must be hooked up to the proper polarity of the voltage source. This is guaranteed if you use their standard connectors, as supplied.
 Contributor
It's a shame these molds cost what they do. I'd really like to have one for really small wires too, but payback of the $75 for the mold would be never. I like them for wiring that gets exposed to the elements though, like boats, trailers, mowers, and tractors and implements.
https://spliseal.com/
[OP]
Member
Yep, too pricey. Last fall for $55 I bought these to do some wiring on my fishing boat in FL:
heat shrink connector ratcheting crimper https://www.amazon.com/gp/product/B0...?ie=UTF8&psc=1
180 heat shrink connectors https://www.amazon.com/gp/product/B0...?ie=UTF8&psc=1

Didn't use them on this project as they are sitting in my RV in FL.
The transformer must convert the 120 v AC to 12v DC as AC does not have polarity. This is what I failed to recognize.
Last edited by Ole Anderson; 01-11-2019 at 8:36 AM.
NOW you tell me...
Contributor
I just bought a mold for 14-16 wire, their mold release stuff, and some of the "glue" sticks to use in a hot glue gun I already had. I bought the one mold that does terminal ends, and a splice with the eye on one side. I slice the eye off on butt connections where I don't need it. I still solder the wires, with rosin core solder, and don't use the crimp connectors, except on the end pieces. I already had a bunch of terminal ends, and just slice the covering off of them to use.
I have used those heat shrink terminal ends, and they seem fine too, but I like to fix wiring, especially on trailers, so I'll never have to think about it again. I use tinned copper marine wire to replace the cheap copper coated steel wire that is typically used on trailers.
I've installed those LED under cabinet lights exactly once, so may look for a better connection next time than solder and tape.
[OP]
Member
Don't you just love trailer wiring? Especially salt water boat trailers and snowmobile trailers where everything gets salt soaked. Seems like you don't discover the lights don't work until you are ready to pull out of the drive. Gotta use sealed splices and connectors there.
NOW you tell me...
Member
soldering with a low wattage pencil type iron is very easy, use heat shrink tubing optional
 Posting Permissions

 Reply With Quote