
-
My condolences to you and your family. Im always impressed with the quality and speed with your work.
-
Thank you!
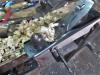
2 hours shop time today....got the lid and top shelf out of the clamps, and cleaned up...Used a piece of scrap..
angle helpers.jpg
to lay out the meeting angles....top shelf ( short one) was the easier of the two...used that scrap to set the saw's angle for the rip cut...
top cut.jpg
Fun one was the lid's...took a few tries...
reset saw.jpg
Had to double check which direction the angle was to go,,,rip face down, or face up...bandsaw had made a wavy cut, to boot...recut to confirm the angle
dry fit.jpgThen made the cut after this
Drilled a few holes, after smoothing out the saw marks..
holes.jpg
Installed the top shelf...then went about adding a pair of hinges...using the usual toys
tools.jpg
Candle wax on the threads of the screws helped...test drive?
hinged.jpg
C clamps to hold the lid open....a book rest was getting glued up..
glue up.jpg
And an end view?
Maybe tomorrow, after the clamps come off....guess I can start on a few drawers, next...
Stay tuned...
-
Had to bring the glue bottle upstairs, this morning....way too cold in the basement shop. Clamps have been removed...lid closed..
end view.jpg
Need to make a bunch of plugs, whenever the shop warms up
front view.jpg
PIP of the front...debating on adding a "topper" at the back edge..
topper.jpg
Too short? Not needed? Too simple?
Same shape as the Book Rest..
IMG_7421 (640x480).jpg
Just glued in place.
IF the shop will warm up a bit...and Tuesday gets here...I may try some drawer building...
Stay tuned
-
I suppose I should get motivated, and head for the shop? Plugs have been milled, need to install them...then putter around on the inside....
-
Dividers have been made, and glued in place..
IMG_7427 (640x480).jpg
Top 2 openings get drawers, bottom 2 allow a notebook a bit of room...
IMG_7428 (640x480).jpg
Pop these out with a screwdriver blade, coat the narrow end with a bit of glue..
IMG_7429 (640x480).jpg
Hammer to tamp them in place...
IMG_7430 (640x480).jpg
And trim flush...maybe after Supper, I can cobble 2 drawers up?
Stay tuned 
-
Turned two piles of parts..
drawer parts.jpg
This is for one drawer....thicker part is the drawer front...just nails and glue
second drawer.jpg
Add a small handle to each drawer..
handles.jpg
I think that will do for one day.  Only needed two drawers..close the lid..
closed up.jpg
Have 4 plugs left to do...
no plugs.jpg
And maybe a final sanding....before the Stain & Varnish goes on....
May be able to varnish this by Friday?
Stay tuned..
-
Sorry to hear of your loss. Thanks for taking the time to post your build, don't always comment but good to see it unfold.
-
IF I happen to inspire someone else to go out and build something like this, or some of my other projects...GREAT! IF they happen to learn a wee bit along the way..great as well.
OK, stain was applied today. Minwax Dark Walnut stain...brush onto a section at a time, put the brush down, and wipe off the excess...then repeat...
IMG_7441 (574x640).jpg
Need better lights, that this camera works with...or, change the camera' s light settings...
IMG_7442 (506x640).jpg
Because, this isn't quite this red looking..
IMG_7443 (640x569).jpg
Will try again, after the clear gloss poly dries, tomorrow.
Stay tuned....almost ready to post as a completed project...
-
Will need to rub this out...varnish is drying slowly in the shop.
Then the fun can begin....going off on a search for the next project idea....might be a bit hard to top this last one...
-
Very sorry to hear about your Mom Steve.
The desk looks great. Lots of good ideas in there.
-
Nice desk Steve. I added an unvented gas heater in my basement shop last winter & it really does the trick. I have a CO detector & it always reads zero. Do you have any heat down there?
-
Gas furnace has one duct vented into the basement...not much else for heat. Have moved the desk upstairs, and tossed a book on it..
top view of a desk.jpg
has a few pencils in the trays..
IMG_7455 (640x480).jpg
Getting this desk up those stairs, by myself, was..interesting..
IMG_7454 (640x480).jpg
Have a small hole in me head, as I found out why it is called a header....beam across the opening had a sharp spot sticking out...
IMG_7450 (640x480).jpg
Grandaughter already has a chair....and I'm not much of a chair builder..
-
And now the fun can begin....I have a pile of Ash cut-offs....leftovers from this project....may try to cobble something out of them...maybe a bit of resaw going on? Will start a new thread, when I see what I have for "lumber"....stay tuned..
-
Desk has been delivered to GrandBRAT Diva, this evening......was a bit hit....so, I guess she will take it.
-
Steven,
I have great faith that you will think of a new project. I think you can get a project done faster than I can stop dithering about things like the details on sizes, how I want it to be, etc.
Good job on the project, I enjoyed the build, but got behind in following it. Had a minor medical issue, but am now on the mend. I did make a post or two, but am also catching up on "to do" paperwork issues at home while on the mend.
I too was sorry to hear about your loss.
At any rate, I enjoyed the build, as I do the builds of yours and others.
Thanks for the pictures and write up. It is much appreciated.
Stew
 Posting Permissions
- You may not post new threads
- You may not post replies
- You may not post attachments
- You may not edit your posts
-
Forum Rules

 Contributor

 Reply With Quote