Page 1 of 2 12 LastLast
Results 1 to 15 of 27

Thread: Just another box build

  1. #1
    Join Date
    Jun 2010
    Location
    twomiles from the "peak of Ohio
    Posts
    12,169

    Just another box build

    ...Well, it does beat throwing the scraps out, into the fire pit....

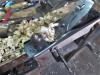
    Been resawing scraps leftover from the latest builds...some I have clamped into a stack.. Trying to keep them flat..
    resaws.jpg
    Others have been sawn for 3/4" stock..
    frame parts.jpg
    Still need ripped for width. Maybe build a few frames, to hold a few panels? May leave these wide, so the plough plane will work better. Need grooves for the panels, and some need a groove to house the bottom panel. need the "extra" for the fence on the planes. Panels?
    ends.jpg
    Hope to get two "end" panels out of the bigger 1/2" thick board...."shorty" is for "Plan B"...needed a glue up for the front and rear panels. Cut a few 1/2" thick parts, 4 wide, and 2 narrow ones. Had to joint the edges...don't like gaps in glue-ups. Smear a bit of glue around, and a few clamps...
    first panel.jpg
    One panel glued up...second panel needed a few cauls ....
    2nd panel.jpg
    Set these two aside, and wait on the glue to cure. There IS a 3/4 panel for a top...
    parts pile.jpg
    Underneath all the Poplar and other goodies, there is what was left of a 1 x 12 of white oak. Will trim it down to size...for a lid.

    It is a start....waiting on the glue ups. May try something "different" for raising the panels....
    Stay tuned.

  2. #2
    Join Date
    Jun 2010
    Location
    twomiles from the "peak of Ohio
    Posts
    12,169
    Had a lot to get done today...just never made it to the shop....feeling "under the weather" today. Decided to just take a day off. Veteran's Day, anyway. (37 years, US Army, Retired)

    Maybe tomorrow, eh?

  3. #3
    Join Date
    Feb 2013
    Location
    Madison, MS
    Posts
    33
    Thank you for your service, look forward to the rest of the build.

  4. #4
    Join Date
    May 2017
    Location
    Lake Charles, LA
    Posts
    5
    Thank you for your service

  5. #5
    Join Date
    Jun 2010
    Location
    twomiles from the "peak of Ohio
    Posts
    12,169
    Ok...was able to stay away from the bathroom for a couple hours, today. Got the two panels out of the clamps....and cut them, and a blank for the ends to roughly the same width...needed a little jointing
    jointer.jpg
    Little parts = little Jointer...Millers Falls No.11 ( #5-1/4 size)
    Trimmed the two glue-ups to the same length....then a little clean up was done..
    clean up.jpg
    Worked on all four faces ( 2 panels) until they were all spiffy..
    side panels.jpg
    Wonder which one of these will be the front of the box.....which left cutting the end panel blank into two matching parts

    diagonals.jpg
    Diagonals to find the center..
    cut line.jpg
    Mark a square cut line..and split the lines..
    2 end panels.jpg
    And I have two end panels. Spent a while. getting the frame parts milled up..
    frame parts.jpg
    None were the same thickness....had a few that needed ripped for width...some were tapered. Almost all are ready to be grooved....
    clamped up.jpg
    More about this in "Part 2" of the Monday Funnies..

    Stay tuned..

  6. #6
    Join Date
    Jun 2010
    Location
    twomiles from the "peak of Ohio
    Posts
    12,169
    Ok..needed grooves to house the raised panels...and needed grooves to house a plywood bottom....the first was the easy part...as to why I didn't use the old plough plane?
    too big.jpg
    Was just too long of a plane, for the work needed done.
    jigged.jpg
    This is all the jig needed...the second second set of grooves needed something else.
    groovy toys.jpg
    Toys. Candle to keep the Stanley 45 moving smoothly. Combo square to check depth, the Stanley No. 3c was there to level the edge, and let me know which way the grain was actually running. IF the stile or rail was to house the raised panel..it got a groove along the edge...however,, a few rails also needed a groove to house the 1/4" plywood bottom...reset the jig..
    rail.jpg
    Not the best way...just not enough room for all the things....like a depth stop. Managed to get two rails done...for the front and back...may try something else for the two on the ends of the box..
    front parts.jpg
    Plan right now, is to work on the front and back sections first...then the ends. Thinking a Tongue & Groove joint to glue the corners of the box together....
    Need to finish four stiles for the ends..

    more parts.jpg
    But, for tomorrow's shop time, will work on Mortise and Tenon joints. And see about how to raise the panels.

    Stay tuned..

  7. #7
    Join Date
    Jul 2014
    Location
    Edmond, Oklahoma
    Posts
    1,750
    Steven,

    One more thank you for your service. Looks like you are making progress on the box.

    Stew

  8. #8
    Join Date
    Jun 2010
    Location
    twomiles from the "peak of Ohio
    Posts
    12,169
    3 hours spent IN the shop, today....until the lower legs started to cramp up....may have been working a tad too hard?

    Tested out the tablesaw's new fence....not so much as a wiggle...rock solid. Got these ripped for width..
    IMG_6679 (640x480).jpg
    Took a bit, to mill those grooves...jig wasn't the greatest..
    IMG_6680 (640x480).jpg
    But it was safer than doing the grooves on the tablesaw ( BTDT, need a better insert)
    Laid out, and milled tenons ..
    IMG_6682 (640x480).jpg
    Then used those, to chop a few mortises..
    IMG_6683 (640x480).jpg
    Enough to dry fit things...
    IMG_6689 (640x480).jpg
    Even cut a foot profile...then raised a panel....just like Sellers does..
    IMG_6692 (640x480).jpg
    Once I got all 4 edges beveled...a dry fit could happen..
    IMG_6694 (640x480).jpg
    Panel was a 1/16" too long...trimmed that back, and the beveled edge redone...then some glue and clamps..
    IMG_6695 (640x480).jpg
    There is a caul across the long edge...to pull things even with the top of the legs...
    Set this aside...and worked on the other long panel...

    Stay tuned..be right back..

  9. #9
    Join Date
    Jun 2010
    Location
    twomiles from the "peak of Ohio
    Posts
    12,169
    Was finally able to do a dry fit for it..
    IMG_6697 (640x480).jpg
    Waiting on the first one...so I can use the clamps..
    IMG_6698 (640x480).jpg
    Trimmed the rails for the end panels...
    IMG_6700 (640x480).jpg
    At least they are all the same length....trying for a 1/2" tenon on each end....Kept one of the cut-offs..
    IMG_6699 (640x480).jpg
    So I can profile these feet, as well.
    IMG_6684 (640x480).jpg
    Spent most of the day sitting on the shop's stool....and put it here, when I was using it....

    How do you hold a glue up...up..
    IMG_6696 (640x480).jpg
    I stuck the ends of the clamps into the vise, so things were up where I could see better.
    IMG_6691 (640x480).jpg
    Beltsander to finish the curved parts, so they at least match each other..
    IMG_6686 (640x480).jpg
    The mortise for the top rail was easy enough...but..I needed to locate where the mortise for the bottom rail needed to be....panel to help mark things out.


    Legs below the knees started to get crampy....was time to call it a day....

  10. #10
    Join Date
    Jun 2010
    Location
    twomiles from the "peak of Ohio
    Posts
    12,169
    Well, was a very interesting day....and not in a "good" way.....I got this mess out of the clamps, just about..noonish
    glue up #2.jpg
    Removed all the clamps, set aside the part..and reused all the clamps..
    glued up.jpg
    Plus a couple extra ones ...second long panel is glued up. From here, things started downhill...slowly at first....
    squared up.jpg
    Got to checking the first panel....seems one end was a tad out of square. BIG square to mark the line, and plane to the line....laid the panel flat on the bench..and watched it rock a bit.....planes and a beltsander soon flattened most of that out....there was a couple spots where the bigger planes just couldn't get to....
    little plane.jpg
    Stanley #60-1/2. With the original blade. Had one glue joint that needed trimmed down. Without hitting the surrounding areas....
    IMG_6707 (640x480).jpg
    Used the Stanley 45 to plough a groove. Needed this one because I use a Tongue & Groove joint to glue corners up with. Speaking of grooves, had to extend one...
    groove juntion.jpg
    Seems simple enough to do? Yeah..right..
    dado breakout.jpg
    Somehow managed. There was some break-out...will be hidden..
    test fit bottom.jpg
    When the bottom panel gets installed....That was about it...sit this thing aside...for now. Should have stopped right there, but.....
    Stay tuned..

  11. #11
    Join Date
    Jun 2010
    Location
    twomiles from the "peak of Ohio
    Posts
    12,169
    One panel done, another in the clamps....still a long way from the 5pm quitting time bell...drat.
    1st tenons.jpg
    Checked and rechecked...sign of things to come....had to re-mark the tenons....used the bandsaw to cut these....( need a lot better light of the saw) not the best I have done. Used the finish panel to lay out mortise locations....and chopped those..
    dry fit 1.jpg
    Dry fit...was quite right....tenon shoulders were at fault. Tablesaw was reset, and an attempt to straighten things out....wound up clipping one tenon completely off Decided to make the other end match...
    More cussing.....Time I got all four rails to match...I needed to trim the raised panels a bit...at least I hadn't raised them yet...
    More dry fits...WITH a raised panel..
    first dry fit.jpg
    First one of these little raised panels..i tried to do flat on the bench.....second one went into the vise. Was way too hard to clamp these so they would stay put, and I wouldn't smack the clamp with the plane, or my knuckles. In the vise, the plane could ride along on the jaw of the vise. Now, about those clipped off tenons.....I drilled a pilot hole through where they went, then counter-bore so the head of a screw would be below the cutter on the match plane..decided to at least try to assemble it...wound up doing a glue-up...
    another glue up.jpg
    Will clean this up..tomorrow. The other end? At least it had all of it's tenons....some needed trimmed back a bit...but at least they were still there...test fit for the second raised panel..
    raised panel.jpg
    HUGE, aren't they? Used the vise one more time...for the last dry fit of the day,,
    second dry fit.jpg
    Made sure everything was square...and it matched the other end panel.. Tomorrow, I'll try to glue this up, then work on the other two, once they are out of the clamps..
    5pm! Time to hang up the apron...
    closed the shop.jpg
    And call it a day...stay tuned....

  12. #12
    Join Date
    Jun 2010
    Location
    twomiles from the "peak of Ohio
    Posts
    12,169
    Am I boring anyone , yet?

    Needed a light bulb for the bandsaw....waiting on the Boss to decide when she wanted to go out into this mess...
    IMG_6726 (640x480).jpg
    Not sure which was uglier...this view, or the one in the bathroom mirror...YUCK. Pulled into Blue Borg,,,
    IMG_6728 (640x480).jpg
    $4.80...for one bulb? While waiting on the Boss, though..I did get a little bit done...clamps were removed, again...and promptly put to use..
    IMG_6721 (640x480).jpg
    While taking the clamps off the other end panel...."Pop!" Seems one of these was too short
    IMG_6722 (640x480).jpg
    1-1/8" long? Replaced it with a 2" long COARSE thread screw. Checked it for square...
    IMG_6725 (640x480).jpg
    Sharpened this old cutter up...will have work for it to do...
    Set the front and back panels "back to back" and clamped them up...for now..
    IMG_6724 (640x480).jpg
    Will need to plane and sand all edges until these two match each other....
    Stay tuned....and find out the rest of today's misadventures..

  13. #13
    Join Date
    Jun 2010
    Location
    twomiles from the "peak of Ohio
    Posts
    12,169
    Ok..back from the stores....still nasty outside.
    IMG_6730 (640x480).jpg
    Lightbulb installed....comes on everytime the saw is running, BTW...
    IMG_6731 (640x480).jpg
    Hmmm, I think I can fix that...
    IMG_6732 (640x480).jpg
    Worked on the front and back panels as a unit...
    IMG_6733 (640x480).jpg
    Got the grooves finished up...as well..
    IMG_6735 (640x480).jpg
    The end panel was done a little differently....first I had to set up a plane..
    IMG_6738 (640x480).jpg
    Clamp the panel in place, so it won't move..
    IMG_6736 (640x480).jpg
    Then try to mill a tongue on that edge....flip over and do the other edge.....no matter which way I turned the dang panel,,,plane still wanted to dig into the wood....even after backing the cutter as far as I could

    Put the Match plane aside...had a groove to finish cutting..
    IMG_6741 (640x480).jpg
    At least here, I can cut straight across.
    Stay tuned..one more episode to do...

  14. #14
    Join Date
    Jun 2010
    Location
    twomiles from the "peak of Ohio
    Posts
    12,169
    Dry fit time?
    IMG_6739 (640x480).jpg
    Dry fit #1....will have to straighten that edge a bit....
    IMG_6740 (640x469).jpg
    Dry fit #2...other panel....only two clamps holding things are those two c clamps...
    IMG_6742 (581x640).jpg
    One clamp here....and that spreader bar....gives some idea of the small size of this box....
    IMG_6743 (640x480).jpg
    Maybe tomorrow, I can get the"missing" end panel done? Maybe cut the plywood bottom to size...and figure out a top.
    IMG_6720 (640x480).jpg
    Now..IF Mother Nature would just pay her heating bill.....that is all ice out there...YUCK....Need to hibernate until Spring...

    Stay tuned....we be moving at the speed of ....smell...

  15. #15
    Join Date
    Jun 2010
    Location
    twomiles from the "peak of Ohio
    Posts
    12,169
    Today was more about road trips, and paying bills, than wood working. Still, was able to mill the last of the tongues, once I got the plane set up right..
    IMG_6744 (640x480).jpg
    Spent so time on making the ends match each other....both sides and the top were matched up....even the feet..
    IMG_6745 (640x480).jpg
    Too thin, you say? Not really..
    Was able to clamp all four sides into a dry fit....
    IMG_6747 (640x480).jpg
    Those same thin feet....that will match the view from the front or back..
    IMG_6749.jpg
    Need to size and cut some plywood for the bottom panel....and cobble up a lid..of some sort.

    May get close to some assembly work by Monday? Stay tuned...

Posting Permissions

  • You may not post new threads
  • You may not post replies
  • You may not post attachments
  • You may not edit your posts
  •