I was just thinking, man, I hope Patrick has pictures of how all that went together. Even with pictures, I’d likely have a few “extra” parts when it was all doneOriginally Posted by Patrick Walsh

That is one fine restoration.


 Friend of the Creek
I was just thinking, man, I hope Patrick has pictures of how all that went together. Even with pictures, I’d likely have a few “extra” parts when it was all done
That is one fine restoration.
[OP]
Guest
Oh I have pictures.
Sadly my I cloud storage filled like two days ago and my pictures are no longer updating.
Now if I could get myself to take some time from the saw to figure out my interbew computer land...
Fridgerator died today so tomorrow is gonna be consumed by replacing it. Well along with working, then first day and Saturday are consumed by family obligations grrrrr saiz the single guy how the heck can it be..
Bearings got ordered today though, not to bad $309 for all of them. Should have them Friday.
Repaired and repainted the delaminating paint. I still don’t know why I had this issue but I’m just glad it was minimal and a easy fix.
Sadly this might be the end of my progress this week. Next week I’ll get the motor together, the outrigger table support arm and the arbor and paint the edge of the cast table.
Oh yeah and get the hand wheel to the cnc engraver and see what he can or can not do for me.
Attachment 409102
Attachment 409103
And the freshly plated knob being used on the clam on the bosses t73. We don’t have any clamps for the saw so sadly my clamp has been sequestered. I’m not happy about it but you know the boss spends like crazy and air clamps are a big spend. As is the Martin manual clamp or a Scm one that he’d just have to pay me to retrofit. Sooner or later I’m taking this clamp back though. Gotta paint the base still. The crackling is where I put the self etch on to heavy and it copied under its own weight.
Attachment 409104
Attachment 409105
[OP]
Guest
So the saw continues to make its journey home piece by piece. I was stuck home today “well kinda” so I tool\k my work home and worked from the couch and coffee table while I hung out with my best friend.
B46044EA-7085-4C37-B2F3-9E6014A277D4.jpg
I started with the outrigger support arm. Pretty much I had it together when I brought it home but I wanted to replace all the screws as the originals were all beat many of the stripped.
I also needed to replace the bearings that just arrived yesterday.
All said and done I need to fine tune a few things. You will notice in the pictures of the backside what looks like some waves or ripples in the cover that screws on. The arm that travels inside it had plastic washer with countersunk screws. These plastic washers air in and tight enough tolerance the arm does not rack within itself and also so it’s not metal on metal.
Sadly at some point some knucklehead screwed around with these washer and when the put the screws back in many of them we’re going in crooked resulting in the countersunk heads not wanting to sit below the surface of the washer. Not having a grinding wheel I resulted to a course waterstone to bring the heads of the screws down until the would sit bellow the surface of the plastic washers. I did not take pictures of the process today but I’ll attach a picture of the piece with washers when I first took it apart.
1473EC95-77C4-499B-AB0C-089F184EE3A6.jpg
The arm has bearings on both ends. On the outside edge they are held on by the nickel plated plated. For whatever reason “I have it figured out” there are Allen set screws in the sides of these nickel plates. The arm itself has a indexing pin on either side that is oversized. The Allen screws can be adjusted back and forth to raid the mounting plates or lower them accordingly as to get both of the bearings to reference the interior outrigger arm. I left these little Allen set screw at work in my toolbox in a very special place so fine tuning will have to wait.
Back to the waves on the backside. These are dents where someone and or something ran into the outrigger arm. The tolerance of these plastic washers to the interior walls of the female portion of the outrigger arm is tight enough that the arm gets sticky when it travels by these dented areas. My solution is going to be to replace the metal dented plate with a delrin one along with make or source new washers and screws. I’m not very impressed by the design of this aspect of the machine. I’d love to tear into a newer martin outrigger arm and se what and if anything has changed.
Anyway the buffed turd...
769FC3C4-0F7F-4A8F-A90A-8C4576BBD678.jpg
9BD58664-7D4C-4B5E-8C5C-14ACB54B4DC7.jpg
E54F5BB9-A933-4737-9B29-E92D302C7A70.jpg
44EF2B11-B29D-4445-ABCF-574A26F93228.jpg
I also got the arbor together. Having never done anything like this other than replace the bearings of a skateboard wheel or bicycle hub or bicycle headset I consulted the Internet. As a result I used the oven to heat the bearings. It pretty much worked a charm.
255BDDF6-6034-4029-A742-7225548B57A8.jpg
65E0374B-B851-4B6B-8DE1-031ACDB54555.jpg
I have more but gotta run...
Contributor
Sweet as always. Set the bearings on a light bulb if you don't have a bearing heater. Dave
[OP]
Guest
And as always, “thank u for all the help”..
This would be much much harder without the gracious help of those with much more experience and talent than I.
I have you guys to guide me when i get stuck. Im Sure many of you found your own way long before this intweb thing. It’s made cheaters of us all..
[OP]
Guest
This is a sport bracket for sheet stock.
Painted it like three times excluding primer and spray on filler before I was happy with it.
The funny thing is I’ll probably never use it. I figured the saw is complete as far as I know and I owe it to the machine to make sure it stays that way. Hopefully before I’m dead someone else whom appreciates it as much as I do ends up with it and can care for it for another lifetime. Wishful thinking I’m sure.
DD2CEC73-7D3A-4F86-B9AF-0BBEA7CD19D3.jpg
C30EC3C0-9F0A-4429-9E33-CDBE205931A1.jpg
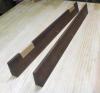
The arbor before i got to putting it together and the massive trunion pieces.
11A67CA8-03D0-45F8-821E-446382CD9EA7.jpg
My attic or what will be a master bedroom is tuning into a Martin T75 in pieces. It’s getting pretty close to everything being home now other than the base, sliding table and motor. Maybe a few other bits but not many.
9AF569A3-968C-49DD-8DEF-48F041D0B482.jpg
2677F513-FD0F-4778-8530-42300EB51C27.jpg
And proof o do make stuff. Well I make stuff all day everyday but you know make stuff I want to make. The wood on these doors I built back in I think December is starting to patina nicely. Gotta get to hanging them..
FBD76184-9144-4A53-BC23-7C4DAA39EC57.jpg
Next week I’ll get the motor sorted and a few odds and ends taken care of. I’ll order the delrin for the outrigger arm and also a piece to make a sub fence for the rip fence. I’m forgetting what else but I promise there’s many little bits and pieces yet.
Oh I gotta make a base for the machine. Kinda like a fancy permanent pallet. As the machine is there is not way to get a pallet jack under it unless it’s on a pallet it wrestled up onto cribbing. Not sure exactly what my plan is but I want to be nice and I want it done before I move the base home. I’m thinking liege ebonized ok or ash.
Oh and the hand wheel scale and plating. Sheesh I still have so much more $$ Im gonna need to dump this heap...
Contributor
Patrick, that is truly a masterpiece! You have set the bar high.
The second support, I think you will find it is used often for non sheet goods cutting.
I made some bun type feet out of Jatoba for the T23 to elevate it and allow for the pallet jack. Plan to do the same for the T17.
[OP]
Guest
Well Joe that means so much coming from you, it was you T21 that got my gears turning on this vintage Martin thing vrs new.
The first time I came across your CWW thread it was like the Sears catalog at Christmas as a child. I just couldn’t believe how beautiful and thorough a job you had done.
When i started in on this I was shopping for a sliding table shaper. I looked at used T25’s all the way through new T12’s. At the end of the day it was your thread and this saw coming along when I wasn’t looking that made me say “you know this is what I’m supposed to do.
I was shopping for a shaper with a T60 next on the list. I did things a little backward but you gotta pick these old machines up when the opportunity presents itself.
I’ll be excited just to see Peres of the new T17 making saw dust.
I’m not done yet but thanks for the various help and inspiration over the last handful of years.
Oh yeah the support. What do you use it for. Currently I have a few of those passage doors to size and throwing them up on the slider is my preferred method. I can see that arm being perfect for such a task. Beyond the random large piece or sheetstock I’m not sure what I’d use it for. I have the miter gauge for the saw also. I have yet to restore it as it also has a brass scale riveted on and I can’t figure out how to get the rivets off then the scale back on.
Last edited by Patrick Walsh; 05-05-2019 at 7:55 AM.
[OP]
Guest
Well Brian you have really screwed me.
Im finally finding time to look at the LM76 stuff to make a fence. I dont quite have the exact item figured out yet as most of there applications leave the bearings exposed in some way.
But Im sure they have something for me and Im sure all said and done the whole thing cost me dearly.
It looks like I should be able to get something to mount to another extrusion or piece of wood much like the original Martin fence. I then would need to have some flip stops fabricated ideally with micro adjustments.
Being I dont have a mill or any metal working tools Im pretty sure that will mean I have to find someone capable to make these flip stops for me. Looks like most of the LM76 options have the sliding portion taped already to accept whatever so that helps.
I also notice they have a telescoping rail. But you know incorporating this all into one cohesive fence may be problematic without another extrusion built around their product to accept the rolling carriage and a telescoping rail. I could see it possible that I could spend as much working this out as I could just buying a fence from Martin. Its pretty amazing how expensive all this gets when you want to do it as nice as one can.
I need some machine tools and the space for them. And I need to start playing the lottery.
 Contributor
It makes sense if it can be made for significantly less than a new Martin. Otherwise it makes sense to buy the Martin and take advantage of their testing/engineering.
Recently I found out that one can have custom extrusions made without minimum order quantities. Certainly broadens the range of possibilities if they’re at all affordable.
Bumbling forward into the unknown.
 Contributor

Brian, I looked at getting some custom extrusion made many years ago and the big cost was making the dies. Now i am talking 20 years ago, so i would guess that cost of producing dies has diminished considerably with all the new advances. But how can you get cost effective prices without setup and minimum order runs? Did you get prices for custom dies?
Contributor
I don’t know much about it yet. I ran into a local maker of custom architectural work, who did prototyping as his career for a number of years. We got on the topic and he mentioned that there are places without quantity minimums. In my research I came across this place;
https://www.quicksilver-mfg.com/services/
I haven’t contacted them, but they were the first I’ve seen who do this work without qty minimums. Not sure if a small quantity is super expensive, but it’s nice to know that it is possible.
Bumbling forward into the unknown.
[OP]
Guest
I 100% prefer to make the piece myself regardless of cost. That is as you kinda suggested only if what I can do is on par with at the least or a improvement over what Martin has to offer. Cost is clearly a factor “if” it saves me money.
Then there is that I agree the New Martin fence will look like crap on this saw. I guess the same is probably true for anything I make with modern parts like the LM76 parts.
Non the less I took a bit of time for the first time to look over the factory fence this morning. The fact is it has no telescoping option and only offers like 76-79:]” or something of scale. That’s just never gonna cut it for me so I’m gonna have to do something. The Felder fence will work till my bank account allows me to tend to this the right way.
Currently “like as we speak” I’m removing the scales from the hand wheels. I fully expect reproducing these scales then having the hand wheels plated 3ill cost me dearly. Sadly I have to pace myself regarding the $$ Im putting into this project at this point as it exterior renovations time again on the house.
Contributor
If it is aluminum you can anodize the handwheel, I would take that approach over plating.
Bumbling forward into the unknown.
[OP]
Guest
A little detective work, another big thank you to Mark H for suggesting paint thinner to remove anything with adhesive and a request for anyone with a Martin of this vintage with a hand wheel.
Even in a Sunday morning I gotta do something. If it makes anyone feel better that thinks I should relax once in a while I have been doing most of this work on the couch in front of the tv.
My best detective work leads me to believe that maybe the rivets I dremeled off where not original. I was originally inclined to think that the rivets original being the brass scale for the rip fence shares them. They even look similar.
However on one of the scale there is some damage around where the the handle to turn the wheel screws in. In this one are the metal scale not only does not encompass the whole opening but it has a rivet in either side of the hand wheel where the metal is missing I assume to hold it secure.
The scale intact and fully incasing where the handle to turn it threads through. Also a joint where the scale is two pieces around the hand wheel. I assumed because of these rivets at these joints that rivets would be from the factory. Now seeing that the scale was held on with some kind of Uber strong and thin double sided tape I’m inclined to think maybe the rivets were done at some point as a repair?
0891F2E5-CDBE-48DC-9E65-29F1678A1599.jpg
The damaged scale with the rivets filed off.
E5D29FE2-FBCB-4351-894C-84830639C63D.jpg
And everything removed. Now That I know I can get the scales off and in one piece it’s off tot he later cnc guy to see what organ I’m gonna have to part with the put this thing back together.
79DF4B6C-F9F6-479B-AD9D-1D0816C568AD.jpg
383A2B62-2CBF-405B-82C5-21DA2AD4600D.jpg
 Posting Permissions


 Reply With Quote