Page 3 of 11 FirstFirst 1234567 ... LastLast
Results 31 to 45 of 158

Thread: Another coffee table

  1. #31
    Join Date
    Aug 2013
    Location
    Princeton, NJ
    Posts
    7,293
    Blog Entries
    7
    Derek, that makes a joint where the abutments are short grain, the slightest force will break it out. I would not consider using it and consider making it to be quite dangerous. I think it is not worth the risk to personal safety and makes a poor product.
    Bumbling forward into the unknown.

  2. #32
    Join Date
    Jul 2017
    Location
    Calgary AB
    Posts
    179
    Derek, I also think that it can be done with full blind dovetails. This effect is done for stuff like boxes in Japan. Not sure if I have seen it done on this large a scale. There is a particularly large full blind dovetail in a Japanese timber framing video that has a 45 degree inner angle in place of the inner round but it does not run the whole way where as the traditional Japanese joint for the boxes do.

    The large scale one.
    https://youtu.be/RH6fNnGbHTU?t=108
    Perhaps this technique can be adjusted to be made round instead.

    I have seen this sort of thing on instagram (maybe even from a real Dane); I will go and trawl when I have the time, lots of helpful masters of the craft sharing stuff there. In the meantime here's a few links. First 2 are same vid different parts.

    https://youtu.be/4AqLCg0jU4s?t=206

    https://youtu.be/4AqLCg0jU4s?t=430

    The audio is out during the part of the second link.


    https://youtu.be/1MhuzCpB2Z0

    This one is particularly helpful, I have been wanting to make this sort of stuff for awhile but until I get to it I get a bit of satisfaction from this guy's work.

    https://youtu.be/1MhuzCpB2Z0

    Here is his instagram which offers a deeper look into the process.
    https://www.instagram.com/tozaidesign/

    Good luck with this one. Can't wait to see the finished product.

  3. #33
    Join Date
    Jul 2017
    Location
    Calgary AB
    Posts
    179

    Exclamation

    Update; I've found the Dane. Went through a few of them until I found the table that was imprinted in my memory.

    Really stunning work. He makes many other things and his boxes are really quite delightful and a treat for the eyes. His instagram is well worth a follow.
    http://www.snedkersind.dk/fika/bdde5...i3fbipwkubuink


    Screen Shot 2018-11-06 at 1.18.00 AM.jpg
    https://www.instagram.com/p/BE_p-Qup...on_share_sheet


    This picture is of particular importance


    https://www.instagram.com/p/BfIkCtfj...on_share_sheet


    Screen Shot 2018-11-06 at 1.20.46 AM.jpg
    https://www.instagram.com/p/BE_vvOTp08_/?utm_source=ig_web_button_share_sheet

    Please go to his website and instagram for more photos.
    Attached Images Attached Images

  4. #34
    Join Date
    Feb 2004
    Location
    Perth, Australia
    Posts
    9,491
    Vincent, I really like this last piece. That looks very doable.

    It's a toss up between dovetailing the ends and then rounding the corner (and adding a filler to the inside and shaping that, as done here), or simply mitering the ends and rounding them. The latter allows the grain to flow around the sides and top, while the former is interesting in a different way (perhaps too busy?).

    Irony is, the nephew has acknowledged that they like a square end as well, and would enjoy either. Decisions.

    Regards from Perth

    Derek

  5. #35
    Join Date
    Jul 2013
    Posts
    547
    Blog Entries
    1
    Clearly the answer depends on how much time you want to put into it and when it will be finished...

    Mike

  6. #36
    As much as I like the seemless flow of the inspiration table I really like the exposed dovetailed option above. I would had thought I’d prefer the hidden mitered dovetail but I don’t.

    My concerns with any joint in this case would be wood movement and joint failure. Originally despite me not caring for veneer and much preferring solid wood construction I would had said go,the bent laminations route.

    My concern with the hidden dovetails would be the possibility for the joint to fail in the slightest long term. Recently I had to make a similar joint for work purposes out of QS cherry. I opted for dominoes as apposed to hidden dovetails as my boss would had flipped if he caught me hand cutting dovetails. Anyway I left the pieces stacked sitting on my jointer in the shop,out of direct sunlight and or heat or drafts anything like that and one failed at the outside most two edges.

    I’m about to start a build of a Krenov style case the box being comprised of solid real deal figured satinwood. I want to use secret dovetails at get the grain to wrap but I’m exptremely reluctant as if the joint ever fails I’ll be devistated. I’m thinking hell tennons or just plane old through dovetails for strength.

    I’d be Leary of that design any other way than laminatations or veneer.
    Last edited by Patrick Walsh; 11-06-2018 at 9:22 AM.

  7. #37
    Join Date
    Dec 2016
    Location
    South West Ontario
    Posts
    1,503
    The rounded corner dovetail is a very different look to the open round of the inspiration piece. I think it changes the Danish element of the design, feel free to ignore me!
    Now if you want to double the dovetails and make a large solid corner round...............
    ​You can do a lot with very little! You can do a little more with a lot!

  8. #38
    Join Date
    Nov 2017
    Location
    Winston Salem, NC
    Posts
    133
    Derek, one interesting question - is it the shape that's important, or the look of it being a three piece element (top, curve, side)? If it has to look exactly like that, I think that drawing from your Oz compatriot is the right thing, a larger rectangle that the top and side could breadboard into, and then cove out the belly and the back to your desired scope. If that's the ticket, I might suggest getting each 'corner piece' oversized, so that it would allow for there to be actual meat for the breadboard / mortice&tenon to provide a sturdy connection. This would also require either a more gentle curve to the edge, or the joining faces being a bit wider left to right if the sharper curve is more desired.

    Just my .02.

  9. #39
    Join Date
    Aug 2013
    Location
    Princeton, NJ
    Posts
    7,293
    Blog Entries
    7
    Quote Originally Posted by Vincent Tai View Post
    Update; I've found the Dane. Went through a few of them until I found the table that was imprinted in my memory.

    Really stunning work. He makes many other things and his boxes are really quite delightful and a treat for the eyes. His instagram is well worth a follow.
    http://www.snedkersind.dk/fika/bdde5...i3fbipwkubuink


    Screen Shot 2018-11-06 at 1.18.00 AM.jpg
    https://www.instagram.com/p/BE_p-Qup...on_share_sheet


    This picture is of particular importance


    https://www.instagram.com/p/BfIkCtfj...on_share_sheet


    Screen Shot 2018-11-06 at 1.20.46 AM.jpg
    https://www.instagram.com/p/BE_vvOTp08_/?utm_source=ig_web_button_share_sheet

    Please go to his website and instagram for more photos.
    Kristian’s piece is beautiful, very slick approach. I see a support on the inside of the joint used to make the fillet.
    Bumbling forward into the unknown.

  10. #40
    Join Date
    Jul 2013
    Posts
    547
    Blog Entries
    1

  11. #41
    Join Date
    May 2016
    Location
    Northeast PA
    Posts
    527
    Quote Originally Posted by Mike King View Post
    A visually striking piece for sure, but the box joints are suspect as far as I'm concerned. Sure box joints give you lots of glue surface, but they rely entirely on the glue to hold the joint together. Personally I'd select a joint that also utilizes some mechanical advantage over just a glue joint. It does appear that he has the grain in the case ends oriented in the proper direction to allow for wood movement across the grain though.
    ---Trudging the Road of Happy Destiny---

  12. #42
    Join Date
    Aug 2013
    Location
    Princeton, NJ
    Posts
    7,293
    Blog Entries
    7
    It’s a cool piece. I think box joints were a good choice for the corners, however personally I would want to hide the joinery when it is that apparent being multiple joints at each corner. I think I would wrap the entire case in veneer, seaming it at the bottom of the bottom corners.

    In any case, that’s a serious piece of work to take on and he did a fine job on it.
    Bumbling forward into the unknown.

  13. #43
    Join Date
    Feb 2004
    Location
    Perth, Australia
    Posts
    9,491
    I have begun the build, but was planning on a little more work before posting, since this is just prep at this stage.

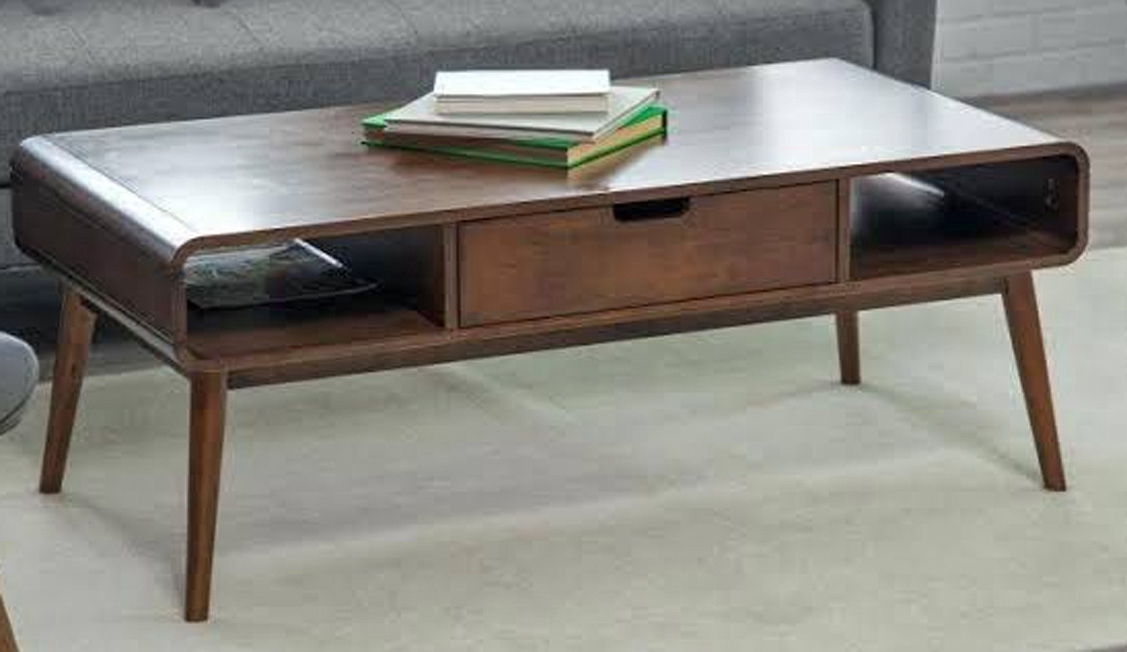
    This is the design chosen by my nephew ..


    There shall be a few interesting challenges along the way since I am using solid wood all the way.

    The joinery will be rounded corners shaped from through dovetails, mitred at each side. The challenge is to have accurately cut and fitted dovetails in hard Jarrah (no compression) as the outside will be removed in the rounding process.


    The other challenge is the splayed and angled legs which, for added strength, will be fitted to a traditional rail design, that is, the legs and stretchers will be mortice-and-tenon joinery. The legs will splay from the corners.

    Lastly, the drawer will extend the full width, and be opened from either end. No handles.

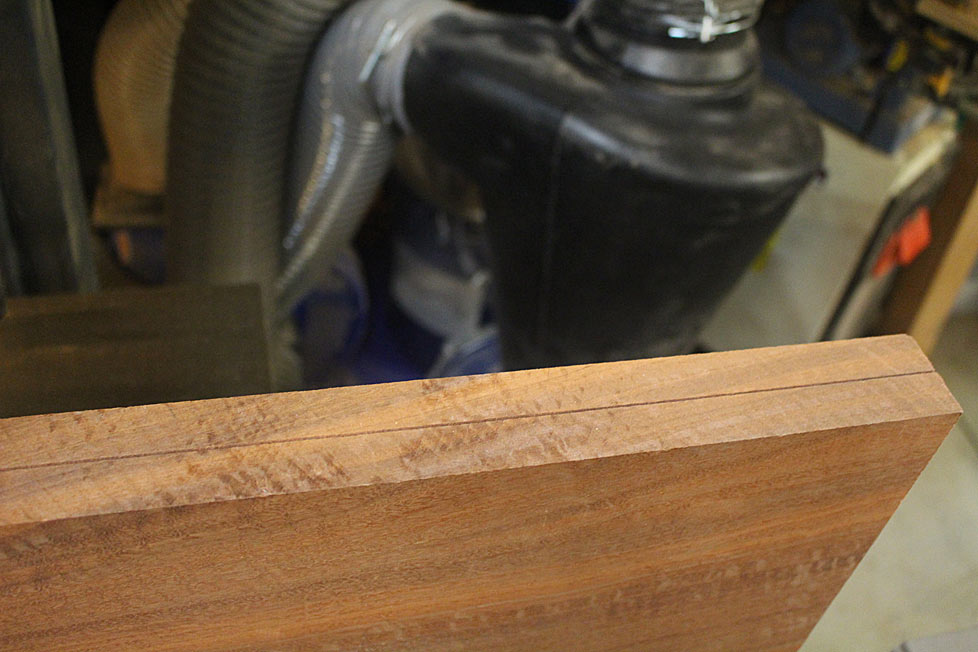
    Beginning the prep by resawing some really nice Fiddleback Jarrah, which will be the top and sides. The length of the coffee table is 1000mm ...


    I was watching the boards come out of the blade, keeping an eye on the kerf for movement. This even kerf told me that the boards were going to be well-mannered and stable ...


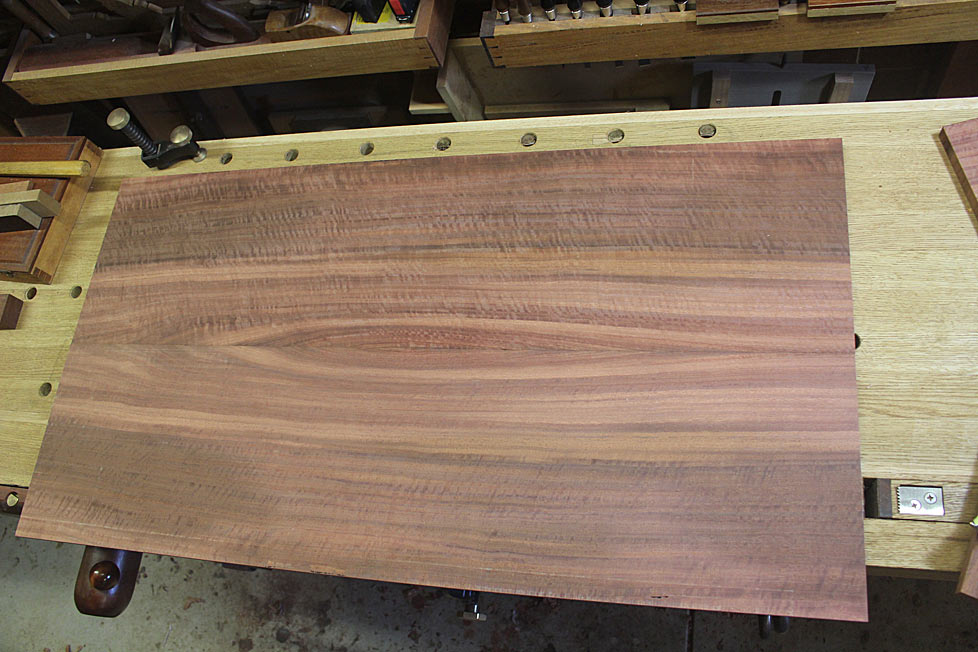
    Here's an example of the figure. These boards will be bookmatched to create a width of 500mm ...


    The lower side of the coffee table will be made of more "common" narrower Jarrah boards (still extremely nice!). I picked up a length 4m long, and then joined three together to get the width ...


    The boards were stickered for a week ..


    Some may have liked to have accentuated the centre figure this way when book-matching ...


    Too busy for my liking.

    I preferred this ...


    And this is where I left the boards at the end of last weekend ...


    I'll get back to the build this weekend, although Saturday morning I am picking up a new lathe (Nova Saturn DVR). I think that this will do a better job turning the legs than my current Jet mini

    Regards from Perth

    Derek
    Last edited by Derek Cohen; 11-23-2018 at 6:46 PM.

  14. #44
    Join Date
    Mar 2015
    Location
    SE Michigan
    Posts
    3,225
    Nice choice of timber, Derek. I agree with your bookmatch choice. Look forward to seeing how this all goes together.

  15. #45
    Join Date
    Apr 2017
    Location
    Michigan
    Posts
    2,769
    Hi Derek
    The drawing from the Oz forum is how I would go. To get the grain to run around the corner you will need thicker stock for the corner piece. So to make the top 1" thick you will need to use 2" stock and cut to length, then resew the flat panels.

    If you want to add strength you could bend some steel and inset it inside the curve a few inches from the ends and finish it for minimal visibility.

Posting Permissions

  • You may not post new threads
  • You may not post replies
  • You may not post attachments
  • You may not edit your posts
  •