Page 1 of 3 123 LastLast
Results 1 to 15 of 36

Thread: Kitchen Project for the Boss

  1. #1
    Join Date
    Jun 2010
    Location
    twomiles from the "peak of Ohio
    Posts
    12,169

    Kitchen Project for the Boss

    Well, vacation from the shop didn't last long....The Boss found an item, in a catalog, that she wants built.....mainly to replace a "catch-all" monster..
    IMG_6237 (640x480).jpg
    Open those doors at your own peril ....4 shelves inside crammed full of.....stuff....at one time, this was to be a 4 drawer "Chester Drawers" then changed to a changing table...then this "pantry" thing. Too tall, too wide, too deep...too full.
    IMG_6235 (469x640).jpg
    This is what she wants, instead. (Think Flat Pack...grrrr) so....like Boris Badanov....I always have a Plan....just had to draw it out on paper, and get it approved..by the Boss..
    IMG_6251 (640x480).jpg
    World Class Drafting Table? Tape measure will also be the one used throughout the project.
    IMG_6249 (640x480).jpg
    There is a front view....drawers instead of "cubby-holes"....sized to fit the current Microwave...since I am a bit frugal (cheap?) flip the paper over..
    IMG_6250 (640x480).jpg
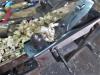
    For the view of an end/side of the case. Lumber?
    IMG_6239 (352x640).jpgIMG_6240 (640x480).jpgIMG_6244 (640x480).jpg
    Plus what is already on hand. Letting this sit a day...maybe tomorrow a few panels will get made?

    Have about 20bf of Oak to work with....will see how the pine supply holds up...

    Stay tuned. Will get the lower unit done first...then do the topper...vacation my......

  2. #2
    Join Date
    Feb 2010
    Location
    Pueblo, CO
    Posts
    329
    Looks similar to a Hoosier Cabinet. We have two that I rescued/restored many years ago. Neither is used in a Kitchen. One is used for liquor and junk, the other is in a Guest room and doubles as a changing table and dresser for when the little ones come to visit.

    You may want to look at some examples before starting the build.

  3. #3
    Join Date
    Jun 2010
    Location
    twomiles from the "peak of Ohio
    Posts
    12,169
    Well, it won't be a Hoosier Cabinet.....just a place for the Microwave to sit. Will be smaller "footprint" to allow people to walk through that doorway. Won't stick out as far into traffic. There are a couple Hoosiers downtown,,,,,$$$$!....Will NOT be painting this Project.....Golden Oak, Shellac, Clear Gloss Poly sounds a lot better than KILZ Primer...

    Need a pair of 16" wide, by 36" long panels made up....then some 1 x 3 face frame parts made. Pine webframes needed under the drawers, and over them. will be two drawers...the doors need to have a flat panel....might have a few of those. Then the door frames in oak....plain, flat-sawn stuff...
    top of the case will need to be a glue up....may use that fancy grained stuff...

  4. #4
    Join Date
    Jun 2010
    Location
    twomiles from the "peak of Ohio
    Posts
    12,169
    Boards for one panel glue up have been rough cut for length....one has been ripped for width. Will take a bit of jointer plane work, to get the edges ready for any sort of glue up...5-1/2" wide boards don't quite add up to 14-1/2" wide panel....adding a 2-1/2" wide strip down the center.

    IMG_6253 (640x480).jpg
    One set of parts....needs the edges jointed...
    IMG_6252 (640x480).jpg
    Parts for the other side's panel..
    IMG_6254 (640x480).jpg
    Cut-offs, so far...
    Last edited by steven c newman; 10-17-2018 at 5:49 PM.

  5. #5
    Join Date
    Jun 2010
    Location
    twomiles from the "peak of Ohio
    Posts
    12,169
    Ok..Breathing Stress Test at Lunchtime today.....sitting in a booth about the size of a phone booth for 90 minutes or so....breathing into a nozzle-like contraption....Not a fun way to "do lunch"..

    Took a nap when I got back home. Rounded up the shop apron...as I am NOT allowed to get my NEW Sunday go to Meeting jeans dirty in the shop..
    apron.jpg
    Keeps the sawdust and glue off of me...
    tablesaw.jpg
    Made a bit, today....also about an hour's worth of these..
    shavings pile.jpg
    Takes a while, when they look like this..
    shaving.jpg
    Three parts got their edges jointed. Then some glue and clamps...and cauls
    clamped up.jpg
    Tablesaw to crosscut and rip parts for side #2...
    parts.jpg
    Might be a bit rough, to blend the grain into a panel? Planes?
    planes.jpg
    Stanley No. 5 is a cambered jack...there is also the WR #62.....then there is the Stanley No. 7c and the Millers Falls No, 14..both have no camber.
    cut-offs.jpg
    Might be some useful parts in this stack? Need to make a 26" x 16" top panel...might be enough there? Face frame parts? Door frame parts? we'll see..
    Stay tuned......

  6. #6
    Join Date
    Jan 2006
    Location
    Schenectady, NY
    Posts
    1,500
    Aaaaaand he's off! Staying tuned.
    Happy and Safe Turning, Don


    Woodturners make the world go ROUND!

  7. #7
    Join Date
    Jun 2010
    Location
    twomiles from the "peak of Ohio
    Posts
    12,169
    Ok..this will take a couple posts to do..got the clamps off of Panel #1 today..
    panel #1.jpg
    and set aside out of the way..
    inside view.jpg
    This will be the "inside" view. Plan is once both panels are done, to clamp them inside to inside and then trim them to final size, at the same time...so they will match each other..
    Had three more boards to work on..
    panel 2 parts.jpg
    Needed to joint a few edges. Started with one of the wide boards..
    first part.jpg
    Had a straight line along the edge to shoot for...
    Mutt & Jeff.jpg
    Jack plane to get close to the line, No. 7c to finish things up..
    Then on to the middle board..
    skinny board.jpg
    Used an "F" style clamp, stuck one end into the tool well..then jointed both edges of this board..checked for gaps with the first board..
    gap checking.jpg
    No gaps? Reset and do the last edge....then glue, clamps, and cauls..
    glue up.jpg
    Needed a caul right in the middle, this time around...skinny board had a curve to it...
    Stay tuned..more to come, from today's follies

  8. #8
    Join Date
    Jun 2010
    Location
    twomiles from the "peak of Ohio
    Posts
    12,169
    Still here? Ok...the center caul?
    middle caul.jpg
    Will let this set a while...
    Needed three boards, to make a panel for the case's top....two I could cut from the "Off-Cut" pile.....@ 26" long. The third one? Needed to haul another 6' plank to the shop...find the best 26" section, and cut the rest away...
    IMG_6283 (640x480).jpg
    Came out to just under 16" wide....not a biggie. Grain match?
    top blanks.jpg
    Work in progress....considering a Microwave Oven will be sitting on it...
    There were two cut offs...one MIGHT be for a drawer front..but...
    fancy leftovers.jpg
    This is both of the "scraps"...plainer one is underneath. The one on top..looks great, right? Flip it over..
    fancy 2.jpg
    Hmm, what to do with this thing....board is even tapered..
    tapered.jpg
    Hmm....we'll see. Swept the floor ( AGAIN!) now that the empty trashcan is back in the shop. Then hung up the apron ( had to keep the jeans clean..)
    apron.jpg
    I think that will do..for a Friday...stay tuned...

  9. #9
    Join Date
    Jun 2010
    Location
    twomiles from the "peak of Ohio
    Posts
    12,169
    Late last night, wander down to the shop, removed the clamps, and then clamped panel #2 to Panel #1....to flatten both bows out. Letting them sit a while.....maybe this afternoon, with them still clamped together...I can move the stack to the bench ( HEAVY!) and see about a trim? One edge is close....the other long grain edge is a bit ..off.....straight edge to mark a line....maybe a stick to guide the saw?

    Get the edges straight, then square the top and bottom ends. Figure out which is which, and cut the feet profiles...stay tuned

  10. #10
    Join Date
    Jun 2010
    Location
    twomiles from the "peak of Ohio
    Posts
    12,169
    Well, today I had several tasks to get done:

    Go to a Barn Sale, and see about some pine 1xs. Brought home enough to get some of the other tasks done.

    Get the two sides matched for width and length....and cut a foot profile in each....as soon as I figure out which end the "Foot" was

    Get the two shelves close to being installed...cleats made, panels cut..

    Rip a couple pieces for the skinny parts of the face frame

    And, get parts made for the two webframes....should be a decent day's work?

    Going to need more than one post....lot going on..
    IMG_6287 (640x480).jpg
    Plopped this onto the bench...right side is close enough that a jointer plane will work....the left side..
    IMG_6288 (640x480).jpg
    Required a bit more drastic option...mainly that circular saw sitting there....once that was done...had to trim the ends square..
    IMG_6293 (640x480).jpg

    Went back and jointed the other edge...
    IMG_6295 (640x480).jpg
    And checked with a straight edge....then the feet profiles...
    IMG_6296 (640x480).jpg
    Nothing fancy,,,will do the same across the front.
    Getting further down the to-do list. Set the sides off to the side...and cut the 1 x 10 I picked up this morning...
    IMG_6301 (640x480).jpg
    Two full width, rip the other two for final width....and make four cleats to set them on...Set this aside, and work on the 1 x 3 I also picked..
    IMG_6303 (640x480).jpg
    Webframe parts, plus a kicker. Ripped the narrow parts to allow for screws.
    Getting there...
    Last edited by steven c newman; 10-20-2018 at 4:20 PM.

  11. #11
    Join Date
    Jun 2010
    Location
    twomiles from the "peak of Ohio
    Posts
    12,169
    Ok, cleared a spot on the bench...after the face frame parts were ripped for width
    Attachment 395180
    Enough to go under the drawer, and up both sides....will rip the wider sections later...right now, the saw is buried under parts.
    Clamped one board for the top's panel and jointed the edge....checked the rest of the edges....looked close enough to glue up..
    Attachment 395181
    The only thing holding these three in place IS the glue....but
    Attachment 395182
    Added clamps and cauls, anyway. This face is the "good" one, where a microwave oven will sit....because the other face..
    Attachment 395183
    Has a knot hole.
    Since this is sitting right where I need to work...thought I would just clean up..
    Attachment 395184
    And call it a day....maybe. May see about building the webframes....we'll see.

    Got a little bit done. Stay tuned..what is with the photos? Did not do anything different, same computer, same OS....same everything....about the third time in the last month or so, that this has happened...is there a reason for this [attachment.....xxxxxxxxx..] as it isn't from my end of the interweb....
    Last edited by steven c newman; 10-20-2018 at 11:18 PM.

  12. #12
    Join Date
    Jun 2010
    Location
    twomiles from the "peak of Ohio
    Posts
    12,169
    Ok....went to the basement...to check on the dryer ( yeah, right..) wound up taking the clamps off the clue up. Set it aside, on top of a stack of parts....marked out for tenons....pieces I had cut earlier were 1" too short....recut 4 more from the leftover 1 x 10. Then mark out the tenons. 1/2" long, by 1/4" thick. Bandsaw to make the cuts. two wound up a bit too fat...Aldi's wide chisel to thin them down. Set up the mortising jig, marked out a mortise. Backsaw to make the starter cuts. The brand new mortise chisel to dig a hole at the back of the slot...then pop the waste out....some had all four mortises done, glue spread....clamped up, and checked for square....then checked the dryer..again.

    Was a bit more fun in the shop, than watching a football game...

  13. #13
    Join Date
    Mar 2004
    Location
    DuBois, PA
    Posts
    1,904
    Quote Originally Posted by steven c newman View Post
    Ok....went to the basement...to check on the dryer ( yeah, right..) wound up taking the clamps off the clue up. Set it aside, on top of a stack of parts....marked out for tenons....pieces I had cut earlier were 1" too short....recut 4 more from the leftover 1 x 10. Then mark out the tenons. 1/2" long, by 1/4" thick. Bandsaw to make the cuts. two wound up a bit too fat...Aldi's wide chisel to thin them down. Set up the mortising jig, marked out a mortise. Backsaw to make the starter cuts. The brand new mortise chisel to dig a hole at the back of the slot...then pop the waste out....some had all four mortises done, glue spread....clamped up, and checked for square....then checked the dryer..again.

    Was a bit more fun in the shop, than watching a football game...
    Always more fun in the shop than a football game. Even if I'm not doing anything at all, it is still more fun.
    If the thunder don't get you, the lightning will.

  14. #14
    Join Date
    Jun 2010
    Location
    twomiles from the "peak of Ohio
    Posts
    12,169
    Ok..try this again....project needed two web frames made...one for the drawer to slide on...one with a kicker for above the drawer. A little show & tell ( I hope)
    usual suspects.jpg
    usual suspects...going to give the NEW Mortise chisel a test run. Backsaw first
    backsaw.jpg
    About all I need for the cut. Trying to leave the lines. then a chisel to dig a hole..
    dig a hole.jpg
    Then the chisel, powered by a hand, to pop out the waste.
    cleaned out.jpg
    Then a dry fit...
    dry fitted.jpg
    Repeat three more times..
    all done.jpg
    Then glue and clamps, checked for square. Allow to cure a while....remove the clamps, drill some mounting holes..
    pilot holes.jpg
    Had to reclamp this end, then pin things in place..
    pinned.jpg
    Ala Norm Abram.
    Will try for a "Part 2"...stay tuned..

  15. #15
    Join Date
    Jun 2010
    Location
    twomiles from the "peak of Ohio
    Posts
    12,169
    Ok, Part 2 from last night...dryer wasn't quite done....
    Used the Twins to drill a few holes..
    twins.jpg
    Not only for the mounting holes, but to also attach the kicker...
    kicker.jpg
    Just needs to be roughly centered. Does not "guide" anything, it is just to keep a drawer from tipping down, when you pull it out a bit far.
    second frame.jpg
    While waiting on the dryer to get done ( finally!) I was able to get a start on the second frame, got two mortises done and fitted...need to do the other two. Drill a few more holes. Second frame doesn't really need any kickers..Maybe I can get this into the clamps, today? Stay tuned...because "a little assembly" will be next to be done. Need to cut rebates for the case's back panel....Wards 78? Stanley 45?

Posting Permissions

  • You may not post new threads
  • You may not post replies
  • You may not post attachments
  • You may not edit your posts
  •